Dogs sniffing butts as a way of getting to know one another. Each dog has an individual scent, and dogs also sniff urine spots and feces to learn who had been in the area. Credit: Jen Tepp | Getty Images
Dogs meeting other dogs sniff butts. They don’t generally call out to each other. It’s all a natural type of dog body language used when meeting another dog. Typically, they will sniff each other, often in the body areas where urine and feces exit the body. It’s analogous to reading the neighborhood newspaper and can provide social enrichment for a dog even if other dogs are physically absent at that time.
Dogs Meeting Other Dogs
Dogs learn to recognize individual dogs through their individual scents, which is why dogs will spend time sniffing where other dogs have urinated or defecated. (Yes, it is gross by human standards, but keep in mind that we are essentially “blind and deaf” when it comes to our own sense of smell.)
Canine Sense of Smell
The sense of smell is the dog’s primary sense (the other senses are sight, hearing, taste, and touch). A dog has about 150 million olfactory receptors in his nose (compared to 5 million for us mere humans), and the area that processes that information occupies about 30% of the brain (compared to 5% in humans).
It is this amazingly keen sense of smell that makes dogs such great partners in search and rescue operations and bomb detection. There are also dogs who are trained as service dogs who can sense (smell!) when their human is about to have a seizure, and dogs trained to detect cancer in blood samples and bedbugs in hotel rooms.
Sniffing Butts and Pheromones
Dogs also have a specialized organ in the roof of the mouth called the vomeronasal organ, the function of which is to detect pheromones, which are chemicals emitted into the air by animals to communicate specific behavioral and emotional states (readiness to mate, fear, relaxation, etc.). Pheromones are produced by glands (including anal glands) and can be found in saliva, urine, and feces.
Keep a close eye on your dog for at least 24 to 48 hours after he comes home following a veterinary procedure that required general anesthesia. It can take that long for all the side-effects of the medications he received to wear off. Photo by JulPo, Getty Images
The effects of anesthesia in dogs typically take 12 to 24 hours to resolve. You can expect some common side effects during this period, including sleepiness, whining, disinterest in food, and a wobbly gait. Your dog may also have been given medication to help with post-surgical pain. These analgesics can have some similar side effects.
How Anesthesia Keeps Your Dog from Feeling Pain
Dogs who undergo general anesthesia for a surgical, dental, or diagnostic procedure often receive a combination of drugs during their hospital stay, including sedatives, anxiolytics (anti-anxiety medications), and analgesics (pain medications). They also receive an injectable anesthetic agent to induce anesthesia and a gaseous anesthetic agent to maintain anesthesia once they are anesthetized.
The injectable and gaseous anesthetic agents are metabolized quickly by your dog’s body and are typically out of your dog’s system by the time he returns home. But sedatives and anxiolytics can linger in your dog’s body and the side effects they cause can last 12 to 24 hours.
If Your Dog Is Whining After Anesthesia
Whining after returning home from a surgical or dental procedure could be due to your dog feeling a little disoriented or dysphoric. But excessive whining or crying that does not resolve within 30 to 60 minutes of returning home could be an indication that your dog is in pain. Follow your veterinarian’s instructions regarding when and how much to give of your dog’s prescribed pain medications. If your dog continues to whine or starts acting uncomfortable or restless, contact your veterinarian for further instructions.
What to Expect After Anesthesia
Being under anesthesia can slow the forward movement of your dog’s gastrointestinal system, also known as peristalsis. Your dog was also likely fasted at least 12 hours prior to his procedure. An empty stomach, combined with slowed peristalsis, means that your dog may not have a bowel movement until 48 to 72 hours after he comes home. This is normal and expected.
Sedatives and anxiolytics can make dogs sleepy, have an unsteady gait, startle easily, or be disinterested in eating. These effects typically last about 12 to 24 hours after returning home.
Dog Care After Anesthesia
Dogs who experience inappetence should not be forced to eat or drink. Your dog will eat and drink when he is ready and feels up to it. He likely received intravenous fluids while he was under anesthesia and therefore may not have a desire to drink water right away.
Keep your dog away from stairs or from places where he might fall. This includes being up on furniture. Once he has recovered from anesthesia, follow your veterinarian’s instructions regarding return to physical activity after a surgical or dental procedure.
Some dogs will startle easily and act in unexpected and unusual ways upon returning home. This can include snapping at loved ones for even the mildest of transgressions. You may want to keep your dog separated from young children and other pets in the home while he recovers.
Your dog may have a slight cough for one to two days after an anesthetic procedure. Most dogs who are anesthetized are intubated to deliver oxygen and anesthetic gas directly to their lungs. Intubation is the placement of an endotracheal tube down the throat and into the trachea. Endotracheal tubes can sometimes cause tracheal irritation, resulting in a mild cough that resolves on its own after a couple of days.
Analgesics are designed to relieve pain for 8 – 12 hours after administration. Some analgesics can make your dog feel sleepy or dilate his pupils. These side effects are typically mild. The benefits of pain relief typically outweigh the mild side effects.
Side Effects After Anesthesia in Dogs
Dogs who are overweight may experience side effects from sedatives and anxiolytics for longer periods of time than lean dogs. This is because many of the sedatives and anxiolytics used in veterinary medicine are fat-soluble. A fraction of the drugs administered are stored in a dog’s body fat and then slowly re-released into their bloodstream over time. This can lengthen a dog’s complete recovery from anesthesia.
While most of these side effects are expected, there are some that are not. Contact your veterinarian if you notice any of the following signs:
Vomiting
Diarrhea
Not eating or drinking after 12 hours
Still sleepy after 24 hours
Still unsteady on his feet after 24 hours
No bowel movement after 72 hours
Cough that does not resolve after three days or becomes worse over one to three days
Recovery from anesthesia continues and ends at home. You are the eyes and ears for your dog’s healthcare team while he recovers in your care. Reach out to your veterinarian with any questions or concerns you may have about what you observe during your dog’s recovery period.
Concerned about protecting the public from health risks posed by pathogenic bacteria in raw meat, the U.S. Food and Drug Administration imposed a “zero tolerance” regulation for pathogens in raw dog food. Many (but not all) of these products have been subjected to a “kill step” that eliminates the threat of foodborne pathogens. A few companies rely solely on ingredient testing, good manufacturing practices, and/ or test-and-hold systems – but none of these can guarantee pathogen-free foods. When handling these products, consumers must employ rawfood safety practices (washing hands and dog bowls, and protecting immunocompromised family members, etc.).
This category of dog foods is an outgrowth of the “raw diets for dogs” revolution that was sparked in 1993 with the publication of Give Your Dog A Bone, written by Australian veterinarian, Dr. Ian Billinghurst. In that and several follow-up books, Dr. Billinghurst made a case for the benefits of feeding dogs a diet that was similar to what their ancestral predecessors ate, namely raw meats, organs, and bones, improved by the addition of minor amounts of other foods (vegetables, fruits, grains).
While Dr. Billinghurst’s original goal was to empower dog owners to prepare their dogs’ food themselves, the immediate popularity of this type of diet created a market for commercial raw pet food, usually sold in frozen form. But these diets required constant freezing and reliable, fast, expensive shipping. When some manufacturers began freeze-drying their raw, frozen products in order to create shelf-stable products that were light and inexpensive to ship, a whole new industry was born.
Today, this category of food hangs loosely together by one main attribute: a high inclusion of raw meat. But the methods the pet food companies use to manufacture these foods vary quite a bit – with freeze-drying, air-drying, or dehydration processes – and the offerings grow more eclectic every year.
As disparate as they are, the products in this category share these attributes:
A high meat inclusion. Many of the companies claim that their products consist of 80% or more of meat, organs, and (ground) bone. Some claim to contain as much as 95%! The inclusion of organ meats (such as heart, liver, kidneys, lungs, beef tripe, and chicken gizzards) is common, as is the use of fresh ground bone. The resulting diets are highly digestible.
Low or zero carb content. Most (not all) of the products in this category have a very low carbohydrate inclusion. The outliers are products from Earth Animal and some of The Honest Kitchen’s foods. (Remember, dogs don’t require carbs; they can live on fat and protein alone, as long as they get the vitamins and minerals they need.)
High protein and fat content. Keep in mind that if you don’t include carbs in a diet, only protein and fat remain. Some of these products may contain more fat than is healthy for dogs who are overweight and/or sedentary, or who are intolerant of fat (such as dogs who are prone to pancreatitis).
These diets tend to be highly palatable to most dogs. Whether due to the high meat inclusion, the high fat content, the high-quality ingredients, the concentration of flavor in freeze-dried food ingredients, or the minimal processing, these foods are almost universally accepted by dogs.
Freeze-dryers expose foods to low temperatures, freezing them relatively quickly. When the pressure inside the freeze-drying chamber is reduced, the trays that the food sits on are heated, causing the frozen water in the foods to transform into a gas (water vapor). Vacuum pumps pull the vapor out of the chamber until the desired moisture level is reached. Proper freeze-drying doesn’t affect the appearance or taste of foods much.
The makers of the dehydrated foods universally describe their products as “gently air dried,” making the process sound very benign. However, these foods are dried with temperatures of 140ºF to 180ºF, which changes the cellular structure (and thus the aroma, taste, and appearance) of meats, fruits, and vegetables. Note that these temperatures don’t qualify the food as “cooked.”
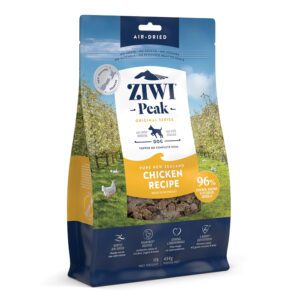
The freeze-drying process sounds extreme, but the process leaves most foods less damaged than dehydration, which toughens meats and other ingredients. To counter this, the moisture in air-dried diets is not as drastically low as it is in freeze-dried foods. Most freeze-dried dog diets contain as little as 5% moisture – about half the moisture content of kibble – but some of the air-dried products contain more moisture than most kibble. Ziwi Peak’s products contain a maximum moisture content of 14%, and Earth Animal’s Wisdom foods indicate they contain 18% moisture (maximum); most kibble diets contain 9% to 10% moisture.
Either process preserves the food with less damage to natural enzymes and vitamins than baking or extrusion. However, this means that the meats and other ingredients are, by definition, raw.
Federal law prohibits the presence of any pathogenic bacteria in pet foods. This presents raw-food manufacturers with quite a challenge, since, as you might be aware, raw meats – even the cuts sold in your favorite grocery stores – are frequently contaminated with pathogens, including Salmonella,Campylobacter, Listeria, and e. Coli. Each of these species of bacteria is capable of causing serious illness in humans and dogs (although, of the four, Salmonella rarely causes illness in dogs).
The thing is, it’s presumed that raw meats will be cooked before they are consumed by humans, and proper cooking renders any bacteria present harmless. Raw pet food makers have a few different processes available that will kill any pathogens present without cooking the food, and most are using at least one of them.
The most popular “kill step” in use for raw meat diets today is known as high pressure processing (also known as high-pressure pasteurization, and in either case abbreviated as HPP). HPP is also used to pasteurize many raw human foods, including many packaged lunch meats, guacamole dips and salsas, and fruit and vegetable juices.
But some of the makers of the meaty canine diets we’re discussing are such strong proponents of raw food diets for dogs that they have resisted, and continue to resist, using any sort of bacterial kill step. Instead, these companies depend on incoming ingredient testing, good manufacturing processes, and the use of “test-and-hold” programs, whereby finished products are tested for pathogens and not released for sale until results indicate the products are uncontaminated.
A test-and-hold program may succeed in detecting products that contain pathogens, enabling the company to dispose of those products and preventing them from being shipped out. But testing can’t ensure the absolute absence of bacteria in the product; only a verified kill step can guarantee a lack of pathogens in diets that contain raw meat.
Most food-industry experts feel strongly that HPP is a very safe technology; we do, too. Our personal preference is to buy products that have been rendered free of pathogenic bacteria by HPP. But we respect the right of owners to feed raw foods that have not undergone a kill step – as long as they are informed about the risks to which they are subjecting themselves and their dogs.
Interestingly, some of the makers of these products are very up-front about their use of HPP or another bacterial kill step, and others are equally forthright about their choice to forgo the use of a kill step. Still others do not disclose on their product labels or websites whether or not they use a kill step. In each case where we could determine the tack taken regarding pathogenic bacteria by each of the companies on our “Approved Freeze-Dried Dog Foods” list, we have included this information.
Approved Freeze-Dried and Dehydrated Dog Foods
On the table linked below, we included companies that are making diets that meet our selection criteria, which can be abbreviated thusly: No unnamed meats or fats; only whole, lightly processed, “real food” ingredients; and no artificial colors, flavors, or preservatives.
The table also includes the range of protein and fat levels found in the products offered by each manufacturer. We’ll repeat this, because it’s important: Virtually all of the products in this category are high in protein and fat. It might be impossible to find an appropriate diet for a dog who cannot tolerate high fat levels in this category.
We’ve listed prices for the largest size of the products that are available; the larger sizes are generally the most economical – if that can be said at all of this category. These foods are expensive! Because of this, we suspect that few people feed them as a sole diet unless they have just one or two small dogs. With three large dogs at home, we use products in this category intermittently, mostly as training treats or as a highly nutritious food “topper” that tempts the appetite of dogs or foster puppies who are feeling under the weather.
I just received the results of my youngest dog’s mixed-breed DNA test from Embark; I already had results from Wisdom Panel. Over the years, I’ve submitted DNA samples from all three of my dogs to both of the most reputable providers of mixed-breed identification tests. In my opinion, the results have gotten more accurate over time – and they even concur on much of the information returned. With one interesting exception – see if you can find it.
Otto
Embark
21.3% American Pit Bull Terrier
14.1% Australian Cattle Dog
13.2% German Shepherd Dog
12.3% Chow Chow
10.3% Labrador Retriever
8% Border Collie
4.3% Rottweiler
16.5% “Supermutt”
Wisdom Panel
12.5% American Staffordshire Terrier
12.5% Australian Cattle Dog
12.5% Border Collie
12.5% Chow Chow
12.5% German Shepherd Dog
37% Mixed Breed Groups
Woody
Embark
40.8% American Pit Bull Terrier
30.3% Labrador Retriever
19.9% American Staffordshire Terrier
9.0% Olde English Bulldogge
Wisdom Panel
62.5% American Staffordshire Terrier
25% Labrador Retriever
12.5% Mixed Breed Groups
Boone
Embark
42.0% American Pit Bull Terrier
29.1% American Staffordshire Terrier
8.1% American Bulldog
8% Boxer
4.7% English Springer Spaniel
Wisdom Panel
36% American Staffordshire Terrier
29% American Pit Bull Terrier
6% Boxer
6% German Wirehaired Pointer
5% American Bulldog
5% Springer Spaniel
4% Great Dane
3% Australian Cattle Dog
2% German Shorthaired Pointer
2% Labrador Retriever
2% Chow Chow
Embark thinks that ALL of my dogs have more American Pit Bull Terrier in them than anything else; Wisdom Panel thinks that all of my dogs have more American Staffordshire Terrier in them than anything.
Despite owning three of these dogs with an apparent preponderance of “bully” breeds in them, I don’t know how American Pit Bull Terriers and American Staffordshire Terriers can be so interchangeable. Who can explain this, in simple terms? I’ve read a dozen articles and am still mystified. At least the companies are consistent in their results!
Dogs clearly recognize that there’s another dog in the mirror, but they are not aware that it is themselves. Credit: Vitapix | Getty Images
Experts say dogs are both self-aware and sentient, able to both feel and perceive others’ feelings. Self-awareness in dogs means they understand how they affect others and the events around them. Dogs are self-aware.
Mirror Recognition Fails
We know that dogs recognize themselves by odor, but they don’t recognize themselves by sight, as the “mirror test” shows. They are not able to realize the creature barking at them in the mirror is them.
But, according to a study in Scientific American, dogs recognize other dogs as dogs and humans as, well, something else. The main reason is that their senses of smell and sight are so much better than ours.
Hence, they recognize people they’ve known before, dogs they’ve known before, and because they remember events, they remember both species if they’ve had a bad experience with them previously.
So, yes, dogs have a level of self-awareness – but it’s not the exactly same as ours.
They’re Aware of Their Bodies
The journal Scientific Reports found that dogs do, indeed, have a definite sense of self-awareness. But it’s not as strong as humans.
For sure, both research and anecdotal evidence show that dogs are aware of the size and shape of their bodies. They know if they can fit in a dog bed or on a car seat.
At Eotvos Lorand University, in Budapest, Hungary, scientists did the same study on dogs that they had done previously on human toddlers and great apes. It’s a test to see if an animal understands its body moving through space – and how to affect it – and they found the results to be roughly the same in all three species.
Using 32 dogs, from a variety of breeds and of varying sizes, did several experiments, including one in which a toy was attached to either a blanket or to the ground. In almost all cases, the dogs quickly discerned that, if the toy was attached to the blanket and not the ground, they had to move off the blanket to drag the toy to them. This showed they grasped the effect of their size or weight on the blanket and the toy.
The mucociliary escalator in the dog’s trachea is designed to keep dust, bacteria, viruses, and other foreign matter from entering the dog’s lungs. Ordinarily, this escalator helps trap these particles in phlegm and bring them up toward the throat, where they can be coughed out or swallowed. Photo by yellowsarah, Getty Images
A dry, hacking cough that sounds like your dog is gagging – almost as if something is stuck in his throat – followed by the appearance of foamy white mucus (known as phlegm) from his mouth are signs of tracheal irritation. The trachea (or windpipe) is the tube that connects your dog’s throat to his lungs and through which air passes. Irritation of the trachea can be a normal physiologic response or it can be a sign of illness. Understanding how the trachea works can help you recognize which cough and appearance of phlegm calls for a veterinary visit.
How Tracheal Irritation Causes a Dog to Cough and Gag
The inside of your dog’s trachea is lined with microscopic hairs called cilia. These cilia are covered by a thin layer of mucus. Cilia rhythmically beat in an upward direction, moving the mucus layer away from the lungs and toward the throat. This is called the mucociliary escalator.
When your dog inhales bacteria, viruses, dust, or anything else the body does not want to reach the lungs, these particles get stuck in the mucus layer. The cilia beat and move the mucus containing these particles toward the throat where they can be coughed up or swallowed. Inhaled irritants, like dirt, dust, or even air pollutants, are naturally trapped in the mucociliary escalator and moved up to the throat where they can be coughed up or swallowed.
Think of this clever apparatus like the up escalator at the mall. As the person riding the escalator, you are like a particle that gets stuck in the mucus. When you get on the up escalator, you have no choice but to go up to the next floor. Even if you try to run down the escalator to go back to the previous floor, the escalator is still moving you upward. And you cannot get off the escalator until you are on the next floor!
Inhaled irritants, like dirt, dust, or even air pollutants, are naturally trapped in the mucociliary escalator and moved up to the throat where they can be coughed up or swallowed. If your dog coughs up phlegm once or twice and then does not cough any more, your dog’s mucociliary escalator is doing its job. But if your dog coughs up phlegm every few minutes, there is a problem that needs to be diagnosed and addressed by your vet.
Are Gagging and Coughing up Phlegm Kennel Cough Symptoms
The most common cause of coughing up phlegm is infectious tracheobronchitis, also known as kennel cough. The bacterium Bordetellabronchiseptica is a common pathogen that causes kennel cough. Bordetella has two properties that help it to wreak havoc on your dog’s trachea. This bacterium is able to bind to the cilia in the mucociliary escalator and immobilize them, ceasing the upward movement of mucus. The mucus accumulates in the trachea and has to be coughed up. This is what causes the dry, hacking cough followed by coughing up phlegm.
Also, as the mucus accumulates, Bordetella bacteria disable the immune cells that line the trachea so they can no longer engulf and destroy pathogens. This is like sending out invitations to other bacteria or viruses to join the party and create a bigger infection. Most young and otherwise healthy dogs are able to clear the infection before it gets worse. But sometimes a simple case of kennel cough can turn into pneumonia.
Other Reasons Your Dog is Coughing up White Foam
External pressure on the trachea can cause a dog to cough up phlegm. Usually, this is caused by a dog pulling on leash. If your dog pulls on leash to the point of coughing, get some help from a trainer – or, at the very least, have your dog fitted for a front-clip harness or head halter. These management devices move the pressure from the dog’s pulling away from his throat and prevent him from pulling as strongly.
The cough associated with tracheal irritation sounds like your dog has something stuck in his throat. In most cases, he’s just coughing up mucus. The exception is when your dog has swallowed something that has gotten stuck in his esophagus. Esophageal foreign bodies can place external pressure on the trachea and trigger a phlegmy cough.
If your dog is coughing up yellow or pink-tinged discharge or blood, or is having difficulty breathing, your dog may be experiencing a life-threatening emergency. Take your dog to his primary care vet or to the nearest veterinary emergency hospital immediately.
The Balance Harness doesn’t have to be pulled over the dog’s head to put it on; the neck loop has a side-release buckle on one side, so it can be fastened like a collar.
Disclaimer: If you purchase items through links on our site we may earn a commission.
Some of the most important gear we need need for our dogs is the stuff we use to take them out in the world with us: collars, harnesses, leashes, and other critical training gear. Whether our walks together are just around the block for pottying or high-mileage adventure hikes, it’s important that the gear we use to secure their identification tags and direct their behavior is strong and well-made, comfortable, and well-fitting.
As critical as this gear is, it’s disappointing to discover that the quality and variety of many of the products sold in national chain pet supply stores is often poor – or at the very least, uninspired. In our experience, the best sources for well-made and innovative dog gear are independent pet supply stores, dog-sport catalogs or internet shops, and the makers of the products themselves. Unless you are immersed in the dog world – going to dog shows and dog sports competitions, where product manufacturers sell their wares in booths – or have a terrific independent pet supply store close to you – you may not ever find the best products in any given category of dog training.
That’s where we come in! We’re sharing information about the products that we like best, so you don’t have to waste money on the junky stuff found in most chain stores.
Best Flat Collars
We’re not fans of fancy frills. Our favorite leash-attachment appliance is still the plain old flat collar. We do recommend and use front-clip control harnesses for training purposes (and we’ll give recommendations for those below) – but since they can’t be left on the dog all the time, there’s still the need for a regular collar as a place to hang ID tags, if nothing else.
The main qualities we look for in a collar are strength; quality stitching and materials (especially buckles and leash-rings); comfort for the dog (soft, to minimize chafing); and ease of adjustment.
We have a preference for collars with “quick-release” buckles, as the old-fashioned pin buckle (also called a watch buckle, a tang buckle, or a tongue buckle) can be difficult to remove quickly in case of emergency, as when a dog gets the collar caught on something and is being strangled. However, owners of giant or very strong breeds usually prefer collars with metal pin buckles, as these are nearly impossible to come apart under even extreme pressure.
Here are some of our favorite suppliers of flat collars:
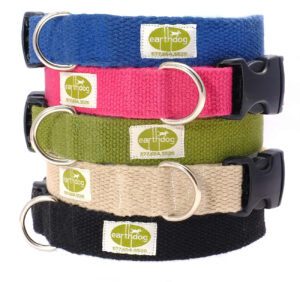
Earthdog. These comfy, attractive, and washable hemp collars get softer with each washing. Four sizes, fitting dogs with necks from 7″ to 26″.
Features we like in a flat collar – and that are offered in spades by these hemp collars from Earthdog: Side-release buckles; a big, easy-to-snap-onto leash ring; hardware for adjusting the size; and a soft, washable, colorfast material.
Ruffwear. This company sells a number of specialty collars, but we like the basic Flat Out Collar, which has a separate, small ring for your dog’s tags, and a large, rounded aluminum V-shaped ring that’s easy to find and snap a leash onto. Three sizes, for dogs with necks from 11″ to 26″.
White Pine Outfitters. Wonderfully soft flat nylon collars in varying widths, from 1/2″ (for small dogs, with necks from 6″ to 16″) to 1″ for dogs with necks from 12″ to 30″.
Specialty Collars
There are a few types of specialty collar that can be very helpful for training and walking certain dogs. These are our favorites:
Break-away collars. These are a great idea if you have dogs who do a lot of neck-grabbing play. We like the Keep-Safe Breakaway Collar, which can be safely left on your dog in “breakaway mode” when you are not present, or used as a regular walking collar when a leash is clipped onto two rings, overriding the breakaway feature.
Collars with a martingale loop. Martingale or “limited-slip” collars prevent clever dogs from backing out of (slipping off) their collars. These are also helpful for dogs whose necks are thicker than their heads (such as Bulldogs or Pugs) and for dogs whose heads are super slender (like Greyhounds and Salukis; martingale collars for these breeds are often made in 2-inch-wide fabrics).
For a huge selection of martingale collar widths, patterns, and materials, check out 2 Hounds Design. Their website claims they have 248 different martingale collars – and they’re all gorgeous and well-made.
Best Leashes
We remember when old-school trainers allowed only leather leashes in class, claiming that leather was softer on the hands – you know, with all that jerking on the choke chains.
It’s still true that leather is easier on the hands than a hard nylon leash; even though we’re no longer yanking on the leash, some dogs do pull hard. But there are some wonderfully soft nylon and hemp leashes available now – and some wonderfully grippy Biothane, too.
In our opinion, six feet is the perfect leash length for normal activities; it’s long enough to give your dog a reasonable “loose leash zone,” but short enough so that you can keep him out of trouble.
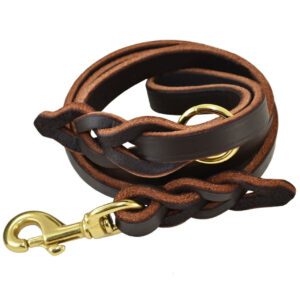
Earthdog. This company makes soft and attractive 1″-wide hemp leashes that come in 2′, 4′, or 6′ lengths.
J&J Dog Supplies. Best variety of leather leashes: flat, rolled, or braided, short or long, and in six widths, from ¼” to 1″. We love the 6′ Oiled Leather Leash (in just one width, ⅝”).
The Signature Oiled Leather Leash from J&J Dog Supplies is strong and supple.
Trailblazing Tails. This is our favorite maker of Biothane leashes. They come in either ½” or ⅝” widths and in any length you like. We love all their products, but their buttery-soft “Premium” material, which comes in a grippy, flat style or a bumpy one, is even easier on the hands.
Best Long Lines
A light line or long line is a great tool to have in your supply closet for those times when you want to give your dog more freedom but you’re not ready to let him off leash. (We don’t approve of retractables, ever!)
A light line is a thin cord; we’d likely only use one for a small dog. Long lines are generally slightly narrower than a normal leash, and may be anywhere from 10′ to as much as 60′ long. These extra-long “leashes” permit dogs to get a lot of exercise in an open field – without risking a high-speed (and high stakes) pursuit after a dog who just spotted a turkey or a cat and can’t resist chasing it.
Long lines can be used to practice long-distance recalls, too; if you have a partner hold the end of the long line about half-way between you and a dog who has been asked to stay, you can double the distance of the dog’s recall.
Our favorite suppliers:
Genuine Dog Gear. Perhaps best known for their wide variety of nylon collars, Genuine Dog Gear sells paracord light lines in 10′, 20′, and 30′ lengths. These are most useful for small dogs.
Trailblazing Tails. Our favorite maker of Biothane gear offers long lines as long as 50′ and in two widths (1/2″ or ⅝”). It doesn’t matter if the grass is wet or if you want to use the long line to allow your dog to swim; these don’t absorb water and get heavy or stiff like fabric long lines do.
White Pine Outfitters. This company uses the softest washable nylon and high-quality hardware in their silky but strong long lines. Offered in two widths and lengths from 10′ to 50′.
The SoftWeb Long Line from White Pine Outfitters is strong and silky and won’t burn your hands.
Try a Tab
A tab is a very short (4″ or 6″) leash that can be left attached to your dog’s collar at home or when off leash. Tabs are especially helpful for dogs who don’t like their collars grabbed, and for any time you might need an unobtrusive “handle” for your dog. You can purchase these – or you can make one by cutting an old leash to the appropriate length. Our favorite:
White Pine Outfitters. makes a 6″-long leather “heeling tab” with a nice, small, brass snap. The leather itself is just ¼” wide, making the tab very light.
Front-Clip Harnesses
We strongly prefer for owners to learn how to teach their dogs not to pull – but we’re also cognizant that unless an owner feels secure in her ability to control the dog, she will tend to avoid taking the dog out on walks for training. In our experience, front-clip dog harnesses provide the least harmful way to give owners the window of opportunity to reinforce – and thereby train – polite leash walking.
We look for products that have a yoke design around the neck (rather than ones where the straps come across the shoulder) and other features that prioritize the dog’s comfort. These are our favorites:
In.Line Harness (Baumutt). This front-clip harness offers a unique feature: a cleverly designed front connection point that tightens slightly if the dog pulls; it also helps prevent the harness from sliding out of position with tension on the leash. The harness also has a second D-ring leash attachment on its padded back.
The front connection ring on Baumutt’s In Line Harness tightens the harness slightly if the dog pulls hard.
There’s one more nice feature that helps the owners of long-haired dogs: The receptacles for the girth strap buckles are positioned on top of the back pad and made with a plastic shield that prevents the dog’s hair from getting caught in the buckles as you are trying to fasten them.
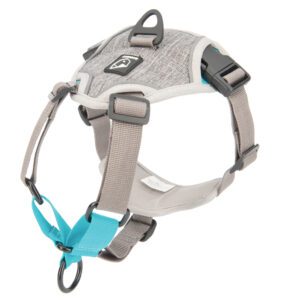
Balance Harness (Blue-9 Pet Products). We like this well-designed, well-made harness a lot. It offers two nice, large rings as attachment points (front and back), and adjusts in six places. A side-release buckle on one shoulder means you don’t have to pull it over the dog’s head to put it on (some dogs fear or hate that). Available in five sizes, including one for dogs with girths as small as 13.5 inches.
Front Range Harness (Ruffwear). The padded Front Range Harness is attractive and well made, with heavy-duty hardware and double stitching throughout. It offers two leash-attachments points (front and back) and adjusts in four locations. Note, however, that of the four harnesses we are mentioning here, each size of this product adjusts less than the others, making it even more important to buy the right size for your dog.
Perfect Fit Modular Fleece-Lined Harness from Clean Run. Each of the three sections (two for tiny dogs) of this harness can be purchased individually, so if you have a particularly long, short, thin, or (ahem) stocky dog, you can still be assured of a perfect fit. This harness is lined with fleece and offers two nice, large rings as attachment points (one in the front and one on the back). Here is a link to the second of three harness parts; here is the link to the third.
Treat Pouches
Smart dog people always have treats with them – but if we keep treats in our pockets and we’re not attentive to emptying said pockets before leaving those clothes laying around, we risk having jackets and pants with the pockets chewed out! Using treat pouches to carry treats with us is a far better solution – and one that doesn’t result in grease stains on our clothing, either. These are the things we look for in a treat pouch:
An adequate capacity for the amount of treats you carry on walks (when walking more than one dog, we need more room!).
Durability and washability.
A secure way to carry it (clip-on bags tend to fall off; we like belted bags better).
Ease of treat retrieval (can we get our hands inside quickly?).
Quick closure (to prevent dogs from helping themselves).
Our favorites:
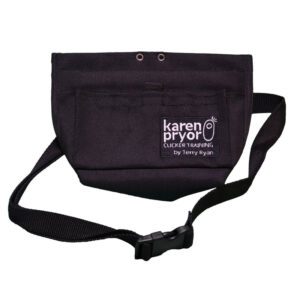
Terry Ryan Treat Pouch (Karen Pryor Clicker Training). A roomy pocket for treats, a smaller pocket (for keys, poop bags, or a clicker), and a belt fastener are prerequisites, but what we love most about this bag is the French spring closure, that pops the main compartment of the bag securely closed with just a tap.
We love the French spring used in the construction of the Terry Ryan Treat Pouch; it holds the bag open wide for access by a handler and snaps closed quickly with a tap if a dog tries to help himself to the contents. One caveat: Trainers find that the spring mechanism is subject to breaking under heavy use; it should last longer under lighter use by the average owner.
Rapid Rewards Dog Training Pouch (Doggone Good). This treat pouch has a very large main compartment (perfect for walking more than one dog), several small pockets, and a magnetic closure with a handy pull-cord for easy opening. Fastens to a belt or pants waist with a clip, or can be used with a waist belt (sold separately). Best price from jjdog.com
Clickers
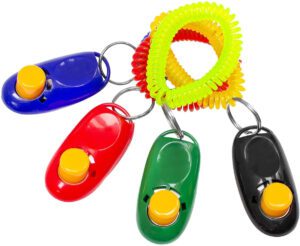
The clicker is now a well-established staple in the field of dog training gear. These are small and simple devices that make a discrete “clicking” noise that can be used to “mark” the moment that a dog performs a behavior that you will reward with a reinforcer (usually a food treat). Using a clicker as a reward marker allows for more precise training, as the noise it produces is utterly consistent.
You have lots of choices. Qualities to consider when selecting a clicker include your personal preference for size, shape, comfort in your hand, type (button or box clicker), and sharpness of sound (some dogs benefit from a louder reward marker, while others startle from all but the most subtle click).
Chewy.com sells this four-pack of button clickers with coil-wristbands for $7.50.
Clickers are inexpensive; we suggest buying a variety and seeing which ones your dog responds to the best! Here are some good sources for these essential training tools:
Clickers from Chewy.com. Chewy offers a number of different clickers, often packaged and sold in multiples at a low cost.
Clickers from The Doggone Good Clicker Company. Whether you like box or button clickers; tear drops or ovals; or solid or translucent models in a wide variety of colors, The Doggone Good Clicker Company has you covered.
Clix Multi Clicker. The volume of the click produced by this unique tool can be adjusted for sound-sensitive dogs. It’s widely available for around $8 (including from Amazon).
Now Gear Up!
While this is by no means a complete list of all the useful dog-walking gear available, it should give you a good start on being the fully prepared, fully equipped dog owner that you aspire to be. Remember that you are your dog’s advocate, so be sure to select high-quality, well-fitting equipment for your dog to wear on your journeys together.
Swelling in the nose or mouth is a reason to seek veterinary care. If the swelling continues to grow, the dog may have difficulty breathing. Credit: Basak Gurbuz Derman | Getty Images
Petting your dog and feeling lots of new lumps or looking at your dog and seeing lots of bumps can be concerning, to say the least. It’s even more scary if the lumps under the dog’s skin seem to move.
If you find a lump on your dog, the first two things to consider are hives and bug bites, which are two common causes of sudden bumps on the skin of your dog.
Bumps from Hives
Hives appear after exposure to something your dog is allergic to. While this might be insect bites, it could also be any topical irritant, including a new shampoo, ointment, or plants he rubbed against.
Hives usually appear a couple hours after exposure, with lots of small bumps on his skin appearing suddenly. Rinsing him off may help remove some of the irritating substances if that’s the cause. Hives often disappear within a few hours without treatment.
If your dog is uncomfortable, ask your veterinarian about short-term corticosteroids or Benadryl for some relief. Many dogs look awful but don’t itch or rub.
However, if your dog begins to have difficulty breathing or is showing hives around the mouth or throat, contact your veterinarian immediately. Swelling in the mouth or throat can compromise breathing.
Bugs can cause extensive skin lumps from bites or stings. This usually happens with large numbers of gnats or blackflies. While your dog may itch or roll, these bumps tend to clear fairly quickly without help.
Your dog may require veterinary attention due to the toxins from multiple stings. Rinsing with cold water can help minor cases, but if your dog was stung multiple times or begins showing signs of moderate or severe reaction, contact your veterinarian.
Stings near the mouth or nose, swelling, difficulty breathing, lethargy or restlessness are all signs that you should seek immediate veterinary care. As with hives, stings in the mouth/nose area can cause internal swelling that makes it difficult for the dog to breathe.
Lump Under Dog’s Skin That Moves
A movable skin lump that appears to wax and wane in size may be a mast cell tumor. The skin over these lumps is generally red and irritated in appearance. Some of these cancers are static, but most will swell up if you or your dog rubs on them. The size increase is due to histamine release in the skin. Surgery is the recommended treatment, and the sooner you can get that done, the better.
Most dogs immediately take to using a lick mat—no training required, just sticky food. Credit: Nancy Kerns
Disclaimer: If you purchase items through links on our site we may earn a commission.
Lick mats are a simple, inexpensive piece of flexible rubber with ridges and grooves that encourage your dog to eat more slowly. He must lick up his food instead of bolting it down. As a result, lick mats are good for his digestion and oral health. And they’re easy to use because dogs like to lick—they’ll even lick you.
Lick mats were invented in Australia and sold under the brand name LickiMat. Now, though, these mats are available in a wide range of sizes, shapes, and (of course) colors. You can get flat lick mats, bowl-shaped lick mats, even lick mats that wobble. Prices range from $2.99 to $22.99 or more, and they are widely available at retailers like Chewy, Amazon, and local pet-supply stores.
Why Use a Lick Mat?
A lick mat’s primary purpose is to slow down dogs who eat too fast and become bloated or nauseous because of it. The ridges and channels force the dog to lick up wet foods or treats, instead of gulping them down.
Licking has been scientifically linked to the release of feel-good hormones. A lick mat reduces a dog’s anxiety because the repetitive act of licking causes the dog’s body to release relaxing hormones called endorphins. Some people use lick mats and the endorphin release as a training aid for issues like separation anxiety or anxiety about meeting other dogs.
Licking also causes dogs to produce saliva, which promotes better digestion and cleans the dog’s tongue and gums, thus promoting better oral health. Of course, all these benefits only come if you have a food-motivated dog. Fortunately, most dogs are food-motivated!
Lick mats are made of non-toxic rubber, and the flat ones are difficult, if not impossible, to chew. Lick mats work well with wet dog food and with sticky treats. Some folks even use them with dog toothpaste.
This dog’s ears are back, but you can tell from his eyes and mouth that it’s a submissive pose. Credit: Nikilay Gluhov | Getty Images
Our dogs communicate with us in various ways, but the most common ones are through tails, ears, and voice. When trying to read your dog’s body language, you should look at all three—and more.
A 2018 study, published in Animals,from researchers in Italy, says that you should also pay attention to the eyes and mouth when judging ear position communication. We agree. If your dog seems to be showing conflicting emotions reflected in his tail vs. ears vs. voice or more, be safe and assume that dog is not happy.
For strictly dog ear language, the Italian researchers determined that:
Dogs can pull their ears back various degrees according to the animals’ arousal state. Ears can vary from simply “back,” to communicate an appeasement intention, to “flattened” or “pressed back,” in frightened individuals as an agonistic response. In extremely fearful individuals, ears can be pressed back so far on the head that they completely disappear (“seal ears”). On the contrary, ears kept forward are associated with interest, attention, and approach-oriented intentions, while sideward position indicates a conflicting inner state (“airplane ears”).
So, when you arrive home, and your dog runs to greet you with ears up, you can be confident that he is excited to see you, making sure it is you, and happy. As he gets closer, he may drop and/or pull his ears back, still wagging and smiling, and you know that’s because he’s trying to please you.
This dog’s ears are telling you he is intently looking at something. Notice also his eyes. Credit: Alexandre Morin-Laprise | Getty Images
This dog’s ears are back, but you can tell from his eyes and mouth that it’s a submissive pose. Credit: Nikilay Gluhov | Getty Images
It isn’t difficult to note that this dog’s up and forward ears are indicating that he is happy, asking what’s the next fun thing! Credit: Purple Collar Pet Photography | Getty Images
Common Dog Ear Position Meanings
It is easier to read the signals of prick ears than drop or partially up ears, but there are similarities.
Ears up: Your dog is alert and listening. He may have one ear up and the other semi alert, too.
Ears rotated: Ears that seem to be rotated in somewhat in different directions means he may be listening to something coming from one area off to the side.
Ears up and tightly held, almost touching: Your dog is very intense. It could be a prelude to a charge. “Squirrel!”
Ears held back and down: Submission or relaxed. If the ears are tightly down, your dog is likely stressed, which may be through submission or fear—even fear strong enough to become aggressive.
Note: If your dog is showing unusual ear postures, such as one ear held down, tilting his head slightly, or holding a drop ear out from his head a bit, he may have an ear infection or hematoma in the ear. Ears are very sensitive, so examine them carefully and consider making a visit to your veterinary clinic.
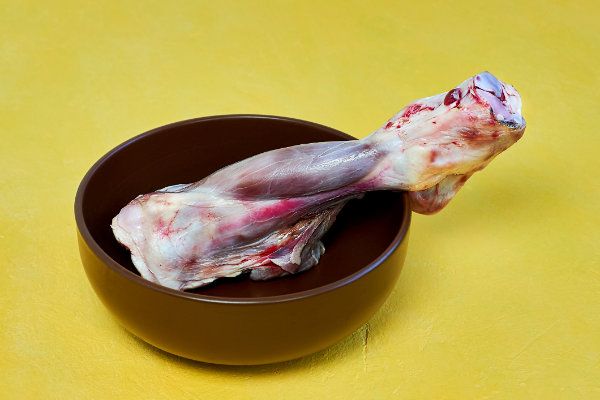
Most of us who feed a raw diet to our dogs include whole raw meaty bones (RMBs), animal parts that are at least half meat but also include bone that is fully (or mostly) consumed. This is in contrast to recreational bones, such as knuckle and marrow bones, which usually have little meat and where the bone itself is not eaten.
RMBs that are commonly fed include chicken necks, backs, and leg quarters; turkey necks; lamb breast and necks; pork breast (riblets) and necks; and canned fish with bones, such as jack mackerel, pink salmon, and sardines (preferably packed in water rather than oil). Raw fish can also be fed, though some may harbor parasites (freshwater fish are more likely to have problems than saltwater fish). Never feed raw salmon or trout from the Pacific Northwest (California to Alaska), as this can cause a fatal disease called salmon poisoning in dogs. Cooking makes salmon safe to eat; canned fish is cooked, so there’s no concern about salmon poisoning from canned salmon.
It’s not always easy to find RMBs. Ask your local meat manager or butcher; they can often order them for you, though you may have to buy a case at a time. (Most of us who feed our dogs a raw diet have purchased a separate freezer to help store the food!) Ethnic markets often have a wider selection than grocery stores do. There are a number of raw food co-ops and groups who share information and buy in quantity directly from vendors, both to lower the cost and to gain access to a wider variety of foods. If there is no group in your area, consider starting one.
You can keep costs down by buying in bulk, looking for sales, and buying meat that is close to its expiration date and marked down. It helps to develop a relationship with your suppliers, who may be willing to save bargain-priced meats for you.
RMBs should make up 30 to 50 percent (one third to one half) of the total diet, or possibly a little more if the parts you feed have a great deal more meat than bone (e.g., whole chickens or rabbits). The natural diet of the wolf in the wild consists of 15 percent bone or less, based on the amount of edible bone in the large prey animals they feed upon. While a reasonable amount of raw bone won’t harm an adult dog, more than 15 percent is not needed and reduces the amount of other valuable foods that can be fed.
Too much bone can also cause constipation, and the excess calcium can block the absorption of certain minerals. The stools of raw fed dogs are naturally smaller and harder than those fed commercial foods, and often turn white and crumble to dust after a few days. If the stools come out white and crumbly, or if your dog has to strain to eliminate feces, you should reduce the amount of bone in his diet.
Most dogs do fine with raw meaty bones, but a few may have problems, including choking and (rarely) broken teeth on the hardest bones. In my experience, turkey parts are associated with the most problems, though many dogs eat them regularly with no trouble.
Remember that if you feed a diet that includes 30 to 50 percent RMBs, there is no need to add calcium supplements.
Many families are surprised and dismayed when they realize that their adorable new family member is equipped with needle-sharp teeth and a strong instinct to use them constantly. Photo by Nancy Kerns
Puppies use their mouths to interact with the world. They bite to play; they bite to investigate. They bite to ask; they bite to answer. They bite because they’re full of energy; they bite because they’re over-tired. They bite because they’re teething; and they bite when teething is supposedly over.
All of this biting is a very natural thing, developmentally speaking, on Planet Dog. Of course, it’s just as natural for us delicate-skinned folks on Planet Human to want it to stop, immediately! It’s awful when your puppy’s “attacking” everyone in the family. Then again, it’s also hard to be a misunderstood puppy transplanted out of your own culture.
The answer is to implement a plan that works for both sides of the teeth! Here’s a five-part plan for helping everyone make it peacefully through this challenging puppy phase:
First, meet your puppy’s natural needs.
Provide appropriate chew items.
Use toys to occupy and fend off puppy teeth in play – and then, in games of tug, as a bridge tool to early training.
Teach Planet Human ways (so-called “training”) gradually.
Employ management equipment to keep everybody safe.
#1) Meet your puppy’s Planet Dog needs
I spend a giant percentage of my waking hours with puppies in their biting prime – between 3 weeks and 6 months of age. (This is because I specialize in puppyhood coaching, run a puppy socialization play-and-train group, and our family fosters litters of rescue puppies.) Quite often, exasperated owners drop their puppies off at my home, saying they can barely interact with their pup because of the nonstop biting. Hours later, when I send them videos of the puppy here – interacting with my human and dog family beautifully, with zero biting – they are simultaneously very hopeful and pretty annoyed.
What’s the secret? I jump into meeting the puppy’s basic Planet Dog needs before I try to interact in a human-oriented manner. Other than food and shelter, what are those needs? Think along the lines of:
Socializing with their own kind.
Digging, sniffing, foraging in nature.
Running, chasing, and “hunting.”
Exploring (and resting) at their own pace.
Having mouthy fun like chewing sticks and biting friends.
At our house, a puppy gets to frolic – teeth and all – with fellow canines, sniff around in a yard bursting with interesting scents, dig in some dirt, chew some sticks, and maybe bark at a deer or a fox. When the puppy has had about half an hour of all that and wanders over to me, he’s no longer bursting with that wild I’ve-been-trapped-in-a-pen-in-the-living-room energy.
Mind you, it’s not that the puppy is exhausted after his half hour with us; he is simply filled up with appropriate enrichment experiences. He’s like a calmly alert second-grade boy who just had an awesome time at recess and is now actually able to sit down at his desk and listen.
No matter where or how you live, you can find a way to give your puppy daily doses of being a real dog. You’ll get the biggest bang for your buck by finding a puppy friend in your neighborhood for regular, delightfully bitey playdates. But an unrushed “sniffari” walking in an interesting spot, some interaction with nice adult dogs, and plenty of chances to chew or dig will help, too.
Meet those natural needs consistently, and the in-the-moment biting management strategies outlined next will do the rest. Every time you’re struggling to get them to work, ask yourself: “Did my puppy get to be a dog much today?” If the answer is no, start there.
#2) Provide ample and appropriate chew items
Sometimes, your puppy’s biting is simple – a demonstration of his biological need to chew. Chewing is a natural canine pastime, and for teething puppies it’s vital. Having great things on hand that prompt a satisfying, long chew session will pay off in a happier puppy who learns the great habit of chewing “legal” items.
But what’s safe to use? There are horror stories about rawhides that cause intestinal blockages, bully sticks that are a choking hazard, toys with threads that get swallowed and tangle intestines, and marrow bones that break off and puncture organs. In fact, there’s almost no chew item that’s completely safe. Just because it’s labeled for puppy use doesn’t mean it won’t land you in the ER!
However, back to this section’s main point: Puppies absolutely need to chew, and those dramatic medical crises are unlikely if you use appropriate chew items. That said, everybody has to make their own risk-assessment choices. Here are my own guidelines:
Food-stuffed Kongs and Toppls (in the correct, non-swallowable sizes for each pup) are the safest choices. Put nutritious stuff in there (a mixture of a spoonful of canned food, some moistened kibble, some almost-too-old carrots or green beans, some plain yogurt, and a smear of peanut butter) so that you’ll feel comfortable using these every day. Freeze them so they last 20 minutes instead of five.
For everything else, watch like a hawk at first while you’re learning your puppy’s chewing style. Later, always stay nearby with an ear open (for sounds of coughing or choking).
As you evaluate different chewing styles, watch out for the pup who is shockingly fast and able to break off pieces of his chew items; he gets a smaller variety of allowed items.
Keep in mind that the presence of another dog will often make a puppy chew too fast.
Also at the root of a switch to dangerous, too-fast chewing is the approach of an owner saying in a threatening tone, “Hey, give that to me!” If you need to take something away, stay cheery, give no attention to the item, and make a little trail of treats (such as bits of ham or roasted chicken) in the other direction. As pup follows the fun new yummies, swipe the chew he left behind.
Fresh marrow bones that the butcher cuts to about a 3-inch length are awesome. While adult dogs can break them into pointy parts, or crack their teeth on them, puppies don’t have the strength for that. I personally will leave a puppy unsupervised in a crate with a nice new marrow bone like this. If you want to make one last a few days, pop it back in the fridge after each 20-minute chewing session.
Rawhides and bully sticks are famous for creating digestive upset, blockages, and choking problems. If I use them, I supervise 100% of the time. Also, I buy only giant sizes, because it’s the tiny ones marked “for puppies” that are much more likely to get swallowed or lodged in the pup’s throat or digestive tract, sheesh! I get the ones that are either super thick or super long, and I offer them to pups in 20-minute increments before the chews go back in the basket.
If a puppy does chew an item down to a swallowable size, I throw it away well before it could become a choking hazard. (Given the price of bully sticks, that kills me, but that stomach surgery would be more!)
#3) Use toys to fend off puppy teeth, then play tug
With those sharp teeth and the clever disguise of extreme cuteness, it takes only a second for a puppy to draw blood or rip your pants. And believe it or not, the worst part of that isn’t the blood and the rip. It’s that your puppy got a chance to rehearse that bitey behavior. Chances are it felt fun and rewarding to her – “Yay! This feels like home, with my littermates!” – which means she’s more likely to repeat it.
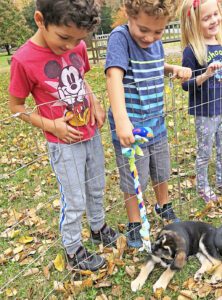
Here is smart use of two championship-level puppy-management tools: a long, soft tug toy and a portable exercise pen, which can keep puppy safely contained – and the kids’ clothing and skin intact! Photo by Kathy Callahan
Don’t let that happen. Instead, every single time you approach, reach into the overflowing toy basket you have handily placed right at the entrance to any place the puppy spends time. Grab a tug toy or two. At first, when the puppy is brand new to you, you’re just using those toys to fend off those needle-sharp puppy teeth.
How well the classic replace-hand-with-toy strategy works in decreasing painful bites depends on your ability to choose the right toys (by observing closely which ones are favorites for your particular pup) and keeping them in the right spots.
In the earliest fend-off stage, big stuffed animals that will block the mouth and protect your hand are a great choice. As you move into tug, you’ll likely find that long, flat, furry animals (bonus if there’s a squeaker in the tail) work best. As for rope toys, the thick, hard ones tend to be ignored while the stretchy, soft, braided fleece style is perfect. (You can make them yourself!)
Keep in mind that length is a hand-saver. Very skilled puppy wranglers can make good use of a six-inch tug toy, but newbies will find that the longer the toy, the safer the human. If you have young kids, you’ll be so grateful if you add that three-foot, crinkly snake to the repertoire.
Even if you have all the right toys for your pup, the way you store and manage them can make all the difference. I want you to have so many options you could litter the puppy’s floor with them. But should you? Nope! Because if that toy has been lying around for days, it won’t be very enticing.
If, instead, you select the fluffy, squeaky raccoon the puppy hasn’t seen since last Tuesday: Bingo! Teeth are engaged in a way that makes everybody happy. (Always rotate your toys. Keep just a few out for the morning, then swap them out for the afternoon, and again in the evening.)
Soon enough you’ll be using toys less as a shield and more as a tool for interaction, by encouraging your puppy to play a game of tug – a beautiful Planet Dog / Planet Human compromise. Tug allows us to give the puppy a YES in response to her innate impulse for physical, bitey play – instead of trying to shut her down with a NO that’s as ineffective as it is unfair.
Back in the alpha-obsessed dark ages of dog training, “experts” used to tell folks that playing tug would teach their dog to question their authority. The modern, happy reality is that tug can be a great opportunity to build cooperative communication, as you slowly start to add some structure to the game.
For example, you begin to teach that a polite sit re-starts the game, and you work toward teaching a “Drop” cue. The result? Fun plus learning plus communication plus bonding.
#4) Introduce fun training games
Puppies are far more capable of calm behavior after they’ve gotten their Planet Dog needs met through play with their own kind – ideally in a natural setting with opportunities to smell, chew, dig, and roll. Photo by Kathy Callahan.
In calmer moments of the day, when your puppy is not all teeth, start introducing a fun new way to pass the time: training. By using tiny bits of food to teach and reward behaviors like “sit” and “touch,” you can open up a whole new way for the puppy to interact with another being. The more the puppy learns to love fun, food-filled training, the sooner you can use training as a way to redirect the biting. Rather than ignoring your voice and continuing an assault on your pant leg, the pup will begin to stop and think, “Oh, right. Let’s do that instead.” Win-win!
One of the best training games to play with a jumpy, bitey puppy is an energetic melding of the games “Find it!” and trainer/author Leslie McDevitt’s game, “Ping-pong.” Here’s how it works: Pup heads to you and you toss a treat very obviously on the floor, calling out the cue “Find it!” Pup will gobble the treat and then swivel back to you. As the eyes meet yours, say “Yes!” and toss a treat to the other side: “Find it!” Repeat, repeat, repeat as pup goes back and forth (like a ping-pong game).
Here are the advantages to this simple game:
It rewards eye contact and focus on you (because that’s what re-starts the game), which is the giant first step in training.
It’s an active game for the puppy (so it suits a jumpy/bitey mood) – and yet it’s controlled by you.
It can be scaled up in terms of difficulty (throw farther), energy expended (add in a little jump over your legs that are extended on the floor), or behavior needed to re-start the game (move from eye contact, to a sit, to a sit-touch-spin).
If you greet your bitey pup with a short game of tug followed by a few minutes of this kind of training, you’ll have drained some energy and established an atmosphere of cooperation. Mental stimulation can be more tiring than plain old physical exertion, which is one reason this ping-pong game is better than an endless game of tug.
Mind you: This won’t work on Day One, because you haven’t yet built up the bond and the understanding that listening to you presents opportunities to earn yummy stuff. To review: The strategy for biting on Day One is fending off teeth with stuffed animals; followed a few days later by a more nuanced tug game; and only later by using a training session to deal with a bitey mood.
#5) Put management tools to work: pens, gates, and crates
Of course, sometimes none of these strategies work! (Remember, your first thought is: “Oh, wait, has my puppy had a chance to be a dog today?”) Even when you’re doing everything right, along comes the witching hour where nobody can be safely around the puppy. This is where the beauty of “management” shines. Hello pens, gates, and crates!
We all need to be able to pop that pup into a safe area where she can’t do any harm. To ease that moment of separation, toss a handful of kibble on the floor (“Find it!”) and/or use a chew. Use this option when:
You truly do not have time this morning to give the pup the playdate or sniffari she really needs.
You’ve been trying tug and/or training, but pup is still wildly going for your limbs.
The combo of the kids’ mood and the puppy mood means disaster.
Puppy is in a wild mood because of being over-tired and needs confinement to encourage that sleep.
Stick to a plan
When it’s all written out, this plan to get through puppy’s biting stage appears complex. Honestly, it’s really not once you’re in the swing of it! It’s just that many people don’t have a plan for dealing with this phase at all – puppy cuteness seems to fool people into thinking that it’s all going to be rainbows and butterflies! Keep these five steps top of mind and you’ve got the guidance you need to weather this adorable but prickly stage of your new puppy’s life.
To provide the best experiences, we use technologies like cookies to store and/or access device information. Consenting to these technologies will allow us to process data such as browsing behavior or unique IDs on this site. Not consenting or withdrawing consent, may adversely affect certain features and functions.
Functional
Always active
The technical storage or access is strictly necessary for the legitimate purpose of enabling the use of a specific service explicitly requested by the subscriber or user, or for the sole purpose of carrying out the transmission of a communication over an electronic communications network.
Preferences
The technical storage or access is necessary for the legitimate purpose of storing preferences that are not requested by the subscriber or user.
Statistics
The technical storage or access that is used exclusively for statistical purposes.The technical storage or access that is used exclusively for anonymous statistical purposes. Without a subpoena, voluntary compliance on the part of your Internet Service Provider, or additional records from a third party, information stored or retrieved for this purpose alone cannot usually be used to identify you.
Marketing
The technical storage or access is required to create user profiles to send advertising, or to track the user on a website or across several websites for similar marketing purposes.
This website uses cookies and other tracking technologies to offer you a better experience, personalize content and ads, and analyze our site traffic. Before proceeding, you agree to our Terms and that you’ve read our Privacy Policy. Update Settings
Functional
Always active
The technical storage or access is strictly necessary for the legitimate purpose of enabling the use of a specific service explicitly requested by the subscriber or user, or for the sole purpose of carrying out the transmission of a communication over an electronic communications network.
Preferences
The technical storage or access is necessary for the legitimate purpose of storing preferences that are not requested by the subscriber or user.
Statistics
The technical storage or access that is used exclusively for statistical purposes.The technical storage or access that is used exclusively for anonymous statistical purposes. Without a subpoena, voluntary compliance on the part of your Internet Service Provider, or additional records from a third party, information stored or retrieved for this purpose alone cannot usually be used to identify you.
Marketing
The technical storage or access is required to create user profiles to send advertising, or to track the user on a website or across several websites for similar marketing purposes.


 The makers of the dehydrated foods universally describe their products as “gently air dried,” making the process sound very benign. However, these foods are dried with temperatures of 140ºF to 180ºF, which changes the cellular structure (and thus the aroma, taste, and appearance) of meats, fruits, and vegetables. Note that these temperatures don’t qualify the food as “cooked.”