Home Blog Page 312

Eliminate Aggressive Dog Guarding Behaviors

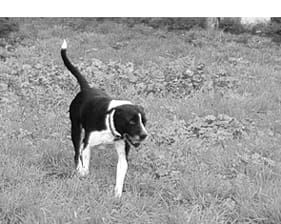
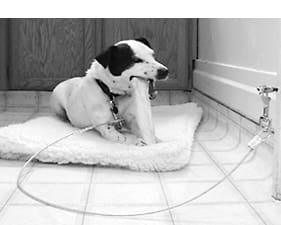
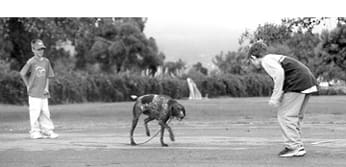
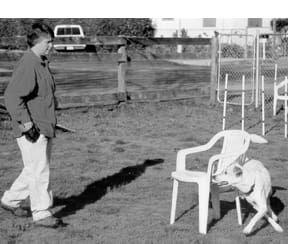
If this dog was a serious “resource guarder,” this would be quite dangerous for the person. As it is, this dog is showing a low – but detectable – level of anxiety about having someone so close to his food: His tail is not wagging; his body is braced, and he’s watching the person as he eats, though he does not make friendly eye contact. More serious guarding behavior might also include growling, raising his lips to show his teeth, or a quick biting attack.

Dusty, our diminutive eight-pound Pomeranian, grabs a chew-hoof and darts under the coffee table with his prize. Tucker, the 75-pound Cattle Dog-mix approaches, eyeing the hoof covetously. Dusty curls his lip and emits a surprisingly convincing growl for such a tiny canine. Despite the fact that he could easily take the hoof away from the much smaller dog, Tucker backs off, leaving Dusty to chew in peace. We watch, and chuckle at the mini-drama that plays out in our living room almost daily.

It’s most common for dogs to defend their food, but edible items are not the only things that dogs will keep from all potential rivals. Some dogs will defend their “ownership” of toys, a favored place to sleep, or the water bowl. Behaviorists and dog trainers call these protective behaviors “resource guarding.”

A dog who defends his food from other dogs is exhibiting a perfectly normal and appropriate canine behavior. In the wild, where food supply equals life, the dog who gives up his food easily has a poor chance for survival. Because survival of individuals is important for survival of the pack, higher ranking pack members often, although not always, subscribe to a “possession is nine-tenths of the law” philosophy. It’s generally not worth the risk of injury to a pack member to argue over a bit of food or bone.

Guarding from humans
Resource guarding is far less acceptable, of course, when it’s directed toward us. For our own safety, we want dogs to understand that everything they have is really ours. But dogs are probably somewhat confused by our species’ apparent ignorance of the “nine-tenths” rule. Accommodating creatures that they are, most dogs learn to give up coveted possessions to their owners without much of a fuss, but from time to time one of our canine pals decides to aggressively assert his ownership rights to something: a precious toy, a tasty rawhide chew, or a bowl of food. If this describes your dog, you have a serious problem on your hands.

Identify objects of dispute
The more specific the guarding, the easier the behavior is to manage. If your dog only guards truffles, say, you’re pretty safe – at $20 per pound, your dog won’t often stumble across a forgotten pile of the costly fungus. If anything remotely edible falls into his definition of “guardable,” however, you have a much bigger challenge.

Generalized food guarding is the most common manifestation of resource guarding, and often the most dangerous, since it is virtually impossible to control the presence of food in the dog’s environment. No matter how diligent you are, he will inevitably find a cookie that fell between the cracks of the sofa, a bag of fast-food remnants in the gutter, or a deposit of kitty-poo in the garden. (While we may not consider cat poop to be edible, to a dog, anything consumable is food.)

Determine extent of guarding
Resource guarding describes a continuum of behaviors, all of which indicate that a dog is not comfortable with the presence of you or some other human in his “space” while he is in possession of a valuable article. Let’s look at a description of various food-guarding behaviors, from those that pose no risk to the dog’s human companions to those that pose a grave risk:

Level 1: The ideal and safest response when you approach Fido at his food bowl is that he stops eating, wags his tail, and comes over to greet you. He is telling you that he doesn’t perceive you as a threat to his food, or if he does, he doesn’t care. The food’s not all that important to him; he’d be happy to share it with you.

Level 2: A slightly less perfect but still very safe reaction is that Fido looks at you, wags his tail, and continues eating, but is still relaxed about your presence in the food zone.

Level 3: The first sign of discomfort on Fido’s part is usually a slight tensing of his body as you approach. He may also wag his tail. However, if the speed of the wag increases as you get closer to him and the amount of tension in his body, he is communicating that your presence near his resources makes him uncomfortable.

Level 4: As the dog’s discomfort escalates, so does his behavior. At the next level you are likely to see a glare in his eye when he looks at you, perhaps a lifting of the lip in a snarl, maybe a low growl, and an obvious increase in eating speed. One very effective way to prevent you from getting any of his food is for him to eat it quickly.

Level 5: If the food is portable, such as a chew-hoof or pig ear, at this level, the dog may carry the item under a chair, a bed, or into his crate, then growl at you when you come too near. If he can’t pick it up, he may try to push the food bowl farther away from you when you continue to trespass.

Level 6: A serious food-guarder is more than willing to put some teeth into his warnings. A snap is the next step on the continuum – no contact with your flesh, but a no-uncertain-terms statement that Fido is not prepared to share his food with you.

Level 7: As Fido’s protectiveness increases, so does the threat to your safety (or the safety of the child passing by). More serious than a snap is the actual bite. Rarely does a food-guarding bite not break skin – the contact is usually very quick and hard, and may consist of several puncturing bites that move up the transgressor’s arm or face.

Level 8: Severe food guarding can be triggered even at a distance. At the strongest level, even a person on the far side of the room can be perceived as a threat to the highly valued food or item, and the dog’s behavior can escalate very quickly and alarmingly with a seemingly innocuous movement, even from far away.

Behavior modification
The key to winning the resource guarding battle lies in:

1.) excellent management of guardable resources in the dog’s presence, and
2.) convincing the dog that your presence is not a threat to his food supply.

Rather, he needs to see you as the welcome harbinger of all delicious consumables. Your presence near your dog should be a reliable predictor of the advent of more good stuff, not less. Your role as benevolent distributor of valuable resources is the foundation of your behavior management and modification program.

The good news is that not all dogs who display low levels of guarding behavior will advance to higher levels. The behavior you see may be the worst that they ever offer, especially if you implement a behavior modification program before the response escalates. The prognosis for successful behavior modification improves greatly if you begin a program as soon as possible.

The bad news is that higher level dogs don’t necessarily give you lower level warnings before they launch an attack. Higher levels of resource guarding can be very challenging to modify. Meanwhile, the behavior presents an extremely high risk of injury to those around the dog, especially children.

A skilled and knowledgeable owner may be able to effectively modify food guarding behavior up to Level 4 or 5. Anything beyond that definitely begs the assistance of a qualified trainer or behaviorist. A person who is not confident about working with the dog’s behavior at lower levels, or who tries and does not make progress, should also seek professional help with the dog.

It can be a lot of work to manage and modify the behavior of a resource-guarder. You will have to:

• Manage the behavior through resource control unless and until the behavior has been completely and successfully modified. You must identify and remove all potential guarding triggers. Food bowls, even empty ones, should not be left lying on the floor. Stuffed Kongs, favorite toys, balls, pillows – anything that triggers even a mild possession response – needs to be put away, and given to the dog only in very controlled circumstances.

• Relocate the dog’s feeding area from a high traffic area to a low one to minimize risk. A dog regularly fed in the kitchen may guard the entire room. A dog fed on the back porch may guard the entire yard. Choose a little-used room, at least 10 feet wide, that visitors are not likely to stumble into, such as the basement office or the pantry.

• Spend two to four weeks preparing your dog for the program. Feed two to three times a day. Confine him away from the feeding area. Place the food bowl in the feeding room, bring the dog to the room, leave the room, and close the door until he has finished eating, up to 30 minutes.

• Attend a positive dog training class using a variety of desirable food treats as rewards. (Do not do this if your dog lunges aggressively for food in your hand). Be sure to let the trainer know that your dog is a resource-guarder.

• Implement a “Nothing in Life is Free” program, where the dog has to earn all good things. Have him sit or lie down in order to get anything he wants, including food, toys, attention, and going outside to play.

• Exercise him more. A tired dog is a well-behaved dog. Weather permitting, three to four 15-20 minute tongue-dragging sessions of fetch can work wonders in reducing inappropriate behaviors. Watch out for heat stroke; do not overdo exercise in hot weather. Spend more time with the dog in general, doing things that you both enjoy.

• Identify and avoid situations that trigger aggression.

• Teach the dog to “Give” on cue (see “Give-and-Take,” page 13).

• Avoid punishing the dog should a food-guarding or other aggressive incident occur.

• Implement a desensitization program (see sidebar, below) after two to four weeks of doing all of the above. This complete program can take four to eight months or longer.

The final outcome
Some dogs are successfully and completely rehabilitated through resource guarding modification programs, especially those who exhibit only the lower level behaviors. Many are not. There is a strong likelihood that you will always need to reinforce your resource guarder’s new nonguarding behavior, and avoid situations that could retrigger the guarding.

Because small children almost always come with food – cookies, crackers, etc. – and they are naturally closer to the dog’s own level, many prior resource guarders are never trustworthy around children. Of course, dogs and small children should never be left together unsupervised, but this goes far beyond that. Many families understandably choose to rehome their resource-guarding dogs rather than risk a serious bite. Of course, finding a good home for a dog with a history of aggression is yet another big challenge.

Rehabilitating a resource guarder can take a huge commitment of time, resources, and emotion. Throughout the program, you, other family members, and visitors to your home are at risk of being bitten if there are inadvertent slips in the program.

We applaud responsible dog owners who are willing to make the commitment required to change their dogs’ behaviors. We also urge them to think long and hard about their commitment and liablility, and to be realistic about whether they are able to do what it takes to ensure the safety of others during the process of reprogramming a resource-guarder. And we cheer when we receive reports from those who have been successful in getting their dogs to “share.”

Give-and-Take: A Good Game for ALL Dogs to Learn

You can help prevent resource guarding in a dog who does not display overt signs of the behavior by teaching him a give-and-take game. Note: Do not do this if your dog lunges and aggressively tries to grab treats out of your hand.

Start by offering him a toy that he likes (but is not extremely valuable to him). When he opens his mouth, say “Take It!” When he does, tell him he’s a good boy, then offer him a treat.

When he opens his mouth to take the treat and drops the toy, say “Give,” (or “Trade,” or “Share”) and let him nibble at the treat while you pick up the toy. The nibbling part is important. If you let him eat the treat and then try to pick up the toy he will race you for it, which may actually encourage resource guarding.

While he is nibbling, slowly and calmly pick up the toy.  Let him finish eating the treat, then offer him the toy again and say “Take It!” as he puts his mouth around it.

Practiced several times a day, a few repetitions at a time, this game will teach your dog the very useful behavior of “Give” on cue. He will also learn that if he gives something up to you, odds are good that he’ll get it back again, or something even better.

Troubleshooting

If he won’t take the toy: Find a toy that he likes more. If he is only a mild resource guarder (Level 3 or 4) you can even use a toy such as a Kong with a cookie inside it. Use a low-value treat (a bland cookie or cracker) in the toy, and a much higher-value treat (a piece of cheese or roast beef) for his reward.

If he won’t drop the toy for the treat: You need a much better treat. Don’t be stingy here; hard dry cookies and bits of dog kibble just may not be exciting enough to convince him to give up a toy that he likes. Even the toughest nut will usually crack for something like a piece of sardine or a baby-food hot dog.

If after a couple of times he just looks for the treat and ignores the toy: Good! You’re convincing him that the stuff you have is better than the stuff he has. That’s what you want him to think. You can either plan to do just a few repetitions each session, or you can gradually increase the value of the object he shares with you.

Once your dog has learned to play the give-and-take game, you can use it for objects other than toys. When he grabs something he shouldn’t have, such as your new Nikes or the remote control, instead of playing the “Chase” game, go get a nice treat and ask him to share. He should be happy to trade.

If your dog won’t trade you his object for the treat in your hand, or worse, starts to guard it aggressively, drop high-value treats on the ground in a trail that leads away from the object. When he drops it to follow the treat trail, wait until he is far away from it and have someone else pick it up, or leave him a large pile of treats and calmly walk back to the object and pick it up yourself. If necessary, Hansel-and-Gretel him with a treat trail into another room and close the door before you pick it up. Then reevaluate your training program to figure out where you went wrong, and consider calling in a professional to help you.

Paws rushes to take a toy. Don’t use your dog’s favorite toy at first. He should want it, but not be obsessed with it.
After just a couple of treats, Paws readily drops the ball for a treat. He doesn’t mind Sandi’s reach for the ball.
After more repetitions, Paws doesn’t want the toy at all. That’s fine! He should anticipate rewards for sharing.
Food Bowl Desensitization

This program can take four to eight months (or longer) to rehabilitate a serious food-guarder – and even then, your dog may never become completely trustworthy. If at any point you are fearful or feel inadequate to deal with the dog, call a qualified positive professional trainer or behaviorist. This program should be implemented only by adults or very responsible older teens. Do not move to the next phase before the minimum time indicated, or before the dog’s demeanor is perfectly calm at the previous phase. Also, keep in mind that following the program outlined below does not guarantee your safety.

Phase 1: No bowl (one to two weeks)

Place the dog’s daily meal in a bowl on a counter or shelf in his feeding room. Include some high-value treats as part of the meal. Schedule several feeding sessions throughout the day. Feed him one-quarter to one-tenth of his day’s ration in each session, a piece at a time, by hand. If he lunges aggressively at your hand while feeding, tether him and feed him his meals, a piece at a time, by tossing them from just out of lunging reach. Wait until he is sitting quietly each time to toss him another piece.

Phase 2: Empty bowl, single pieces (two to four weeks)

As he progresses, the dog’s expression should change from vigilant to relaxed.

Schedule several feeding sessions throughout the day. Place the dog’s daily meal in a bowl on a counter or shelf in his feeding room. Place his empty bowl on the ground at your feet. Alternate between feeding him several pieces from your hand, a piece at a time, and dropping several pieces of food, a piece at a time, into his food bowl from waist height. Wait until he has finished each piece before dropping the next.

Phase 3: Empty bowl, multiple pieces (two to four weeks)

During several feeding sessions throughout the day, place the dog’s daily meal in a bowl on a counter or shelf in his feeding room. Place his empty bowl on the ground at your feet. Drop several pieces of food into his food bowl and wait until he has finished them. Then feed him several pieces, one at a time, from your hand. Now drop several more pieces into his bowl. While he is eating those, drop more treats, one at a time, into his bowl from waist height.

Phase 4: Two partial bowls (two to four weeks)

Again, schedule several feedings throughout the day, and place the dog’s meal in a bowl on a counter or shelf in his feeding room. Put a handful of food in each of two bowls and place one bowl on the floor. Put lower-value food into the bowls; save the higher-value food for treat dropping. If you cannot safely put down the bowl in your dog’s presence, tether him, put him on a sit-stay, or shut him out of the room while you put the bowl down.

While he is eating from the first bowl, place the second bowl on the floor a safe distance away. “Safe” will depend on your dog, and could be as much as 10-15 feet or more. Err on the side of caution. Return to the first bowl and drop treats into it as he continues to eat.

When he has finished the first bowl, stop dropping treats and direct him to the second bowl. While he is eating from the second bowl, return to the first bowl and pick it up. Continue to drop treats into the bowl from which he is eating.

Over the two to four weeks of this phase, very gradually – a few inches at a time – place the bowls closer and closer together. Watch for signs of tension or aggression. If you see any, you have closed the distance too quickly; go back to the distance between bowls where he was relaxed and work at that distance for several days before moving the bowls closer together again.

Phase 5: Several partial bowls (two to four weeks)

Repeat the previous phase, using several bowls (up to six). You can prepare all the bowls at the same time and set them on the counter, but place them on the floor one at a time, while he is eating from the first bowl. Continue to drop treats into the bowl he is eating from, and occasionally pick up an empty one that is a safe distance from the dog. During this phase, reduce the number of meals to two or three. Also look for opportunities outside of feeding time to drop treats near the dog when he is in possession of other reasonably valuable items.

Phase 6: Calling the dog (two to four weeks)

Repeat Phase 5, except try to call the dog to you from a distance of six to eight feet just as he finishes the food in a bowl. Have the other bowls set out so he must pass you to go to another bowl. Be sure to give him a very high value treat when he comes to you. Gradually start asking him to come to you before he finishes the food in the bowl – first, when he is almost done, then when there is more and more left. As long as he stays relaxed, gradually move closer to the food bowl he is eating from before you call him.

Practice this phase for at least one full week before moving closer to him. Also, look for opportunities outside of feeding time to call him to you to feed him high value treats when he is in possession of other reasonably valuable items.

Phase 7: Adding people (two to six weeks)

Starting back at Phase 1, have a second person repeat the exercises. This should be another person who is close to the dog, not a child, and not a stranger. Have the person move through the phases, spending up to a week at each phase or longer if necessary. If he is doing well with a second person, add a third, then a fourth. Be sure to use people who are well-educated as to their training duties, and able to follow directions.

Phase 8: Coming out of the closet  (two to six weeks, for the rest of the dog’s life)

Again, starting back at Phase 1, move the food bowl exercises out of the dog’s feeding room into other areas of the house: the kitchen, the dining room, the den, etc. Assuming the training has been progressing well, you should be able to move through the phases relatively quickly. Continue to look for other real-life resource-relevant opportunities to reinforce the message that your presence means more good stuff. Remember that, depending on the success of your desensitization program, your resource-guarding dog may never be totally reliable in the presence of valuable items. For the rest of your dog’s life, always be aware of the environment and be prepared to intervene if there is a potential risk.

The Facts You Need Before Feeding Your Dog a Fiber Regiment

4

[Updated October 19, 2017]

Recently there has been renewed interest in fiber as a dog food ingredient. One pet food manufacturer published an article on the Internet condemning beet pulp in dog food as unhealthy, if not downright dangerous. There is a lot of myth and misunderstanding concerning fiber, so let’s take a closer look at this controversial ingredient.

The term “fiber” (or “roughage”) applies to complex carbohydrates that are resistant to mammalian digestive enzymes, although certain bacteria possess the enzymes needed to break them down. Even ruminants, with their four-chambered stomachs and cud-chewing habits, rely on their symbiotic rumen bacteria to digest plant fiber.

Fiber is found only in plants – hair, hooves, bones, fish scales, and feathers do not contain any fiber. Fiber is composed of polysaccharides (complex sugars), and is found in plant cell walls, where it provides structural strength and rigidity.

fiber dog food

While some food manufacturers use whole grains and vegetables to serve as both a source of nutrients and fiber – the method WDJ most admires – many others use dedicated fiber sources such as beet pulp, peanut shells, oat and other brans, tomato pomace, buckwheat and other grain hulls, psyllium, fruit pectin, guar gum and other gums, flaxseed, and powdered cellulose. This last one is defined as “purified, mechanically disintegrated cellulose . . . from fibrous plant materials.” I fondly refer to it as “sawdust,” which I believe is a fair description (though technically, wood contains a related fiber called lignin in addition to cellulose).

What Fiber Has to Offer Dogs

It’s true that the “wild” canine diet contains very little fiber, and the dog has no absolute physiologic need for it. However, dogs eating processed commercial foods do appear to benefit from the addition of fiber.

While fiber itself is indigestible and generally considered non-nutritive, some fibers do contain nutrients, such as vitamins and minerals, that can be extracted during digestion, either by the mechanical grinding action of the stomach and intestines, or through bacterial fermentation in the colon. However, the nutrients present in fiber are not the reason it is often included in dog fods.

Fiber’s major contribution to commercial dog food is modulation of the digestive process; the fiber content of a food greatly affects the speed of passage of food through the digestive system. Fiber’s moisture-absorbing and lubricating actions can slow down peristalsis (the muscular contractions of the intestine that push food through the tract) in cases of diarrhea, or speed it up in the case of constipation. In other words, fiber has a normalizing effect on the gut.

The presence of adequate fiber allows time for absorption of nutrients and water from the intestine into the blood. Some fibers also impart mucilaginous (slippery) qualities to the food, helping it “slide” along the gut walls. Certain fibers increase the rate of stomach emptying (this is one theory behind feline “hairball” diets), while others slow it down. Fiber binds some toxins in the gut and eliminates them in the stool.

Types of Fiber

Fiber is usually characterized by describing its solubility and fermentability. These terms are used for different properties, and any one fiber can be described in terms of either trait. Cellulose, for instance, is both insoluble and nonfermentable, while guar gum is soluble and fermentable. Others lie on a continuum between these two extremes. These terms evolved as the technology for analyzing fiber improved.

However, the method used to assay “crude fiber” as stated on a dog food label is actually a very poor technique, and fails to detect most of the lignan, hemicellulose, and even some of the plain cellulose. Thus, the actual level of fiber in a dog food may be considerably underestimated by the outdated Crude Fiber method.

Soluble fibers are considered more digestible than insoluble fibers and will dissolve in water. Soluble fiber dissolves in water to form a viscous gel, which may aid in food passage through the gut. Insoluble fiber tends to speed up gut motility.

Fermentable fibers are those that yield nutrients that can be used for energy by the body. Soluble fibers tend to be more fermentable than insoluble fibers. Bacterial digestion of these fibers produces short-chain fatty acids (SCFAs) such as proprionate, acetate, and butyrate. Butyrate is thought to be beneficial to the cells lining the colon. These SCFAs can be absorbed by the animal and used as an energy source, acidify the colonic environment, and draw water into the stool by osmosis. Basically, they keep the colon bacteria happy, and this is the reasoning behind use of fructo-oligosaccharides found in such plants as chicory and yucca in dog food.

Fiber and Medical Conditions

It has been thought for many years that high fiber diets are “more filling” and provide increased satiety. Thus, weight loss diets have traditionally included high fiber as well as less fat. However, a new study has reported that fiber appears to have no effect at all on a dog’s appetite; no matter how much fiber a food contained, all dogs were willing to eat a “challenge” meal given an hour later. Other researchers have suggested that the primary mechanism of weight loss produced by “light” diets may be decreased palatability.

The ability of certain fibers to decrease intestinal transit time is the theory behind feeding high-fiber foods to diabetics. The addition of fiber slows absorption, resulting in a more stable blood glucose level over time.

While different fibers behave differently depending on the composition of the diet and the individual metabolism of the dog, it seems clear that excessive fiber increases fecal bulk, frequency of defecation, and may produce loose stools and flatulence.

Beet Pulp Fiction

Beet pulp seems to be the main target for much of the misinformation flying around about fiber. Here are a couple of the untruths currently being promulgated about beet pulp:

MYTH 1: Kibble containing beet pulp swells up in the stomach and causes bloat. This is based on the observation that extruded kibble that gets wet (i.e., dropped into the water bowl) will indeed expand, and any of us with sloppy dogs (or playful cats) have seen the evidence with our own eyes. However, baked food does not swell, and several baked foods also contain beet pulp.

The expansion of wet kibble is mainly due to the air trapped in the pellet as it “pops” from the extruder. The other thing to notice about wet kibble is how easily it breaks apart. Far from forming “an indigestible mass” in the stomach, this property of kibble probably helps speed its passage from the stomach and ultimate digestion.

MYTH 2: Beet pulp is full of sugar and can cause diabetes. Pulp is a by-product of sugar extraction from sugar beets. Sugar manufacturers, obviously, extract every last little bit of sugar from the pulp before they sell the pulp off for drying and use in dog food. There is no evidence that beet pulp causes diabetes.

MYTH 3: The saponins in beet pulp cause bloat. Saponins are basically soaps, which cause an increase in surface tension of a liquid. While normal water forms bubbles, they burst rapidly. Soap allows the molecules to stick together longer. Saponins are found in beets, legumes like alfalfa and beans (including soybeans), and hundreds of other plants. Saponins are specifically associated with one type of bloat (“frothy” bloat) in ruminants (cows and goats), but this is completely unrelated to the “gassy” type of bloat that dogs can suffer from.

MYTH 4: The saponins in beet pulp contains paralytic toxins. There are thousands of saponins; the soybean alone contains at least five different ones. The highly biased claim that all saponins (or even all soy and beet saponins) are toxic is ignorant and inaccurate. According to one expert, “From the biological point of view, saponins have diverse properties, some deleterious but many beneficial.”

Medicinal herbs such as ginseng, licorice, and alfalfa contain helpful bioactive saponins. Digitalis is a saponin that is extremely toxic in high doses, but has saved millions of lives as the basis for digoxin, a drug used to treat congestive heart failure. Saponins are largely destroyed by processing such as soaking and cooking; it is unlikely they have any biological effect when consumed in dog food.

Overall, I don’t have any objection to beet pulp. For a normal animal, I’d probably choose a food that contains beet pulp or pomace – the more fermentable fibers – over peanut hulls or cellulose. And I’d pick a food that contained a whole-food source of fiber (such as oatmeal or tomatoes) over one that included beet pulp or any other food fraction for its fiber source.

To Sum It Up

As you can see, fiber does play a useful role in commercial dog food. It probably doesn’t significantly contribute to whole body nutrition, but can provide important nutrients of value to the cells and bacteria of the colon. Fiber may actually prevent absorption of some toxins.

Most dog foods range from 1-10 percent in fiber content on the guaranteed analysis; moderate levels of fiber, in the 2-4 percent range, may be a realistic goal when selecting a dog food. In amounts of more than 10 percent, fiber increases stool volume and has a negative effect on stool firmness.

Each manufacturer uses different types of fiber to obtain specific results. Each will vigorously defend its particular source or combination as the best, but they can’t all be right! Aside from minor variations in each fiber source’s effects, which one any given healthy dog consumes will probably not matter too much. However, if your dog has any specific health issue, you may want to ask your veterinarian which type of fiber she recommends for that condition.

And, as usual, WDJ prefers foods that utilize whole foods, rather than isolated food fragments (by-products of other food manufacturing processes) that lack the balance and natural cofactors of the real thing.

Dr. Jean Hofve is the Companion Animal Program Coordinator for the Animal Protection Institute, located in Sacramento, CA.

How to Stop Lunging Behavior

My nine-month-old Bouvier puppy is in training, but I am having trouble finding a positive way to stop his lunging; he is very strong. I am using a choke chain, and my current trainer feels I’m not firm enough in my corrections. I don’t feel comfortable using the choker, but also don’t like the idea of the Halti because it might be even more dangerous if he lunged.

-Carol via e-mail

———-

Pat Miller, WDJ’s Dog Training Editor, answers this question for us. Miller offers private and group dog training classes from her base in Fairplay, Maryland. For contact information, click here.

Miller responds:

Kudos to you for resisting your trainer’s advice to jerk harder on your pup’s choke chain. Choke chains have been shown to cause spinal subluxations in dogs that were trained with them. In worst-case scenarios, trainers using choke chains have damaged and collapsed dogs’ tracheas, and in some cases even killed dogs.

Head halters are, if used correctly, a much safer way to manage lunging while you train your pup to act properly on leash. I prefer the Snoot Loop and the Gentle Leader to the Halti, as the Halti seems more susceptible to slipping off the dog’s nose (see “Head Halters Right and Wrong,” WDJ June 2000). I recommend using two leashes – one clipped to the head halter, the other to the dog’s regular collar. If he lunges, you can absorb the shock with the regular collar, then use gentle pressure on the head halter to turn him away from the object of his attention.

Then, of course, you must reward the appropriate behavior with a reward marker (such as the Click! of a clicker or the word “Yes!”), followed by a yummy treat. If you use the halter without the marker and treat, you are managing his behavior, but not training him to offer you the correct behavior voluntarily. If you only manage the behavior without training, you may always need the halter to control him. If you train him to perform the desired behavior by rewarding him when he’s not lunging, you should eventually be able to wean him off the halter.

If you are really concerned about using the head halter you can try the J.S. Sporn Halter (actually a harness, which tightens around the dog’s legs and chest when he pulls). Again, you will need to actually train the behavior you want, not just rely on the equipment to change your dog’s behavior.

Socialization is important
It’s also important to understand why he’s lunging, and to work on training him out of that behavior as well. Is it aggression, or is he lunging out of a friendly desire to visit approaching people or dogs? Either way, avoid verbal or physical punishment (corrections). If he begins to associate pain or stress with the approach of others, he may well become aggressive.

Instead, teach him a rewarding, incompatible behavior – such as looking at you with rapt attention – using Clicks! and tasty treats, so he associates the approach of others with really wonderful stuff coming from you. If he is lunging at other dogs because he wants to go play with them, teach him that the way to get to go play with other dogs is to be calm and sit looking up at you. Do this by always having him sit and pay attention before you release him to go play.

More and more trainers are coming to realize the value of positive training methods. You might want to ask your trainer if she will allow you to use positive methods in your class, or find one who can help you train more positively.

Hands-Free Dog Leashes

With more than 25 years of working with animals professionally under my belt, I don’t find many new product concepts that come as a total and pleasant surprise to me. What a delight, then, to test hands-free leashes for Whole Dog Journal and discover that the best of these products, which started making their appearance in the pet supply retail market in recent years, offer far more than just a convenient way to free up your hands while walking your dog on leash.

Few things irritate me more than having a dog constantly tugging on the leash. Thanks to my new doggie daycare center, I now find myself in the position of walking untrained dogs far more frequently than before. With some trepidation, I decided to test the hands-free leash products on my daycare dogs. The first candidate was a large, rambunctious Old English Sheepdog with poor leash manners. I buckled one of the hands-free gadgets around my waist and set out across the parking lot.

Warning: If you decide to use one of these products, the greatest danger is rampant ridicule. Be prepared to fend off guffaws and wisecracks. Just as I stepped out the daycare door with MacDuff attached to my body, my landlord stepped out of his office across the blacktop parking lot, and broke into uproarious laughter. I smiled boldly, waved, and continued on.

When MacDuff reached the end of the leash and began to pull, I stopped. It was surprisingly easy to let my hips and lower back absorb the mild impact. MacDuff, feeling no give in the leash at all, quickly backed off the end of the leash a foot or so. I started forward again. It took just a few repetitions of the stop-start routine for MacDuff to realize that if he wanted to get to the grass to relieve his bladder he had to stop pulling.

I was amazed. I had tried the same routine earlier that day with this 80-pound bulldozer on a traditional leash, with no improvement whatsoever in the pulling behavior. I can only surmise that despite my best efforts, when he pulled on the regular leash there was a certain amount of give in my arm. With the waist-belt it was much easier for me to effectively prevent him from moving forward at all, thereby preventing him from getting any reward for pulling. I found the hands-free leash just as effective with several other pullers, from Pete the black Lab-mix to Jeep, the Boston Terrier.

I was concerned initially that the concept of a waist-leash might be contraindicated for someone with back problems. Dog walkers with such a condition should consult with their physician before using this product. But one of my clients with a bad back and a big Rhodesian Ridgeback found the hands-free leash much kinder to her back. When Gator pulled on a traditional leash, it torqued her sideways. With the hands-free leash, she could brace squarely and absorb the shock evenly and comfortably across her hips.

The only remaining concern I have is the size and strength of the person relative to the size and strength of the dog. Anyone walking a dog on a hands-free leash must outweigh the dog by enough to act as a solid anchor when the dog pulls. Children or frail people would not be any more able to control a pulling or lunging dog with a hands-free leash than they would be with a regular leash; in fact, the hands-free model could very well put them at risk of being toppled over or even dragged by a very large or strong dog. And while some of the products are marketed as being a useful accoutrement for joggers, I personally would not want to be suddenly yanked by the waist by a lunging dog while running.

As daunting as this concern sounds, I do think that hands-free leashes have something to offer the average person and the average dog. One definite advantage is the freedom granted to those of us who train with a clicker and treats. No longer do you have to juggle the leash, clicker, and food rewards – you’ve got one hand for the treats and one for the clicker; the leash takes care of itself. Need to scoop a pile of poop? Again, no worries over trying to manage the leash while doing the plastic bag thing. Have a problem with the dog pulling the leash out of your hand and taking off down the street without you? Not anymore!

As always, WDJ looks for value in the products we review. Convinced that the hands-free leash concept had something to offer, we focused on the criteria of cost, quality of materials and construction, safety, comfort, and ease of use as we tested four different models to see how they fared.

Please note that in this discussion, our “Safety” criterion relates to the product’s ability to hold the dog securely, without exposing him to harm. Because (as we already discussed) all of these products pose some risk of tripping or dragging the handler if used inappropriately (such as with a strong, untrained dog and a small or weak handler), we regard them as equally safe for the handler. We did note which products include quick-release snaps; such snaps could protect a handler from being dragged by an out-of-control, strong dog. However, releasing the dog, obviously, would expose him to the many dangers of being loose.

Unique designs
Often, when we review specialty or “niche” products, we can find only minute differences in the products’ designs. But each of the hands-free dog-walking products we reviewed takes a very different approach.

For example, the High Sierra Walk-A-Belt is all about the dog walker’s comfort. This was the first hands-free product we tested, and the one that convinced us that hands-free was a wonderful concept.

The Walk-A-Belt’s comfortable design is unparalleled. As the name suggests, this product is simply a belt that a person can use for anchoring a leash – you have to provide the leash! The belt comes in two styles, felt- or fleece-lined, both made of top quality materials and more than two inches wide for maximum comfort. The belt rests on your hips rather than around your waist, to provide maximum safety and comfort. The nylon straps are strong and well-stitched, with sturdy metal and plastic fittings. Buckle the belt on, snap the handle of your dog’s regular leash into the carabiner provided for this purpose, and off you go! One model has a sturdy plastic buckle; another has a strong metal snap. You also have the option of ordering one with a quick-release snap.

If you are training a dog who pulls, the High Sierra Walk-A-Belt would be the most comfortable and secure for you to wear.

The J. M. Rogers Company’s Dog Jogger is a very serviceable hands-free belt and leash combination. It is exceptionally well constructed, with high-quality nylon webbing, sturdy plastic clasps on the belt portion, and a strong metal snap that attaches to the dog’s collar.

We prefer the extra wide webbing on the belt of this brand over the narrow straps of the Safe Pet and Buddy System brands that follow. Although the fabric is not our favorite kind of soft and smooth nylon, its width enables the belt to be worn resting comfortably on the hips rather than snug around the waist. While the lack of padding makes the Dog Jogger less comfortable that the White Pines belt, it also makes it cooler – a significant factor in summer heat and humidity.

We appreciate the detachable leash feature: The leash snaps easily on and off the belt and can be held in the hand as a regular leash when desired.

The Safe Pet Hands-Free Leash is the least-complicated product we examined. Made of high quality, strong, soft, and supple webbing and sturdy plastic fittings, this is simply a nylon leash that terminates in an easily adjustable loop that clips around your waist. Should you choose, the loop can be minimized to a hand-sized loop and function as a regular leash as well.

We liked this product, and its coolness around the waist, but, as with the Dog Jogger, we found the waist fit less comfortable than the hip-hugging White Pine model.

The Buddy System hands-free leash incorporates numerous innovative features not found in any of the other models we tested. One innovation is a quick-release collar attachment that makes it easy to release and reattach your dog quickly. The quick-release buckle at the end of the leash also enables you to snap the end back to the waist belt if you release your dog, so you don’t have to carry the leash as you walk or jog. Cool!

It’s also extremely adjustable. The leash can be shortened or lengthened (from 22-40 inches) while attached to the belt, and also can be used as a regular leash when released from the belt. The company also offers “Extra Buddy” ($16) an extra piece that enables you to attach a second dog to the waist belt, and “Extend-A-Buddy” ($6), a piece that increases the length of the leash by 18” to 36”. Plus, the Buddy System comes in a wide variety of sizes. Their “little dog” model (for dogs under 20 pounds) uses three-quarter-inch webbing and costs just $18. The larger dog models use one-inch webbing, and come in three human waist sizes, from 22-40, 27-50, and 33-60 inches.

However, in our opinion, the nylon material used is of a slightly lower quality than that used in the Safe Pet product, the stitching on the seams appeared a little minimal, and on the item we tested, the metal collar snap was extremely stiff and difficult to release. If the company were to improve the quality of materials used, we would give this product our top rating. However, a person who wants 20 different ways to secure his dog to his body would probably like this product best, even as it is now.

The BP Jogger takes a totally different approach to the hands-free concept. It’s a leash made of a 24-inch plastic coil that stretches to 72 inches, with a Velcro-fastened cuff that is secured around your upper arm.

We don’t like this product for this particular application. The company’s literature explains that as the plastic coil extends when the dog pulls, its tension increases, which encourages the dog to stop pulling. We thought it worked in the exact opposite way. Despite the increased tension, the ability to stretch, we think, rewards the dog for pulling – he gets to move toward whatever he wants to see or sniff.

We liked the idea of the coiling leash; the fact that it could keep you from having to constantly release and take up the slack when the dog moves around is an attractive concept. But, in practice, the stretchiness prevents the handler from effectively restraining the dog within the Jogger’s six-foot limit. If a dog were to dart ahead of you at a bad time, there wouldn’t be much you could do to stop him. It’s like grabbing a dropped phone receiver by the middle of the cord – because the cord stretches, the receiver hits the floor anyway. It would be great, though, if you were walking somewhere that was perfectly safe for a dog to range around a six-foot perimeter.

Then there is the matter of fastening this leash to your upper arm; we found it to be an uncomfortable way to carry a leash, and the discomfort increases when a dog pulls. If you are really excited about the coiling feature, consider the BP Walker made by the same company – not at all a hands-free product, but the same coiling leash with a nylon loop handle on the end.

Also With This Article
Click here to view “Off Leash Training: Building Reliability”
Click here to view “How To Train Your Dog for Off Leash Walks”

One Dog Toy Does Not Fit All Dogs

0

Regarding your review of toy balls (“Best Dog Ball Brands for Playing Fetch,” WDJ August 2001): We give a wholehearted FOUR stars to the Jolly Ball at our house, and from two years experience with them, I have to disagree with the reasons you rated this a three-star toy. Our dogs (one of which is a dead ringer for the one pictured) are brutal with their two Jolly Balls. Neither ball has been destroyed, and quite frankly, the dogs love them so much that I have to hide them so we can play MY favorite game: Frisbee.

The Jolly Ball is also very easy for me to throw. I fling it by the handle. My husband kicks it like a soccer ball. It’s easy for the dog to pick up and it looks adorable hanging out one side of our dog’s mouth, as seen in the enclosed photo.

We vote four stars and four paws up for this one!

-Tina McGugan
Palatine, IL

———-

I have to comment on the review of the Jolly Ball you put in the August 2001 issue. You state that it held up well, despite a few tooth marks in the ball, even after several days of play.

I’m wondering what dog breeds you used for this test. I have a three-year-old male Whippet who has chewed off most of the handle and that was the first time I gave it to him over a year ago! I doubt it has improved since then, but he is only allowed to play with it when I am with him and can take it away when he starts to chew the handle.

I recommend that you print something about the Jolly Ball not being a good toy for super-chewers and to never leave a dog alone with it for long.

-Stephanie Russell
via e-mail

We’re sticking with our assessment and rating of the Jolly Ball. All of our test dogs love the balls – but some of our test dogs have trashed their Jolly Balls. My sister’s Jack Russell Terrier, Patrick, chewed the handle off within days. As we mentioned in the sidebar (Safety First: Use Common Sense), “Leave no toy unattended with any dog, anytime.” A compelling case for this admonition is contained in the following letter.

———-

I have been breeding, showing, and training dogs for more than 15 years. I am also a professional dog groomer. I do everything with my dogs: conformation, flyball, obedience, and everything else.

I bought the Teaser Ball and within less than three minutes of having it, one of my Jack Russell Terrier’s had her head STUCK in one of the outside holes. It did not appear that this would happen, but it did. If I had not been standing right there she may have been seriously injured or even broken her neck. It was very difficult for me to remove the ball it was that stuck on her neck.

Please let your readers know of this danger. I am in no way a novice dog owner and I did not expect this to happen. I do not want anyone’s dog injured.

-Coleen Timmons, Stealth Terriers
via e-mail

———-

Choosing the Right Shelter Dog

Just a few comments on your article about Sue Sternberg’s shelter dog evaluations (“How to Choose the Best Shelter Dog for Your Family,” WDJ July 2001). As you noted in your article, Ms. Sternberg is very rigid in her requirements of potential adoptees. If all dogs lived up to her ideals, they probably wouldn’t be in a shelter to begin with.

I, for one, wouldn’t think of harassing my dogs while they were eating (to test for temperament?). Would you like to be prodded while you were eating? Many of her issues are valid, but we would certainly eliminate the overpopulation problem if we euthanized dogs that didn’t comply with her requirements.

We all know that most shelter animals have issues that with a little love, work, and understanding can be resolved. I believe anyone that strictly adheres to these adoption guidelines is better off with a stuffed animal.

-Susan Miller
Carmel, NY

———-

Thanks so much for your article on selecting the best shelter dogs. I volunteer at my local shelter, and I cry every time we have to euthanize sweet, quiet, wonderful (sometimes older) dogs who have stayed too long in the shelter. Many of these nice dogs are not adopted because people would rather take home a puppy, or a “tough-looking” dog, or a dog that looks like one they saw on TV. People pick dogs for the stupidest reasons! And it’s incredibly hard on the dogs (and the shelter staffers) when a dog goes home with a family that is obviously not ready or able to deal with its challenges – food aggression, fighting with other dogs, awful leash manners, whatever – and is returned to the shelter a few days later. Often, after a bad experience, people will decide not to get a dog at all.

Any dog who passes all of Sternberg’s tests will be a good candidate for any family. Well-mannered, safe, and affectionate dogs should never have to be put to sleep so that people can try (and usually fail) to make a challenging, aggressive dog get along in a world unsuited to its temperament.

-Name withheld by request
San Diego, CA

Download the Full August 2001 Issue

0
To continue reading this article or issue you must be a paid member.

Join Whole Dog Journal

Get full access to Whole-Dog-Journal.com – more than 4,000 articles – for just $20.
Join today and save 30% off our full price.
Already a member?
| Forgot your password? | Activate Web Access

Protecting Your Dog from Tick Bites and Lyme Disease

2

[Updated December 14, 2018]

Given the potential duration and magnitude of a Lyme disease infection in your dog, we think it’s pretty important to do something to protect your dog from ticks, especially in areas where cases of Lyme are common. This is one of the instances where you have to weigh all the factors against each other – in this case, your dog’s health and vulnerability, the risk of his exposure to ticks, the prevalence of Lyme in your area, and the tick-repelling and tick-killing products available to you – to decide what you are going to do to protect your dog. It’s not an easy equation; it’s more of a complicated algorithm. Let’s look at each of these areas and how they interact.

dog at risk for ticks

Tick-Killing Chemicals and Your Dog’s Immune System

Say your dog is vibrantly healthy – no chronic skin problems, no recurrent ear infections, no mysterious digestive ailments, and no chemical sensitivity that you have noticed. He may not have any problems with an occasional treatment with a pesticide.

Unfortunately, a small percentage of dogs (or people in their families) can’t tolerate the use of powerful insecticides. Some respond with nausea, vomiting, tremors, and even seizures when exposed to even low concentrations of tick-killing chemicals. Others suffer skin reactions: hair loss, rashes, and sores. Animals with compromised organ function or a history of chemical sensitivity may suffer a general health setback after treatment.

Doxycycline

In a study published in the New England Journal of Medicine, researchers at New York Medical College tested the once-controversial strategy of administering a one-time dose of doxycycline immediately after a tick bite, and found that this effectively prevents the development of Lyme disease. The findings have important implications for dogs as well as humans living where Lyme disease is widespread. For those who prefer not to use even a single dose of antibiotics, the swift administration of medicinal herbs and other products that kill bacteria may have a similar result.

The researchers also discovered that Lyme appeared only if a tick had been attached to the skin for 72 hours or longer, verifying the research of Dr. Max Appel. In addition, there was no risk of Lyme if the tick was flat and had not become engorged with blood.

The doxycycline test, led by Dr. Robert Nadelman, was conducted in Westchester County, NY, which has one of the highest rates of Lyme disease in the world.

Your Dog’s Tick Exposure

If you live in an area where there are few or no cases of Lyme disease (among people or dogs), or your dog never has the opportunity to come into contact with ticks (this may be true for many city-dwelling dogs), you may be among the lucky few who don’t have to worry about Lyme disease prevention.

But there are many places where, especially in the tick’s most active time of the year (April through October), any dog that leaves the pavement will end up with ticks. And dogs that spend a lot of time afield will come home loaded with the pests. (The ticks that carry the bacteria that cause Lyme disease include the deer tick and the western black-legged tick; however, other ticks can carry and transmit other diseases, including Rocky Mountain spotted fever, babesiosis, and erlichiosis).

Also, some individual dogs seem to be more attractive to ticks than others. Holistic practitioners often regard an animal’s susceptibility to parasites to be a sign of poor or compromised health – a result of a sputtering immune system or, in more esoteric terms, weak life energy or chi. However, anyone who has been the target of more mosquito bites than his campfire companions might beg to differ; maybe some people (or animals) actually do “taste better.”

Whatever the cause, you might find it necessary to do more to repel ticks from one of your dogs than the others. You may not have to dose each of your pets to the same extent to provide a similar level of protection. Instead, treat each dog as an individual. If you have one dog that tends to attract more ticks, use more repellents (and vigilance) with that dog, and, as long as the ticks stay away from your other dogs, less with them.

Prevalence of Lyme Disease

According to the Centers for Disease Control, in the United States Lyme disease is mostly localized in states in the northeastern, mid-Atlantic, and upper north-central regions, and in several counties in Northern California.

In areas where Lyme is common, the risk is greatest in residential areas surrounded by woods and/or overgrown brush. Venturing off paths and into grassy areas increases a person’s or dog’s exposure to ticks, who sit on grass leaves, waiting for any warm, carbon dioxide-exhaling body to approach. They begin waving their arms as soon as they detect such a candidate and grab ahold!

Tick Repellents and Killers

There are also a number of commercially produced herbal preparations that some owners swear keep ticks off their dogs.

CJ Puotinen, author of The Encyclopedia of Natural Pet Care, says she alternates between a topical repellent made by Heart Foods called Tickweed Plus, and a neem-based repellent called NeemAura Naturals Herbal Outdoor Spray made by NeemAura. Tickweed Plus contains tickweed, neem, pennyroyal, lavender, and other herbs; NeemAura’s product contains neem, myrrh, lemongrass, orange, citronella, and other oils.

Get Puotinen’s recipe for a homemade essential oil tick repellent here.

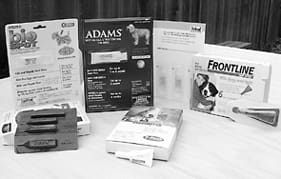
Comparing Best-Known Pesticide Tick Repellents

DRUG/ MAKER/ ACTIVE INGREDIENT APPLICATION ACTION FREQUENCY NOT RECOMMENDED FOR: PRESCRIPTION? MODE OF ACTION
Adam’s Flea & Tick Mist
Farnam Pet Products
Pyrethrin
Liquid spray Kills and repels ticks As needed; no more than 1x per week Puppies less than 12 weeks No Pyrethrins are natural extracts of the chrysanthemum plant. They affect the nervous system of insects and kill ticks quickly. Products that contain pyrethrins are generally applied directly to the dog.
Bio Spot
Farnam Pet Products
Permethrin
Liquid spot application Kills and repels ticks Monthly Puppies less than 12 weeks No Permethrin is a synthetic pyrethrin compound that affects the nervous system of insects. In this application, it is used in an oil carrier that helps distribute the chemical over the dog’s body; the permethrin is stored in (and gradually released) from) the animal’s sebaceous (oil-producing) glands. Permethrin lasts longer than natural pyrethrins and is more toxic.
Defend Ex Spot
Schering-Plough
Permethrin
Liquid spot application Kills and repels ticks Monthly Puppies less than 4 weeks; dogs with known organ dysfunction No Permethrin is a synthetic pyrethrin compound that affects the nervous system of insects. In this application, it is used in an oil carrier which helps distribute the chemical over the dog’s body; the permethrin is stored in (and gradually released) from) the animal’s sebaceous (oil-producing) glands. Permethrin lasts longer than natural pyrethrins and is more toxic.
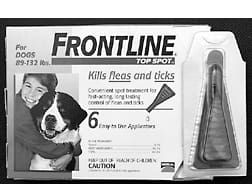
Frontline
Merial
Fipronyl
Liquid spot application Kills ticks Monthly Puppies less than 12 weeks Yes Fipronyl blocks the passage of chlorine through cells in the tick’s nervous system, paralyzing the insect. In this application, fipronyl is mixed with an oil carrier that helps distribute the chemical over the dog’s body; the fipronyl is stored in (and gradually released from) the animal’s sebaceous (oil-producing) glands.
Revolution
Pfizer
Selamectin
Liquid spot application Kills American dog ticks only Monthly Puppies less than 6 weeks; dogs treated with other topical flea/tick preps; use caution with sick, weak or underweight dogs Yes Selamectin blocks the transmission of the insect’s nerve signals; the tick dies of paralysis. Unlike the other liquid, spot-application products, Revolution enters the dog’s bloodstream through the skin, eventually passing into the sebaceous glands and onto the skin and hair. This product is said to control only American dog ticks — NOT the deer ticks that commonly carry Lyme disease.
Preventic Collar
Virbac, Inc.
Amitraz
Chemically impregnated collar Kills ticks 4 months Puppies less than 12 weeks No Amitraz-laden collars kill ticks by inhibiting the function of their nervous system; ticks are paralyzed and die before or shortly after attaching to dog. Amitraz has little or no affect on fleas. May be used in conjunction with other flea and/or tick treatments.

Dietary Supplements as Tick Repellent

Some holistic practitioners say that adding bitter herbs to a dog’s diet can actually make him less attractive to ticks. Juliette de Bairacli Levy, author of The Complete Herbal Handbook for the Dog and Cat, developed a supplement for this purpose that is now manufactured by Natural Rearing; the herbal antiseptic tablets contain garlic, rue, sage, thyme, eucalyptus, and wormwood.

While neem is most frequently seen as a topical agent used as an insect repellent, first-aid therapy, and to treat a variety of health problems, neem also improves digestion and helps make animals less attractive to fleas, ticks, mosquitoes, and intestinal parasites. Puotinen recommends giving dogs one 500-mg. capsule per 10 pounds of body weight daily.

Beverly Cappel, DVM, of Chestnut Ridge, New York (heart of Lyme country), makes a nutritional supplement called Fleas Flee that contains brewer’s yeast, liver, and oyster shells. Dr. Cappel regards the supplement as very helpful for making dogs less attractive to fleas and ticks, but reminds clients that a supplement should not be regarded as a sole line of protection. (Fleas Flee can be purchased from Dr. Cappel by calling 845-356-3838.)

Thorough and Frequent Tick Checks

The war on ticks can’t take place on just one front; you have to devote time and constant vigilance to prevent sneak attacks on your dog. Practice these anti-enemy missions on a regular basis:

• Check for ticks during and after every outdoor venture. Especially examine your dog’s legs, armpits, belly, neck, and face. Ticks naturally travel toward dark and/or warm, blood-rich areas of the dog. Remember: The goal is to find the ticks when they are still tiny, before they are engorged with blood. The transmission of the Lyme-causing spirochete does not happen until 24 hours after the tick begins feeding.

• Take extra time to examine your dog for the presence of ticks when the pests are at their most active. Ticks increase their movements in mid-morning, from about 8am until about 11am; the largest number of ticks emerge on sunny days. Ticks are also most active from April through October.

• Using a flea comb helps detect and remove tiny ticks. Drop the ticks you find into a container of tick-killing solution. Do not squish them or toss them away; the tiny creatures can survive this treatment.

Relieving Separation Anxiety Symptoms

You are at your wits’ end. You were gone for less than an hour, and when you returned home, your dog Maxx had already destroyed your new sofa, defecated on your antique Oriental rug, and inflicted deep gouges in the just-repainted front door frame.

You have tried leaving him in the backyard, but he chewed through the fence and got picked up by animal control. You tried crating him, but he scraped his toenails bloody and broke a canine tooth trying to dig and chew through the crate door. When you left him in the garage he tore everything within reach to shreds. When you left him in a covered chain-link dog pen on the back patio, you got complaints from three different neighbors about his nonstop barking and howling. You’ve even tried showing him the damage and punishing him for it, but it hasn’t helped. You hate to think of giving him up, but you don’t know what to do with him. If he would only behave himself when you are away from home.

Maxx has separation anxiety – a behavior problem that results from a dog’s natural instincts to want to be near other members of his pack. It is a normal survival instinct, but one that can often be derailed early in a pup’s life through proper conditioning (see “Learning to Be Alone,” WDJ July 2001). For you and Maxx, however, it’s too late for the proper early stuff. Mad Maxx already has a full-blown case of separation anxiety, and now you need to try to fix it.

Conditioned response
It won’t be easy. Separation anxiety is a panic attack – your dog’s classically conditioned response to the terror of being left alone. When you walk out the door, Maxx doesn’t sit around and muse about whether or not to eat the sofa. Separation anxiety behavior is not a conscious choice – it just happens.

In fact, his anxiety begins before you even leave the house; your dog can tell from your morning routine whether this is a get-up-and-go-to-work day (which leaves Maxx home alone) or a relax-and-stay-at-home day. As soon as Maxx determines that it’s a work day, he starts to worry, and every step in the routine increases his anxiety. The 5a.m. alarm clock. The rush to put Maxx out to potty and then toss him his food dish. The shower and shave. The suit and the shiny shoes instead of blue jeans and sneakers. Coffee and a banana instead of bacon and eggs. The grab for the briefcase and car keys, the pause at the front door for dramatic hugs and kisses to Maxx, and the fervent admonitions to behave himself while you’re gone.

Phew! By the time the door closes in his face and you rush down the sidewalk to the car, Maxx is already worked up into a high state of arousal. He makes no conscious decision to go on a destruction binge – he is simply stressed to the max. Effective ways for him to relieve his stress include chewing, digging, urinating, defecating, and vocalizing.

Anxiety or hijinks?
Most separation anxiety behavior happens within 30 minutes of the owner’s departure and within a similar period before the owner’s anticipated return. This is one of the keys to determining whether Maxx’s behavior is truly an anxiety reaction or simply a bout of puppy hijinks.

If you can leave and come back in an hour to an unscathed home but four hours puts Maxx over the top, chances are you’re dealing with boredom, excessive energy, or a housetraining issue rather than true separation anxiety. (Some dogs will become destructive in their efforts to go outside to relieve themselves if they are very committed to not soiling the house.)

If, on the other hand, your dog displays immediate signs of anxiety upon your exit, he’s a candidate for SA retraining. If you can just get the anxious dog through the first half-hour or so, and avoid raising his anxiety level at homecoming time, you are usually home free. Simple – but not easy.

This task is best accomplished through a program of counter-conditioning and desensitization (CC&D) – fancy terms to describe getting Maxx to like something he now intensely dislikes or fears. In this case, the “something” is being left alone.

The challenge with using CC&D for separation anxiety is that ideally you start with a very low level stimulus that the dog can tolerate, associate it with something wonderful (like the dog’s favorite treats), and gradually work up to a level of normal stimulus, while taking care not to trigger the unwanted response during the process.

If you are desensitizing a dog to loud noises, for example, it is relatively easy to prevent his exposure to noisy environments between training sessions. It’s considerably more difficult for the average pet owner to design a schedule that leaves Maxx alone for no more than a few seconds at first, then minutes, then hours, during the weeks or months that it takes to build his tolerance to being alone. If you are truly committed to working through the problem, and have the time and energy, you can get through this.

Managing Maxx
So, where do you start when you can’t confine him, you can’t trust him loose in the house or yard, and you can’t punish him? What are you supposed to do with a Mad Maxx who is rapidly wrecking everything you possess? You need to do two things:

• Manage his environment while his behavior is being modified so he can’t hurt himself or destroy the things around him.

• Using counter-conditioning and desensitization, teach Maxx that it is safe for him to be alone.

Let’s start with the easy one: managing the environment. This means not leaving Maxx alone until he has decided that being alone is okay. You might be able to find a friend, neighbor, or relative who is home during the day, where Maxx can stay and be safe. Perhaps you are fortunate enough to work in a place where your dog could come to the office with you. It never hurts to ask!

Doggie daycare is another excellent option. Commercial daycare centers are thriving in an increasing number of communities around the country; there might be a good one near you. Be sure the daycare operator knows that Maxx has separation anxiety and understands how to deal with it – that he can’t be left alone and must not be punished for anxiety-related behavior.

Sometimes, although only very rarely, getting another dog can help. If you are considering this, you should only get a second dog because you want one and are committed to keeping the newcomer whether it helps Maxx’s problem or not. Be careful – you could end up with two dogs with separation anxiety/destructive behavior!

Finally, there are pharmaceuticals that have appeared on the market relatively recently that purport to help with resolving a multitude of canine behavior problems. Clomicalm (clomipramine hydrochloride) is the one most commonly prescribed for separation anxiety, but must be used in conjunction with a good behavior modification program in order to be truly effective; the drug alone will not solve the problem.

Maximized training
A behavior modification program will help your dog understand that he can survive being left alone. Depending on the severity of the problem, this may happen relatively quickly, or it may take a long time and never be completely resolved. If you have a Velcro dog who can’t even tolerate you being in the next room, you will need to start with very small steps. Here’s one program for working with separation anxiety:

1. Teach your dog to accept a tether with you standing right next to him (See “Tethered to Success,” WDJ April 2001). When he is comfortable on the tether, take one step away, say “Yes!” before he has a chance to get upset (or Click! your clicker, if he is clicker-trained), then step back to him and feed him a treat. Repeat this step until he shows no sign of anxiety when you are one step away. Be sure that you remain very matter-of-fact about stepping away. If you get excited or emotional, so will he.

2. Now, gradually increase the length of time that you remain one step away before you “Yes!” (or Click!) and return, until he will tolerate your one-step distance for a full minute or longer. Vary the longer times with shorter ones, so he doesn’t start to get anxious about the exercise getting harder and harder each time. You want him to never know how long you will be gone, and at the same time you are teaching him that you always return.

3. Now take two steps away, say “Yes!” and immediately return to feed him a treat. Repeat at this distance until he is comfortable with you being two steps away, then again gradually increase the time at this distance.

4. Very gradually increase the distance, repeating the exercise at each new step until he is calm, then increasing the time at each new distance. If he panics at any point, you have moved too quickly – go back to the previous distance and work there again until he is calm. The take another half-step, if necessary, to avoid triggering his panic.

5. When he will remain calm while you walk to the other side of the room, sit down, and read a magazine, you are ready for the next phase. Start the exercise as before, but this time walk to the doorway to another room, step outside briefly, “Yes!” and step back into the room before he has a chance to get upset that you are out of sight. Return and reward. Repeat this until he is calm about you stepping out of the room, and then gradually increase the length of time that you remain out of sight.

6. Now, sometimes close the door as you step out of the room, briefly at first, then for longer periods.

7. Do the same exercise with each of the doors leading from the room, including the door that leads to the outside. Sometimes leave the door open, sometimes close it. Be sure to return and reward each time before your dog goes into panic mode. If he starts acting anxious at any time, slow down, and go back to a part of the exercise that he can tolerate. Then, when he is calm, proceed more slowly to the step that upset him.

8. Now take him off the tether and repeat Step 6, closing the door each time to prevent him from following you out of the room. Start with very brief departures, so he doesn’t have time to start digging at the door. Gradually increase the length of time you are out of the room, but remember to intersperse the longer ones with short ones so he never knows how long you will be gone. Remember, too, to remain calm yourself. If you start getting anxious or excited about the process, so will he.

9. When he is comfortable with you stepping outside for several minutes, start adding bits of your departure routine to the exercise. Pick up your keys, step outside briefly, return, “Yes,” and reward. Then put the keys down. Go outside, open and close the car door, then come back inside. “Yes” and reward. As he gets better with pieces of the routine, add more pieces.

10. Assuming that you drive a car to work or school, the next step is to actually start the car engine, then come back inside and reward. Start the car engine, then vary the amount of time you wait before coming back in to reward. Drive down the driveway, then drive back to the house, come back in and reward. Your goal is to gradually increase the length of time you can be outside to 30 minutes or more. If you can hit the magic 30-minute mark, you are well on your way to success.

Pacing is key
Be sure to proceed through these 10 steps at a pace that your dog can tolerate. Short, successful sessions at first (five to 10 minutes), are better than long, frustrating sessions that end in failure. You may be able to proceed through the steps in a week or two if your dog’s separation anxiety is mild, but it is more likely that it may take you several weeks, or months, to work up to 30 minutes. If you aren’t making any progress at all, talk to your veterinarian about adding Clomicalm to the equation.

Fixing separation anxiety is hard work, and it’s easy to get frustrated with your dog’s destructive behavior. Remember that he’s not choosing to do it out of spite or malice – he is panicked about his own survival without you, his pack, there to protect him. It’s not fun for him – he lives in the moment, and the moments that you are gone are long and terrifying.

If you make the commitment to modifying his behavior and succeed in making him brave about being alone, you will not only have saved your home from destruction, you will have enhanced the quality of your dog’s life immensely, and perhaps saved him from destruction, too.

-by Pat Miller


Taking Steps to Making Vet Visits Less Stressful for Your Pup

10

Let’s face it: Most dogs aren’t crazy about going to the vet. And why should they be? After all, vet visits are stressful at best. They often mean a new environment, slippery floors, and even more slippery exam tables. Vet offices are full of funny smells, scary sounds, strange people, and unknown animals. Plus, the poking and prodding they are subjected to can be uncomfortable and sometimes even painful. It may be overwhelming for even the most easygoing dog.

Reasoning with your dog may help some (“Oh, honey, it’s for your own good!”). But what will help even more is getting your dog accustomed to the types of experiences that he is likely to encounter on visits to the veterinarian. The following seven tips can help you help your dog learn to tolerate the occasional “well-dog” health examanination. They will also help your dog be better prepared to accept necessary medical treatment in case of a serious illness or injury.

1. Take your dog by the vet’s office, just to say hello.

“One of the best things you can do,” says E.V. Sharp, DVM, of Creekside Veterinary Hospital in Soquel, California, “is just to stop by every once in a while. Bring your dog in, weigh him, and walk out again.” New places are sometimes anxiety producing – just because they are new. Stopping by occasionally reduces your dog’s anxiety by simply transforming the vet’s office from an unknown to a known environment.

Better yet, take along some great treats, preferably something that is incredibly special to your dog like steak or hot dogs. Ask the receptionist, the vet tech, and even your veterinarian to give your dog a few treats, too. If you have a puppy, start your “social” vet visits as early as possible. But don’t worry if you have an older dog or a dog that is already anxious about vet visits. Fun and happy social visits can dramatically reduce an adult dog’s stress level too.

Be sure to call ahead and tell your vet what you want to do. Ask if there is a good time to stop by for a few minutes. You’ll want to make sure that your social visit is convenient for the vet and the office staff. You’ll also want to make sure they are not dealing with an emergency or an infectious disease at the time of your visit.

2. Take the time to touch your dog everywhere, every day!
Getting your dog accustomed to being touched all over is essential for your dog’s comfort during an examination. In a routine exam, a veterinarian may look in your dog’s eyes, ears, and mouth, listen to his heart and lungs, touch and probe his belly, manipulate his joints, and take his temperature. Dogs that are handled, petted, and touched all over daily will be less likely to perceive this as invasive, and more likely to regard it as affectionate (if somewhat personal!) touching.

In addition, when you regularly spend time touching your dog, you will be more likely to notice changes such as lumps, swelling, or tenderness that may indicate health problems.

One great way to help your dog learn to tolerate being handled is to make it part of play and relaxation. When you play rowdy games such as fetch, wrestle, or tug-o-war with your dog, you can encourage the game and help your dog tolerate touch through play pats, ruffling his fur, and gentle roughhousing. When you spend quiet time with your dog, stroke and pet him all over. Play with your dog’s ears, muzzle, belly, and around his tail. Try holding your dog’s paw while you rub his tummy. Massage his shoulders and hips. Stroke your dog’s ears and gently place your finger inside the ears. Touch around his legs and in between his toes.

“It’s also a good idea to pinch them every once in a while,” said Dr. Sharp. Not hard of course, but enough that a little needle pinch for vaccinations or drawing blood won’t be a totally unusual experience.

Another very important part of this routine is to take note of your dog’s sensitive spots. Most dogs have one or more spots where they prefer not to be touched. Some dogs don’t like to have their paws touched. Others may not like their hips, ears, or tails touched.

You can help even the most reluctant dog accept the handling of sensitive areas with a little patience and some great treats. Have your dog near you in a comfortable position. Then feed your dog his favorite treats while briefly touching the sensitive spot. For example, if your dog is sensitive about having his paws handled, gently and quickly stroke your dog’s paw and then give him a slice of hot dog or another great treat. Once your dog is happy about the brief touch (because he knows the hot dog is coming!), you can leave your hand on his paw just a little bit longer before giving him the treat. Gradually work up to holding the paw, then giving gentle squeezes, and eventually touching between his toes. (For more details on this technique, see “Classical Conditioning,” WDJ June 2001.)

Don’t try to rush it or push your dog to do anything that is uncomfortable. The goal is to help your dog learn to accept or even enjoy being touched everywhere. If your dog exhibits any aggression around being touched, please consult with a behaviorist to help you work through the problem.

When your dog is happy about being touched all over, ask friends, a trainer, or other family members to touch your dog, too. The more dogs are accustomed to being handled by different people, the easier it will be for them to be handled during regular vet visits or in the case of an illness.

Remember being a kid and wanting to dress your animals up? That can actually help, too! “If your dog enjoys it, put things on them,” Dr. Sharp said, laughing at the idea. Bandanas, doggie sweaters, booties, dog packs, and other items can help your dog accept things like bandages or Elizabethan collars if the need ever arises.

3. Play with your dog’s mouth.
“Probably the hardest thing we deal with regularly are dogs who are not used to having their mouths handled,” says Dr. Sharp. She recommends brushing your dog’s teeth regularly to help them get used to having their mouths handled. “It really pays off! It’s good for the dog and the vet. It can extend times between teeth cleanings, too.” With some dogs, Dr. Sharp notes, it can even mean the difference between being able to perform teeth cleanings with the dog awake and having to give the dog anesthesia.

In Dr. Sharp’s opinion, it’s not as important to brush the teeth really well as it is just to do it! Even brushing the outsides of the teeth can make a big difference. Always use canine toothpaste; people toothpaste isn’t safe for dogs. Plus, the great flavors available in doggy toothpaste, such as chicken, beef, or malt, can make brushing all the more enjoyable for your dog.

Another good exercise is opening your dog’s mouth, looking in, and then immediately popping a treat in his mouth. Your dog will learn that your opening his mouth means treats are coming.

Dogs can also learn to enjoy having their mouths’ handled if you dab a little peanut butter, yogurt, or cottage cheese on your finger and then rub your finger over your dog’s gums or along the roof of his mouth. Your dog will get used to having fingers in his mouth, plus he’ll get a special taste treat.

4. Get your dog used to being leaned over, held onto, and picked up.
Even dogs that are handled regularly can have a tough time when someone leans over them, holds them down, or picks them up – understandably so! But during routine vet visits and especially during an emergency, your dog may need to be lifted onto a table, the veterinarian will need to lean over your dog, and your dog may need to be held for vaccines or exams as well as for emergency procedures.

Bending over your dog from various positions in play and other activities can help him learn to accept this behavior from humans. In addition, you can help your dog tolerate being held through everyday affectionate behaviors. For example, if your dog enjoys a good belly rub, try reaching over your dog’s shoulder to rub his belly. In our home, for example, we routinely kiss the tops of our dogs’ heads, reach around their shoulders to rub their tummies, and give them great big gentle bear hugs. All of these activities are fun, and help our dogs accept and even enjoy being leaned over and held onto (plus we get lots of dog kisses in return!).

Smaller dogs are more often used to being carried, but for some larger dogs, the only time they are physically picked up is at the vet’s office. That in and of itself can be a traumatic experience. You can set up specific training times to familiarize your dog with being lifted, or you can incorporate this into regular activities. When you groom your dog, for example, consider lifting him on to a low table. If you are not sure how to lift your dog properly (for your safety and his), ask your veterinarian, groomer, or trainer to show you how to easily and safely pick up your dog.

5. Teach your dog to sit, stand, lie down, and turn around.
Basic training can really help lower your dog’s stress at the veterinary clinic. Your dog will be a whole lot more relaxed if you can ask him to move his own body, rather than having to push, pull, or cajole your dog into position.

The basic behaviors that are essential for ease during vet exams include:

• Sit and down. Because many dogs want to flop over or slink away instead of holding still, knowing sit and down can make it easier on both your dog and the vet during an exam.

• Relax. Also known as “roll on your side,” this trick is great for positioning dogs when the vet needs to scrutinize just one side of your dog.

• Stand. This is another basic position that is good for specific exams. Plus, it’s easier to pick your dog up from a stand if you need to lift him onto the table.

• Turn. Veterinarians often want to turn your dog so that he is facing a different direction on the table. Instead of having to physically move your dog, a simple turn behavior (carefully if they are up on a table) can eliminate the need for having to physically manipulate them into position.

A few other behaviors that may also be helpful include:

• “Touch” or “Target.” If your dog is trained to touch your hand with his nose on cue (see “Right on Target,” WDJ March 2001), then you can use a hand touch to help move or position your dog, or to move his head up or down. It may also be useful in helping dogs if they need to be given nose drops!

• Shake. Also called “give me a paw,” this exercise can help turn foot examinations into a fun activity for your dog!

• Watch me. Any type of eye contact exercise is a good tool to turn his head in a particular direction, but also this is a great exercise to keep your dog occupied while being examined.

6. Familiarize your dog with a muzzle and crate, just in case!
Getting your dog used to wearing a soft muzzle doesn’t mean your dog is bad, or that he will necessarily bite. For some dogs, using a muzzle is a good way to ensure safety if the vet needs to examine a sensitive place. And, even sweet, gentle, and well-socialized dogs can bite when they are threatened, scared, or hurt; it’s an instinctive and normal reaction. Plus, a dog that is seriously ill or has suffered a painful injury may lash out without even realizing what he is doing.

Purchasing a soft muzzle (the fabric kind with an opening on the end that allows your dog to take treats while wearing) and helping your dog learn to wear it comfortably can become a fun game – and it will ensure that your dog is prepared, just in case.

To help your dog learn to wear a muzzle, simply hold a treat on the “nose” part of the muzzle. Let your dog put his nose through and take the treat. Have your dog do this several times every day for a week or more. When your dog becomes excited when he sees the muzzle (because he knows it means treats), you can slip it on for a few seconds, feed your dog a treat or two, and then take it right back off. After a week or more at this stage, you can start leaving it on for a few seconds at a time and gradually increase the time. Keep this game fun!

Once your dog can comfortably wear the muzzle for a few minutes at a time, you can put it away and bring it out occasionally to remind your dog how much fun the muzzle is to wear. Then, if your dog ever needs to wear a muzzle during an emergency, he will be prepared.

Crate training your dog is equally important. Crates are not only wonderful aids for house training, they also make comfy sleeping quarters and provide safe travel compartments. Your dog’s ability to settle into a crate can mean the difference between a stressed-out dog and a comfortable dog if he should ever need an overnight stay at the veterinary hospital.

“We can really tell when a dog is crate trained,” said Dr. Sharp. “The dogs who are crate trained, go in and lie down.” Dogs who aren’t crate trained more often bark or cry from being confined.

7. Liberally employ treats and toys.
When you do take your dog to the vet for a regular exam or for treatment for an illness, be sure to bring along treats or toys to help reinforce your dog’s good behavior. Be generous with your rewards and really let your dog know when he is doing a good job.

Use chew toys to help dogs who tend to “hide” in the waiting room; this helps many dogs feel safer and more secure. Some dogs will lie under a chair (preferably behind your feet) with a chew toy and settle in until it is their turn to see the vet. You may also want to try TTouch or other types of relaxing massage to help your dog “de-stress” while in the waiting room (see “A Calming TTouch,” WDJ May 1999).

Many dogs who are nervous in a vet’s office do very well when given a “job.” I’ve been known to run through my dogs’ entire “trick” repertoire in the waiting room because it keeps my high-energy working dogs focused and relaxed.

Your vet may also find it useful to employ your dog’s favorite toy or treat. Dr. Sharp recalls dealing with a Border Collie whose stress reaction manifested itself through aggression; she won him over by playing ball with him in the exam room! “This was a Flyball dog,” said Dr. Sharp, “and playing ball totally broke through his aggressive behavior.”

Keep up the good work!
After your dog has become well-accustomed and trained for trips to the vet, it’s a good idea to continue with your daily handling and occasionally stop by the vet clinic just to say “hello.” And, if your dog has been doing great at the vet and then suddenly, after a traumatic visit, does an emotional backslide, don’t worry! Just read back over these tips and re-acquaint your dog to the different elements involved in vet visits. You can help your dog recover and learn to again relax during regular vet exams.

-by Mardi Richmond

Mardi Richmond lives in Santa Cruz, California, where she teaches Agility for Fun classes and writes about dogs. She is the co-author of Ruffing It: The Complete Guide to Camping with Dogs.


Let Them Eat Grass!

Most dogs will eat a few blades when they have the chance. Others are veritable lawnmowers, eating (and often vomiting) whole clumps of grass, to their owners’ dismay.

A reader asks, “Why does my dog eat grass? It makes him throw up. I’’d like to train him not to do this, but I’’m not sure how.”

Dogs have been eating grass for so long that one species is called dog grass in their honor. Dog grass or couch grass (Agropyron repens), which is also called quackweed, grows in all but our southernmost states, and it is most commonly found in the upper Midwest.

The world’s most experienced canine herbalist was Juliette de Bairacli Levy, whose Complete Herbal Handbook for the Dog and Cat was published in 1955. In its sixth edition (1992, Faber & Faber, London), she wrote, “”The favorite dog medicine, also much eaten by cats, is dog grass or couch grass. Of this herb they eat the leaves and the root, which they either vomit up, with much yellow bile fluid, or excrete. It is a cleanser of the bowels and removes worms. When my dogs cannot get couch grass, they will utilize other grasses, but do so with reluctance. Their next choice after couch grass seems to be wild oats.””

Preventing dogs from eating grass is a serious mistake, she warns, noting that dogs bring on deliberate internal cleansing by eating things that help them expel excess bile, mucus, and other impurities.

Feeding clean greens

At the same time, dogs fed grass on a regular basis don’’t seem to crave outdoor grass the way they do if grass isn’’t part of their diet.

“”I know a man who raised barley sprouts commercially for horses,”” wrote wheatgrass pioneer Ann Wigmore in Our Precious Pets (National Humane League, 1987). “”He had great success with restoring fertility to impotent studs. A friend thought that if these sprouts were so great with horses, they might also be great with dogs. He fed them to dogs with wonderful success. I would suggest either rye or barley sprouts for dogs and cats. These sprouts should be better for animals than wheat sprouts. They would serve as a good supplement to commercial pet foods.””

To grow rye or barley grass for pets, soak one cup organically grown grain in one quart water for 8 to 10 hours or overnight. Drain the jar and leave it on its side in a warm location, away from direct sunlight. After 24 to 48 hours, a tiny white rootlet will emerge from each grain. If you don’’t see this growth, your grain is not viable and should be discarded. Irradiated grain won’’t sprout, and neither will grain that has been improperly stored.

To grow grass, spread the sprouting grain on one inch of moist potting soil or top soil in a plastic garden tray. For best results, create a one-inch channel around the soil for drainage.

Cover the tray for two days, then uncover, water it thoroughly and place it in direct sunlight or under grow lights. Water as needed to keep the soil moist.

Begin harvesting the grass with scissors or a sharp knife when it is six to eight inches tall. Cereal grasses keep well in the refrigerator if stored with a damp paper towel in plastic zipper bags from which the air is expelled prior to sealing.

Cut or mince the grass into tiny pieces, or place a small amount in a blender or food processor with other foods.

Begin by feeding a small amount, as little as a fraction of a teaspoon, to be sure your dog will accept the grass. Gradually increase the amount to about one tablespoon per 50 pounds of body weight.

Cereal grasses are rich in chlorophyll, vitamins, minerals, enzymes, and amino acids. Before fast-acting antibiotics were developed, chlorophyll was the drug of choice for preventing infection, curing ulcers, relieving pain, and treating skin diseases and anemia.

Ann Wigmore described how wheat grass and other cereal grasses improved the health and growth of her guinea pigs, parakeets, turkeys, chickens, dogs, cats, monkey, raccoon, and skunk, and she published letters from people who gave grass to their pets to prevent or treat cataracts, fleas, tumors, excessive shedding, diarrhea, anemia, and other illnesses.

There’s probably no humane way to train a dog not to seek something its body needs, so the best strategy here may be to add grass to your dog’s dinner and respect his practice of herbal medicine.

Download the Full July 2001 Issue

0
To continue reading this article or issue you must be a paid member.

Join Whole Dog Journal

Get full access to Whole-Dog-Journal.com – more than 4,000 articles – for just $20.
Join today and save 30% off our full price.
Already a member?
| Forgot your password? | Activate Web Access

How To Choose The Best Shelter Dog for Your Family

Ask trainer Sue Sternberg where you should get a dog and, without hesitation, she’ll tell you to go to an animal shelter. She should know – as a nationally recognized dog trainer and owner of Rondout Valley Kennels, a boarding kennel, training and behavior center, and private shelter in Accord, New York, she regularly works with shelters across the country, and counsels families who have adopted from them.

In addition, Sternberg has produced several booklets and videotapes about issues specific to shelter dogs and shelter dog adoption. The booklets include Temperament Testing for Dogs in Shelters and A Guide to Choosing your Next Dog from the Shelter; the videos include The Controversial Pit Bull about temperament testing Pit Bulls in shelters, and Training Your Shelter Dog. She also is a frequent and popular speaker at all sorts of dog-related venues.

Setting aside all of the arguments for buying a puppy from a breeder, Sternberg emphatically pronounces that you should adopt a dog from a shelter because, as she says, “it’s the right thing to do. Because there are great dogs in animal shelters, and because dogs in shelters need homes. There is no need to get a puppy from a breeder in order to raise it right – getting your dog at an early age is no guarantee of how he will turn out. Plus, you can find all the great qualities you could ever want in a shelter mixed-breed dog or puppy, or in one of the thousands of purebreds waiting in shelters on any given day.”

Of course, there are plenty of canine train wrecks desperately seeking homes in animal shelters as well – dogs who will cause heartache and trauma for the average dog owner. Sternberg offers tips to help prospective adopters find the diamonds in the rough world of animal sheltering.

Before you visit a shelter
There are a number of steps you need to take before you even set foot inside the shelter door. Doing some pre-visit homework can greatly increase your odds of finding the perfect pup. Here are Sternberg’s suggestions:

• Visit Petfinder on-line, at www.petfinder.org. This web site lists shelters across the country, and can pinpoint the ones in your area starting with those closest to you. You can also search for specific breeds or breed mixes.

Caution: If all dogs on a particular shelter’s website are described the same way (sweet, friendly, loving) then the shelter probably doesn’t know the personalities of their dogs very well, or chooses not to be forthcoming with the information. This would be a good shelter to avoid.

Petfinder is not a complete list of all shelters, so you also need to check your local phone book for others in your area. You should be willing to travel a good distance, as much as three hours or more, to find the right dog at the right shelter.

• Contact the shelters on your list and ask about their return policy. A good shelter will always accept any dog as a return that they have adopted out at any time in his life, for whatever reason the owner may be unable to keep him. You should not expect a refund if you must return your dog, but shelters that refuse to take a dog back after 30 days (or whatever time limit) are not accepting full responsibility for the lives that pass through their hands.

• Ask the shelters about their adoption procedures. You will want to be able to visit with your prospective new family member outside of the kennel. If that is not allowed by a shelter, cross that one off your list.

• Ask the shelters about their criteria for making dogs available for adoption. Good shelters do temperament testing, and do not make dogs available who have a prior history of biting. Some dogs are not appropriate for our human society. A shelter who places all dogs up for adoption and never euthanizes is doing a disservice to potential adopters. Don’t go to such a shelter.

• Sit in on a dog training class (or several). Find a trainer you like, who is kind to dogs and motivates them with treats, toys, and praise. (A selection of trainers from across the country is available from the APDT Trainer Locator at www.apdt.com.) Ask the instructor for good shelter referrals. If there are students in the class with shelter dogs, ask them which shelter they adopted from and what their experiences were. Avoid shelters where others have had negative experiences.

• Talk to the trainer you like about accompanying you to the shelter to select a dog. You should expect to pay a fee for this service, so you may want to arrange to have her visit with you once you find one or more possible adoption candidates.

• When you do start visiting shelters, look beyond a slick exterior. A good shelter is made up by people who care, and the good dogs in their kennels. There are lots of old, rundown, dark and damp shelters that have great dogs and are staffed by wonderful people, and there are others that are just as wretched as they look. There are also bright, pretty, high-tech modern shelters that treat people and animals well, and still others that are all window-dressing, forgetting to treat their human and canine clients with compassion.

• Avoid rigid preconceptions about what kind (age, breed, sex, size, color, coat length) of dog you want. Be prepared to enter the shelter with an open mind. Size, for example, is not a good indicator of energy level or adaptability to a small house – many large dogs are better suited to apartment life than are the typically high-energy but small Jack Russell Terriers.

The shelter visit
Although it’s best to avoid preconceptions about what model of dog you are looking for, Sternberg advises that it is very important to know what to look for behaviorally. “A high level of sociability will contribute more to a dog’s success in a home than any other trait,” Sternberg says. “Overall, be looking for a dog that really likes people and wants to be with them, who is affectionate, congenial, and bonds easily and strongly. These are the dogs who are most fun, and the least worry to live with.”

Stand firm on this behavior criteria as you progress through Sternberg’s 12-step program for adoption success:

1. As you enter the shelter, get a reading on the attitude of staff and volunteers. Are you greeted warmly and treated well? If you are asked to fill out a questionnaire, are the interviewers genuinely interested in who you are and helping you find the right dog, or are you grilled like a criminal? Any concerns about your answers should be used to help educate, not condemn you. If you feel like you are getting the thumbscrews and third-degree, leave. It would be almost impossible to concentrate on your task in an environment like this.

2. When you enter the kennels, make a quick pass through without stopping to schmooze the dogs. Pen and paper in hand, make note of any dogs that stand out for you. Ideally, you might find four or five who do.

3. On your second pass-through, stop and visit with each of the dogs you noted. Put your hand up to the kennel wire or bars. The dog should readily come up to visit you and sniff your hand. Remember, these dogs are socially deprived, and should be seeking your attention. When a candidate sniffs your hand, tell him he’s a good dog, and move your hand back and forth, slowly, several times, about five inches each way. A social dog will follow your hand. Remember, you want a social dog – a well-socialized, outgoing, and friendly dog is the least liable to be aggressive. If the dog jumps at your faces, barks at you, lunges or, alternatively clings to or retreats to the back of the kennel, cross him off your list and move on to the next dog.

4. When you have identified the dogs on your list who are very social, take them out of their kennels one at a time, to a quiet room if possible. (Not all shelters can provide this luxury. Do the best you can – find a relatively quiet corner somewhere.)

Stand with the dog for five minutes, and totally ignore him. The dog should look at you in a warm way, and try to worm his way into your affections – leaning on you, nudging, licking, trying to cuddle. Jumping up is okay if it is done as attention-seeking, not in an attempt to bowl you off your feet as he bounces away from you.

If an employee is with you and the dog is seeking attention from the employee, that’s okay – it just means the dog has already formed a bond with that person. If in five minutes the dog shows little or no interest in you or in other humans who are with you, put him back. He is not a good candidate.

5. If he is very social, pet him slowly and gently down his back. He should stand still and enjoy this, or lean into you, seeking more contact. If he shakes you off after you’ve touched him (“Yuck, people cooties!”) or moves or lunges away from your touch, he’s telling you he doesn’t like being petted, or being around you. This dog is at risk for being aggressive anytime people touch him in a way that offends him. Put him back.

6. If he passes the petting test, ask a shelter staff member if you can feed him a meal – a small bowl of kibble, or a handful of biscuits that you brought with you. You want to test him for resource guarding – another behavior that puts him at high risk for biting. Put a bowl of food or pile of treats on the floor, enough that it will take him about 45 seconds to finish it. Now (BE CAREFUL!) talk to him, then pet him gently on the back. (Do not try to take the food away!) You want him to wag his tail, wag his tail harder, or even stop and look at you as if to say, “Hi! I’m eating right now, I’ll be back with you shortly.” He may even stop eating and prefer to be with you.

However, if he stiffens, blocks you with his body, glares at you, lowers his head into the dish, growls, or tries to move the food away from you, he is a resource guarder, and not a good adoption choice.

7. If he passes the first food test, up the ante. Ask the shelter staff if you can give him a chew hoof, pig ear, rawhide, or some other very valuable object. Again, you want to see if he is cooperative or competitive with this resource. Slowly move toward him and look for any of the guarding signs described in the previous step. If you see them, stop the test. If not, slowly reach for the object from a distance of at least two feet, then jerk your hand back. Repeat this step three times. You are looking for a dog who is relaxed about your approach. If you see any signs of guarding, don’t adopt. Have the staff person retrieve the valuable object and put the dog away.

8. If the dog is still with you, your next step is to pet him all over. He should actively enjoy being petted, perhaps wag his tail, even lick you. He should not mouth you, even gently. If he does, put him away. Mouthiness, even done gently, is a sign of resistance, and may escalate to a bite if someone, such as a child, ignores the sign and keeps on petting or touching.

9. Now take out a toy (that you brought with you for this purpose, or one that the shelter provides, if they prefer) and see if he will play some sort of game with you: fetch, tug-o-war, or chase. Play the game for three to four minutes – enough to get him excited and aroused. Then abruptly stop the play, and put the toy up, preferably on a shelf where he can see it. Take note of how long it takes him to disengage from playing and return to you to settle and socialize, perhaps sit or lie down next to you. Ideally, he will do this within two minutes. If he is still aroused after five minutes, put him away. This is the kind of energy level that the average dog household is not equipped to deal with. (If, on the other hand, you are looking for the next World Frisbee or Agility Champion, he might be a candidate.)

10. Take the dog for a walk on leash, outside if possible. Don’t worry if he pulls, or is very distracted – these are behaviors that are normal for shelter dogs, and can be retrained. Do watch for aggressive behavior toward other dogs or people while he is on leash. If you see any, put him away and cross him off your list.

11. If this dog is still on your list when your walk is done, have a staff person put him back in his kennel, then watch him as other strangers pass by, especially children, big men, and anyone who moves or dresses oddly. Avoid a dog who barks or lunges at anyone who walks by – this is a sign of inadequate socialization. If your dog will be around children, look for a dog who wants to greet passing children first. A dog who will live with children must worship little humans, not just tolerate them.

12. If you still have one or more candidates in the running, ask the shelter staff if you can put them on temporary hold while you make arrangements to return with your kids and spouse (if you have them) and trainer. You may also want to bring your current dog, if you have one, so your trainer can help with the first introduction. Shelter staff may tell you that they can’t put a dog on hold, because if someone else wants to adopt in the meantime and you don’t return for some reason, he might miss out on his best chance for a home. This is reasonable. However, they should be willing to note that you are interested on the dog’s paperwork, and give you a reasonable amount of time to return, so the dog isn’t selected for euthanasia before you can get back with your crew in tow.

When you do return, your trainer will be able to help you make an educated final decision about which of the dogs on your short list is the best choice for a long relationship with your family.

Also With This Article
Click here to view “Awesome Adoptions – Consider A Shelter Dog”
Click here to view “How to Help A Shelter Dog Find Their Home”