While today many pet professionals are aware that the company that owns and sells the brand they feed may not actually be manufacturing the food, many dog owners do not. A substantial number of companies “co-pack” their foods, which means that the pet food company gives their formulation (recipe) to a manufacturing company that produces, bags, labels and ships their food. The manufacturer mixes ingredients according to the specified formulations and produces a wide variety of pet foods that are sold under different brand names. So while you may think that P&G or Nestle Purina make the food you feed your dog, in some cases the company that actually puts together the final product is a business you have never heard of such as Ohio Pet Food, CJ Foods and Simmons – none of which would qualify as household names.
This process becomes even more convoluted when one considers that, like many consumer goods today, the supply chain of ingredients may be outsourced to several different middleman companies (consider the sequence from the 2007 disaster – Chinese supplier to ChemNautra to Menu to Pet Food Brands). In addition, pet food companies also may contract food production to several different factories, some of which are located in the US, while others are not. One of the reasons that the Menu Foods recall was so extensive was that Menu Foods specialized in producing wet (canned) products. While many of the large pet food companies own and operate their own dry food factories, there are only a handful of factories that operate as canneries and produce wet pet food. As a result, many companies, including the large corporations, contract the manufacture of their wet foods to another company, typically referred to as a co-packer. Another example is chicken treats, many of which, until the 2012 recall anyway, were completely sourced and produced in China.
Need help choosing a food for your dog? Want assistance wading through the ads, labels, hype and information bombarding you every day? Learn what matters most by reading Dog Food Logic. Buy it today from Whole Dog Journal.
If we’re fortunate enough to have them live to old age, at some point, most of our canine companions begin to lose their hearing and may eventually be, for all intents and purposes, deaf. It’s painful to watch a beloved dog become less and less responsive to his environment because he’s unaware of what’s going on around him, and even more so when it limits your ability to communicate with him. The thought of a hearing-impaired dog wandering off and not being able to hear your calls is frightening. Here are some things you can do if your dog’s hearing isn’t what it used to be:
Use hand signals. Every time our dogs reach the old-age-can’t-hear stage I appreciate having taught them basic hand signals as well as verbal cues. Since dogs communicate primarily through body language, hand signals are easy to teach, especially if you do it when your dog can still hear well. As your dog ages, it’s a great opportunity to expand your visual cue vocabulary.
Some owners use American Sign Language (ASL) to communicate with their hearing- impaired dogs.
Run interference at home. This is all about management. If you have a multi-dog household, one or more of your other dogs make take offense when your geriatric pal doesn’t respond quickly enough to their signals – because he doesn’t hear them, and therefore doesn’t look and notice their body language. Manage your household to prevent encounters that cause tension due to his lack of hearing and subsequent lack of response. This often includes keeping potential problem dogs separated when you are not home.
For more advice on ways to live with a dog who losing his hearing, purchase Canine Hearing Loss from Whole Dog Journal.
Owners of deaf dogs frequently relate that their biggest challenge is getting their dogs’ attention, whether at home or out in the world. Here are some tips for getting a deaf dog’s attention (these tips work well with dogs who hear, too.)
Hand signal for his name
Just as you teach a dog to respond to “Max” or “Spot,” you can teach a deaf dog to respond to a signal that means, “I’m talking to you now.” A simple finger point or a wave will each work and are easy to teach, but any signal will do.
To teach that the finger point or wave means “Max,” start by simply pointing or waving at the dog, then offering a reward such as a great treat.
Throughout your daily life, use his “name signal” much as you would a verbal name. If you are about to feed your dog, point or wave in her direction, then walk to the kitchen and prepare his dinner. Before walks, point or wave to your dog, then get out the leash.
Soon the dog will respond to the hand signal just as a hearing dog would respond to the sound of his name spoken verbally.
For more advice on ways to live with a dog who losing his hearing, purchase Canine Hearing Loss from Whole Dog Journal.
Here is how I initially teach hand signals for Down, Sit, and Come. I encourage my students to start with big hand signals, like the ones most people use in obedience competition. No one wants to risk having their dog miss the signal from across the ring!
– Down: Hold a treat in your right hand. With your dog sitting in front of you, stand with both arms relaxed at your sides. Raise your right arm straight up. A second after your arm reaches its full height, fingers pointed toward the ceiling, say your verbal “Down” cue. Pause for another second. If your dog does not lie down, lower your right hand to his nose and lure him down with the treat. Click! (or “Yes!”) and treat. Repeat this exercise until he will lie down for the hand signal and verbal cue without the lure.
When he has done at least a half dozen downs without the lure, give the hand signal (arm raised) without the verbal cue. If he goes down, Click! and Jackpot! That is, feed him lots of treats, one at a time, in special recognition of his ac- complishment. If he doesn’t lie down, do another dozen repetitions with both cues, and then try again with just the hand signal. You will probably be surprised by how quickly he does it.
– Sit: Hold a treat in your left hand this time. With your dog lying down in front of you, stand with both arms relaxed at your sides. Bring your left arm up in a circular motion in front of your chest with your elbow bent, then straighten it out to your left side, parallel to the ground, in a “ta-da!” sort of flourish.
A second after your arm straightens, say your verbal “Sit” cue. Pause for another second. If your dog does not sit, bring your arm down and lure him up with the treat in your hand. Click! (or “Yes!”) and treat. Repeat until he will sit for just the hand signal and verbal cue without the lure.
When he has done at least a half dozen sits with- out the lure, give the hand signal (arm raised) without the verbal cue. If he sits, Click! and Jackpot! If he doesn’t, do another dozen repetitions with both cues, and then try again with just the hand signal. Keep repeating until he gets it. Then practice this from the “Stand” position as well.
– Come: If your dog is well trained, you can leave him on a sit- or down-stay and walk five feet away. If his stay is not rock-solid, have someone hold him on a leash while you walk away.
Turn and face him, with your arms at your sides and a treat in your right hand. Fling your right arm up and out to your side, as if you wanted to smack someone standing behind you. A second after your arm is out and parallel to the ground, say your verbal “Come!” cue. If he does not come, hold your arm parallel to the ground for another second, then bend your elbow and sweep the treat past his nose, ending up with your hand in front of your chest. If necessary, take a step or two back to encourage your dog to get up and come to you. Repeat this exercise until he will come for the hand signal and verbal cue without the lure. When he has done at least six or so recalls with- out the lure, give the hand signal without the verbal cue. If he comes, Click! and Jackpot! If he doesn’t, do another dozen repetitions with both cues, and then try again with just the hand signal. When he starts responding, begin practicing the hand-signal “Come” from increasingly greater distances.
For more advice on ways to live with a dog who is losing his hearing, purchase Canine Hearing Loss from Whole Dog Journal.
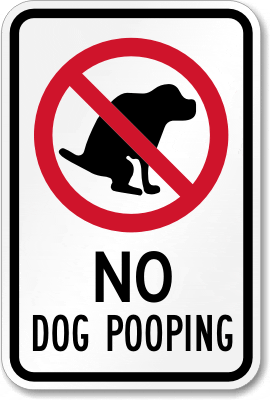
File this under “more preaching to the choir,” because I’m SURE that all WDJ readers clean up after their dogs – right?! I’m just wondering what some dog owners are thinking when they take their dogs for a walk without a bag. And how do you get the anonymous, unseen dog walkers in your community to clean up after their dogs?
I admit, I hate these signs. They make me feel guilty by association; just walking my dog past a house with a sign like this on the lawn makes me wonder if someone is inside the house looking out, narrowing their eyes suspiciously, making sure my dog doesn’t poop anywhere in their vicinity. My next-door neighbor has one on her lawn! And I always hope that people walking by realize it’s not MY dog she’s worried about!
On the occasions when I have been caught “out without a bag,” I go out of my way to find something, anything, to pick up the poop. Sometimes you can find a piece of trash nearby – a drink cup or plastic bag. (Unfortunately, where I live, there is as much litter on the walking paths as there is unscooped dog poop.) Way back when I lived in San Francisco, I’ve taken the plastic bag off of someone’s newspaper before; I’ve also taken someone’s newspaper before (just the free kind that gets delivered to every address, not the paid subscription kind!).
I saw a terrific video PSA on YouTube recently; I applaud this kind of creativity – though I wonder whether or not it changed anyone’s behavior.
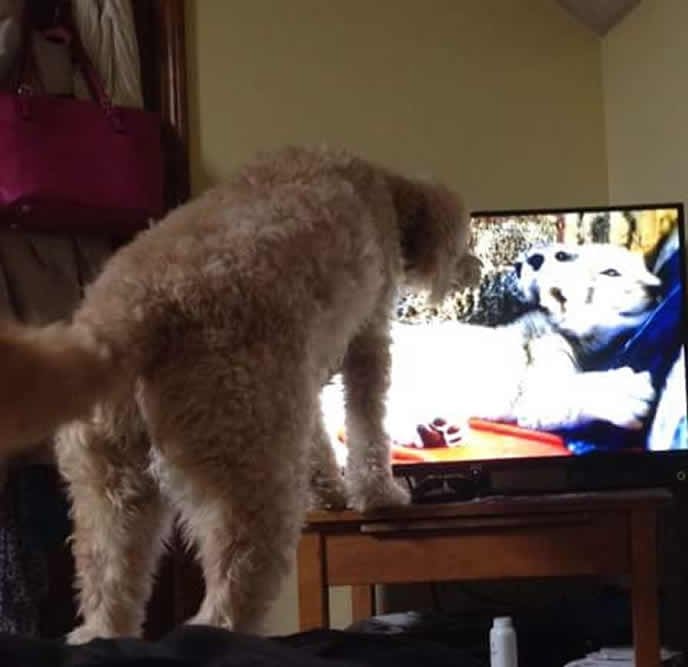
None of my dogs have ever watched TV. So I was frankly dubious about my sister’s claims that her dogs go crazy every time a certain pizza commercial comes on; she told me that when the dogs hear the pizza commercial music, they come running to the TV, and they leap in the air and whine when the close up shot of the pizza appears, where the single slice is pulled away from the sizzling hot pie and tendrils of cheese are stretched through the air. But why the pizza commercial, I asked? She said they always share pizza with their dogs, and they really like it! Hmm, I said.
Until I was at her house and witnessed the pizza commercial phenomenon for myself. Her two Jack Russell Terriers were snoozing on the couch and the TV was playing in the background while my sister and I talked. Suddenly, both dogs sat up and fixed their gazes on the TV. “Ha! It’s Round Table time,” my sister laughed. The dogs tilted their heads this way and that until the close up, when they both leaped off the couch and jumped in the air in front of the TV, as if they could somehow grab a slice of the pie out of the air for themselves. I was flabbergasted. Did they really recognize the pixelated vision as something they’d like to eat?
Not long after this, I was interviewing a dog owner at her home. She and her two lovely standard Poodles met me at the door, and I fussed over the well-mannered, healthy dogs for a bit. But when we prepared to sit at the dining room table to do our interview, she brought the dogs into the adjoining living room, and turned on the TV. The dogs jumped up onto her sofa and lay down, and she told me, “I’ll just put on a nature show for them. They’ll stay out of our way for a while.” I laughed, not sure if she was joking, but when she tuned the television to a PBS channel showing a forest scene, both dogs sat up, transfixed. They scanned the screen, clearly looking for whatever animal might appear in the scene. And when the camera panned the sky, taking in a picture of a bird flying across the forest canopy, one of the dogs barked in excitement. “Now, now,” my interviewee warned her dogs. “If you get too excited I will change the channel.” They seemed to understand, because both dogs lay down again, and we left the room. Again, if I hadn’t seen it for myself, I never would have believed it.
It was clear that my dog, Otto, had never been in a house before the summer day in 2008 when my husband and I adopted him from my local shelter. He jumped at every household noise, including the change of the washing machine cycles and the microwave’s “ready” ding. But he paid no attention to the TV, until about a week after we brought him home, a commercial featuring the Geico caveman came on. Some noise made him look at the TV, and when he saw the caveman’s hairy face, he jumped to his feet and started backing out of the room, growling and then barking, hackles raised. As soon as the caveman was no longer on the screen, he came back into the living room and lay back down. And he never did this again. The only thing he responds to on TV now is the sound of a doorbell. That will always make him growl and at least look toward the door, if not jump to his feet and bark at the door.
Do your dogs watch TV? Do they have favorite shows?
Did you see this news brief? A shelter in the San Francisco Bay Area is conducting some small studies regarding breed identification and adoption rates. Like many shelters, they are often overrun with dogs of a certain type: Chihuahua-mixes. Wondering whether potential adopters might be biased against Chihuahuas, or might be biased toward a dog who had other desirable breeds “in the mix,” they ran DNA tests on a dozen small dogs in their shelter, and advertised the results with the description of those dogs. And voila! The dogs who were promoted with the DNA test results got adopted more quickly than a control group of 12 other small, brown dogs in the shelter – TWICE as fast, in fact.
As a volunteer in my local shelter, I’ve heard it countless times: “We don’t want a Chihuahua. Too yappy.” But when you show them a sweet, funny, friendly small dog who knows a few cute tricks, and you emphasize the “mix” in “Chihuahua-mix,” they often soften.
The Peninsula Humane Society is calling this DNA test program “Who’s Your Daddy?” and calling out the dogs who have been DNA-tested with a banner over their photos on their website (see here: http://peninsulahumanesociety.org/adopt/dog.html). Staff members have been having some fun with the results, making up cute names for the “breed” of the mixed dogs, including “Mini Shihuahua” (for a Miniature Pinscher/Shih Tzu/Chihuahua DNA test result), “English Chaniel” (English Cocker Spaniel/Chihuahua), and “Frichese” (Bichon Frise/Maltese/Chihuahua). “Free cheese”? That’s just funny, clever marketing.
As the owner of a mixed-breed dog who was DNA-tested and found to display genes from the German Shepherd, Chow Chow, Border Collie, Poodle, Basenji, and I can’t remember what else, I don’t put a lot of stock in the mixed-breed ID tests. But I know people who are super proud of their mixed-breed shelter dogs and tell everyone who asks that the dogs are definitely a certain mix, because the shelter they adopted the dogs from told them so . . . The main thing is, they adopted a dog from the shelter and they love it; who CARES what they say the breed is? Every time I hear one of these dubious pronouncements, I smile and nod and say nice things about the breeds mentioned. “Oh, that’s awesome! I can see that!”
Kudos to the Peninsula Humane Society for experimenting with anything that works to create greater enthusiasm for a population of dogs that are over-represented and underappreciated in shelters everywhere.
(Full disclosure: proud owner of a Chihuahua-mix, the mighty Tito.)
In the upcoming April issue of Whole Dog Journal, new contributor Cynthia Foley discusses “10 tips for senior dog care” – things that you can do to help your senior stay healthy longer! She quotes a couple of our favorite veterinary sources, who shared some of their favorite “recipes” for a dog’s active longevity.
Editing and fact-checking the article gave me an opportunity to exchange greetings with one of those sources, the highly experienced holistic veterinarian, Dr. Jenny Taylor, owner of Creature Comfort Holistic Veterinary Center in Oakland, California. Dr. Taylor is one of the “things” I miss most about living in the San Francisco Bay Area. I used to live about 10 miles from her clinic, and she was my go-to vet for almost everything, from basic wellness exams, to diagnosing and treating a sick animal, to veterinary acupuncture for my senior dog (one of the things she recommends in the article for keeping those oldsters moving well, by the way).
Have you ever been through a harrowing and scary medical experience with a skilled and caring practitioner, and then found yourself feeling emotional every time you think of that practitioner for years afterward? That’s how I feel about Dr. Taylor. She’s a highly intuitive doctor with great instincts and a lot of skill. Her dog-handling manner is warm and caring, and I trust her implicitly. And I haven’t found another practitioner I feel the same way about, even in the nine years it’s been since I moved three hours away from the Bay Area. So if my dog Otto ever developed a serious condition, to find out what was wrong, I’d surely consult with the internists/diagnostic experts at the whiz-bang, high-tech emergency/specialty clinic about a half-hour from my home. But I’d also then drive those three hours as often as it might take for Dr. Taylor to oversee Otto’s care and treatment.
Do you have a veterinarian you feel bonded to for life? Go ahead and recommend him or her in the comments!
A signal can be a swift movement, with the dog either turning his head to the side and back, or holding his head to one side for some time. It can be just a tiny movement, or the whole head can be clearly and deliberately turned to the side for several seconds.
Your dog may use head turning to tell an approaching dog to calm down. Perhaps the other dog approached yours too quickly, or approached him directly head on instead of in a curve.
Your dog may turn his head if you stoop over him. Although he may stand still, he might also turn his head which tells you that he is feeling uncomfortable in this situation.
You can use head turning yourself when a dog starts to get worried or frightened if you have approached him impolitely. If a scared dog starts to bark or growl at you, stop moving towards him, turn your head to one side and this help him feel better.
To learn more about signals your dog give you and the world and how to use them, purchase On Talking Terms with Dogs: Calming Signals from Whole Dog Journal.
Turning the side or back to someone is very calming. When dogs play together rather wildly, some of them will start turning their side or back to the others in between playing, to make things calm down a little.
Your dog may use this signal when another dog growls or behaves threateningly towards him in some way, such as running up to him too quickly. He may also use it if you speak in a very cross voice or go up to him when he feels that you are angry. When young dogs pester older ones, the older often turns back to make them calm down. When you jerk at the leash your dog may turn away from you, maybe pulling even more.
You can use this signal yourself when a dog shows signs of nervousness or aggression towards you. If he jumps up at you, turn away, and more often than not he will stop.
To learn more about signals your dog gives you and the world and how to use them, purchase On Talking Terms with Dogs: Calming Signals from Whole Dog Journal.
So-called “sticky” ideas are concepts that grab our imaginations, pass quickly from one person to the next, and are easily remembered – but they aren’t necessarily true. Advertising executives constantly search for sticky ideas to use in product-marketing campaigns in order to hook customers and increase product recognition and sales. When the idea is good and true, stickiness is a wonderful thing. When the concept is false, stickiness can be very destructive.
There are many sticky myths in dog training and behavior that have the potential to be destructive to dogs and their owners. Here are some of the stickiest myths that need to be unstuck, the sooner the better, for dogs’ sake:
The “Alpha Dog” Myth
This myth is also known as the dangerous “dominant dog” myth, and it comes in a seemingly endless variety of forms, all of which are destructive to the canine-human relationship and the believer’s real understanding of behavior and learning. In fact, it’s probably the all-time king of false and destructive sticky dog-behavior myths. Some of its common variations include:
– If your dog jumps on you (gets on the furniture, pulls on the leash, grabs the leash, sits on your foot, walks ahead of you, humps you), he is being alpha/dominant.
– You must eat before you feed your dog to show him you are alpha.
– You must spit in/handle your dog’s food with your hands before you give it to him to show him it’s yours and you are alpha.
– You must go through doorways before your dog does to show him you are alpha.
– If your dog misbehaves in any way he is challenging you and you have to roll him on his back to show him you are alpha.
This myth goes back decades, and is rooted in flawed research on wolf behavior. While “dominance” is a valid construct in behavior, it refers very specifically to the outcome of an interaction involving a resource. It is not a personality trait.
If two dogs meet in a doorway, Dog A may say, “I would like to go through the doorway first,” and Dog B may say, “Sure, you go ahead.” Dog A was dominant in that interaction. The same two dogs may meet over a bone, and Dog B may say, “I really want that bone,” while Dog A may say, “Oh, I wouldn’t mind chewing on it, but you clearly want it more than I do; you go ahead.” Dog B was dominant in that interaction. Neither Dog A nor Dog B is a “dominant dog.”
In reality, your dog isn’t trying to take over the world or even your household; he is just trying to figure out how to make his world work for him. He wants to make good stuff happen, and make bad stuff go away – just like we do. It has nothing to do with being “alpha” – but when you believe that it does, it sets you up to be confrontational in almost every interaction with your dog. Figure out how to make sure your dog gets good stuff for behaviors that you like, and doesn’t get good stuff for behaviors you don’t like, and you’ll find your dog is more than happy to accept his role as your compliant pal. (See “Alpha Schmalpha,” WDJ December 2011.)
The “Dog Looks Guilty” Myth
Humans naturally ascribe ulterior motives to each other, and given the fact that we live so closely with dogs, it makes a certain amount of sense that we also try to explain our dogs’ behavior with ulterior motives, too. But we give them a lot more credit for remorse than they are probably capable of.
To us, a dog’s normal appeasement behavior (avoiding eye contact, lowering body posture, flattening ears) smacks of “Guilty!” when in fact the dog is just reading the body language of his unhappy/angry/aroused human and trying to avoid any unpleasant encounters with said human.
Let’s say you come home to find the contents of your kitchen garbage can strewn across the floor. Your face tightens, your body tenses, and as you say your dog’s name, your voice has an unmistakably emotional tone.
“Ruh-roh,” your dog thinks. “My human is upset about something. I better be at my most appeasing self so nothing bad happens to me.”
You see his appeasement body language and think, “See? Look at him acting guilty – he knows he did wrong!”
Fortunately, studies have shown what ethologists and educated dog trainers have long claimed: that a dog’s “guilty” (appeasement) behavior is dependent on the human’s body language, not on what the dog did – or didn’t do.
The “Destruction Out of Spite” Myth
The spite myth rears its ugly head most often when a normally well housetrained dog either soils the house or does something destructive when left home alone. The misinformed human thinks the dog did to “get even” with the owner for leaving.
In fact, far more often than not, this is a dog’s stress-related behavior, and frequently is a sign of separation or isolation distress or anxiety.
It makes matters worse when an owner punishes the dog for the behavior. The punishment will not only prove useless, as it is too far removed from the behavior itself to have any effect, but also will make the dog more stressed the next time he is left alone, as he learns to anticipate the bad things that happen to him when his owner gets home. (See “Scared to be Home Alone,” July 2008.)
The “His Tail is Wagging So He Must be Friendly!” Myth
Somewhere in our history, it seems the entire human species latched onto the sticky myth that a wagging tail means a happy dog. As a result, humans across the millennia have been bitten as they attempt to pet a dog whose tail was wagging.
In fact, a wagging dog tail is simply an indication of some level of arousal. Certainly, sometimes it’s happy arousal and it’s perfectly safe to pet the wagging dog. On many other occasions, however, it may be tense or angry or fearful or reactive arousal, and you pet the wagging dog at your own risk!
Here’s a general guide to how to tell the difference:
– Low, fast tail wag, often in conjunction with lowered body posture, and possible whale eye, ears back, and submissive urination. This dog is fearful and/or appeasing; pet at your own risk.
– Half-mast gently swishing tail, combined with relaxed body language and soft eyes. This dog is probably safe to pet.
– Tail mid to three-quarters raised, wagging quickly, combined with some animated body language and happy facial expression. This dog is more aroused, but may be safe to pet. Use caution.
– Tail wags in a circle, combined with calm or animated body language. This dog is happy/excited and probably safe to pet.
– Tail vertical, swishing slowly. This dog may be calm and relaxed and just have a natural high tail carriage, such as the Husky, Malamute, Chow, Pomeranian, and others, or he may be becoming aroused. Since a high tail often indicates a higher level of arousal, it’s even more important to be aware of the other body-language cues of these dogs. This dog may or may not be safe to pet; wait for more information to go on!
– Tail vertical, wagging quickly, often accompanied by tall, forward body language. This dog is alert, tense and aroused. It is best to avoid interacting with this dog.
As you can see, it’s critical to evaluate the whole dog when determining whether his wagging tail means he is happy or not. Be advised, then, that this evaluation is too complex for small children to carry out; teach them not to pet strange dogs.
The “All Breeds are Alike” Myth
This myth is most likely to be promoted by people who are trying to sell you something, whether it’s puppies or breed-specific legislation. If someone tries to make you believe that all individuals of a given dog breed will display homogeneous characteristics of that breed, or that certain characteristics are inherent in any and all members of that breed – well, hey, would you by any chance have any interest in buying a bridge?
While dogs of a given breed may exhibit behavioral tendencies that are common to that breed, little, if anything, is universal in all the individuals of any breed. There are Labrador Retrievers who hate the water and won’t fetch a ball, Border Collies who have no interest in sheep, and Huskies who wouldn’t pull a sled if their lives depended on it.
Breed registries maintain descriptions of their ideal, and people who breed purebred dogs are supposed to be trying to produce puppies who will grow into physical and behavioral manifestations of the breed standard. The problem is, not all breeders are good breeders! Some people are just trying to make a buck, and take little or no care to choose complementary parents for their “purebred” puppies. (And why would you, if you were selling puppies that were going to be sold like interchangeable widgets in pet stores to anyone with the money to spend?) And even educated, responsible breeders who take the utmost care to choose mates for their dogs don’t always succeed in producing perfectly conformed, perfect behavioral clones of the breed standard; it’s impossible!
When a truly responsible breeder produces a puppy who has physical or behavioral traits that are atypical of or aberrant for the breed, they will not only decline to use that particular breeding again, but also will work to find the pup an appropriate home with someone who will embrace it as a fully disclosed, atypical individual.
In addition, responsible breeders and adoption counselors should advise prospective owners who are looking for a dog of a certain breed that all individuals of any breed are just that: individuals. If there are certain traits of a certain breed that most appeal to you, make sure you take the time to look for a dog who exhibits those traits, not just the first representative of that breed that you happen to find in your local shelter.
And if you are set on buying a puppy of a certain breed, take the time to talk to a lot of breeders. Make sure that they understand exactly what you are looking for. Give them as much information about your home, family, and dog experience as they need to make sure they match you with a puppy who is most likely to succeed in your family.
If, on the other hand, you don’t have a specific breed in mind, write down the qualities that are most important to you in a dog, and then go out and start looking at individuals of any breed until you find one who best matches your list of desired traits. You should neither assume that any Golden Retriever you find will love your children nor that any Pomeranian you find will be too barky to endure. Be observant and deliberate. (See “Pick a Winner,” April 2009.)
The “The Best Dogs are Eager to Please” Myth
This is one of my pet peeves – the myth that dogs exist to please us. It’s such a commonly used descriptor that dogs who aren’t perceived as “eager to please” are often seen as flawed in character.
Dogs exist to please themselves, not us. It just so happens that for some dogs, the things that please them also please us. The dogs that we label as “eager to please” tend to find it reinforcing to be in our company, happily sitting for petting, fetching toys, and participating with us in whatever activities we’re engaged in.
Dogs who are perceived as “eager to please” are most often those who have been bred to work closely with people, such as the herding, working, and sporting breeds. If these working dogs are typical of their heritage (see previous myth), it will likely please them to engage in activities that involve humans.
We’ve created a number of breeds (including hounds and terriers) to do unsupervised jobs, such as chasing game through the woods, or killing rodents in barns and fields. It used to please us if one of those dogs took the initiative to do one of those jobs well, but today, it’s just as likely that a dog who pursues one of these activities without permission will be accused of being stubborn, willful, dominant, or disobedient.
The “Pack Mentality” Myth
There is enough truth to this myth to make it extra-super sticky. The part of this one that gets dogs into trouble is their humans’ assumption that because dogs are a social species, they should be able to get along with (and play with) every dog they see. I always remind my clients that we humans are a social species, too, and we certainly don’t all get along with each other!
In fact, while wild wolves may live in close family groups we call “packs,” there is a growing body of evidence that where groups of feral dogs exist, they live in loosely knit social groups that don’t even begin to resemble a wolf pack.
Besides, a pack of familiar friends and close relatives isn’t at all the same as a bunch of ill-behaved strangers. Not unlike small children, most reasonably well socialized puppies will happily play with any other behaviorally appropriate puppies all day long. But as your dog matures he is likely to be more comfortable engaging with a limited number of dogs he knows well. This is normal, and a lot like we humans, who may enjoy wild parties as teenagers but as mature adults are more likely to be found enjoying relatively sedate dinner parties. (That said, there are always exceptions, and there are some dogs who continue to behave as the life of the dog park well into their senior years.)
Listen to your dog, not the mythologists; your dog doesn’t have to play with other dogs if he doesn’t enjoy it. If he tells you he’s having a blast at rowdy canine romps, go for it. But if he tells you he’d rather not, heed his wishes!
Resist Dog Myths and Stereotypes
These sticky myths can damage your relationship with your canine family member, and prevent you from having the fulfilling and enjoyable life experience that every dog – and every dog-loving human deserves. Don’t let them.
Pat Miller, CBCC-KA, CPDT-KA, is WDJ’s Training Editor. She lives in Fairplay, Maryland, site of her Peaceable Paws training center, where she offers dog-training classes and courses for trainers. Pat is also the author of many books on positive training. Her two most recent books are Do Over Dogs: Give Your Dog a Second Chance at a First-Class Life, and How to Foster Dogs; From Homeless to Homeward Bound.
Find It is the very first behavior every dog should learn, in my opinion. It’s versatile, easy to teach, easy to do, easy to maintain, and can be used under all kinds of circumstances in all kinds of places. It’s not on the list of traditional basic obedience skills like Sit, Down, Stay, and Come, yet we can probably get more mileage out of Find It than any other behavior.
Find It looks something like this: You say, “Find it!” and your dog stops what he’s doing and scans the ground with his eyes and nose for bits of food.
What’s it good for? Everything! It’s especially useful as a management tool while the dog learns new, more appropriate behaviors.
“Find It” can be very effective at stopping a dog in his tracks and redirecting his attention. A well-timed “Find it!” can interrupt him just long enough for you to do whatever you need to do – clip his leash on, close the gate, remove something from his reach, etc. – to gain some control of the situation. The following are some of my favorite applications for Find It:
JUMPERS – I use Find It to help manage dogs who like to jump up on people they meet on a walk. Before the dogs have a chance to get their paws up, they’re asked to “Find it!” Their attention is immediately focused on the ground rather than on the person. When they’re done finding and eating the bits of food from the ground, they’re in a better state of mind to learn how to properly greet someone with all four paws on the floor or in a sit position. For the enthusiastic door-greeter, tossing food away from the entrance with a playful “Find it!” – every single time someone walks through the door – has the added effect of teaching the dog to hang back whenever the door opens, because he learns that often, the really good stuff happens a few feet away!
NIPPERS AND GRABBERS – Tossing food on the floor rather than delivering it from your hand helps to remove your dog’s attention from your body. Mouthy dogs quickly learn that the good stuff is more readily available on the ground rather than from our hands or pockets. It works well for sweater grabbers and pant-leg tuggers, too! With the dog’s attention diverted toward the floor rather than on us, he’s now in a better position to be rewarded for his good behavior.
PULLERS AND LEASH TUGGERS – Playing Find It while teaching a dog to walk politely on leash can be great fun for both you and the dog. It can be used to draw the dog’s attention back toward you when he begins to pull ahead. It’s also a handy trick when you need to quickly divert the dog’s snout away from the leash if he looks like he wants to initiate an unwanted game of leash tug. Dropping some treats on the ground immediately next to you (the “yummy-stuff zone”) and inviting your dog to “Find it!” will draw him back toward you; then you can resume walking together while rewarding him for walking politely next to you.
DISTRACTED DOGS- When a dog is very distracted or maybe even mildly concerned with what’s going on around him, playing Find It can give him something fun and specific to focus on, helping him to keep busy and feel safe. You don’t need lots of room. You can toss treats on the floor within the range of the dog’s leash and invite him to “Find it!” I’ve used this game in the waiting room at the vet clinic, sitting in group training class with a fidgety dog while the instructor speaks, and while walking by a house with a dog barking at us through a fence (to encourage my dog to disregard the barking and to keep moving forward).
JUST FOR KICKS – As an activity all on its own, Find It can be an extremely satisfying game that can be played anytime, anywhere, indoors and out. In fact, the more you play Find It in different locations and contexts, the faster the dog’s response to the “Find it!” cue becomes, helping the cue to grow more useful and reliable in sticky situations.
Scenting games (activities that involve the dog using his nose to locate things) can be very tiring for dogs. If your energetic dog is just learning to walk nicely on leash, try engaging in a short Find It session with him before taking him out for a walk; it can help to calm him considerably.
How to Teach Your Dog to “Find It!”
Here is how to teach your dog this highly useful behavior:
In a quiet space with no distractions and plenty of treats in your hand, toss a treat to the ground, not too far from you, and say, “Find it!” Make sure your dog sees you toss the treat. Let him go to it and eat it. Repeat several times.
Now, after you’ve tossed a treat and said, “Find it!” – and while your dog is making his way toward that treat – quietly and secretly drop another treat on the floor. You don’t want the dog to hear it land, if possible. When your dog has eaten the first treat and starts to return to you or looks back toward you, say, “Find it!” and remain as still as possible. Your dog may just stare at you, waiting for your hand to move to toss another treat. Repeat the cue (“Find it!”), walk toward the treat on the floor, and tap-tap-tap your foot on the floor next to the treat to draw your dog’s attention to it.
While he dives for that treat, once again toss another treat to the ground without him hearing it. When he looks toward you, say, “Find it!” and remain still. By now your dog may have played the game long enough to have figured out that the treat is probably on the floor, and he might direct his search there. Give him a few seconds to find the treat on his own. If he does, that’s great! Toss another treat close by while he eats that one, and say, “Find it!” when he’s done eating the first one.
If, instead, he continues to look at you rather than directing his gaze to the floor, walk toward the treat and tap-tap-tap your foot again next to the treat while saying “Find it!”
When it looks like your dog has caught on to the game, you can toss many treats on the floor (one after another) in various directions and continue to coach him with your voice to “Find it!” as long as there are treats on the floor. Be enthusiastic – it’s a game!
To end the session, and to let your dog know there are no more treats on the floor, show him your empty hands and say, “All done!” In time, your dog will recognize this to mean the game has ended and he can stop searching.
With practice, your dog will become an expert at seeking and finding treats on the floor. Feel free to increase the level of difficulty by hiding treats in spots you don’t mind your dog sniffing around, like under furniture, beneath cushions, behind floor plants, on a low shelf, or inside a shoe. Playing Find It in grass is especially fun and tiring, and can be a convenient way to slow down a speed-eater.
Once your dog understands this game and will readily search for treats that you toss or hide in your home or yard, take the game out into the world. Start in low-distraction situations at first, until his response to your “Find it!” cue is so consistent and strong that you can use the behavior to counter the type of behavior challenges discussed at the beginning of the article.
Stay alert for opportunities to use this fun “game” to prevent your dog from jumping up on people, grabbing his leash, or dragging you on walks. In no time at all, you will find that he’s become far more attentive to you, as he looks for opportunities to play Find It, instead of amusing himself with activities that are less enjoyable for you!
Nancy Tucker, CPDT-KA, is a full-time trainer, behavior consultant, and seminar presenter in Quebec, Canada. She has written numerous articles on dog behavior for Quebec publications about life with the imperfect family dog.
To provide the best experiences, we use technologies like cookies to store and/or access device information. Consenting to these technologies will allow us to process data such as browsing behavior or unique IDs on this site. Not consenting or withdrawing consent, may adversely affect certain features and functions.
Functional
Always active
The technical storage or access is strictly necessary for the legitimate purpose of enabling the use of a specific service explicitly requested by the subscriber or user, or for the sole purpose of carrying out the transmission of a communication over an electronic communications network.
Preferences
The technical storage or access is necessary for the legitimate purpose of storing preferences that are not requested by the subscriber or user.
Statistics
The technical storage or access that is used exclusively for statistical purposes.The technical storage or access that is used exclusively for anonymous statistical purposes. Without a subpoena, voluntary compliance on the part of your Internet Service Provider, or additional records from a third party, information stored or retrieved for this purpose alone cannot usually be used to identify you.
Marketing
The technical storage or access is required to create user profiles to send advertising, or to track the user on a website or across several websites for similar marketing purposes.
This website uses cookies and other tracking technologies to offer you a better experience, personalize content and ads, and analyze our site traffic. Before proceeding, you agree to our Terms and that you’ve read our Privacy Policy. Update Settings
Functional
Always active
The technical storage or access is strictly necessary for the legitimate purpose of enabling the use of a specific service explicitly requested by the subscriber or user, or for the sole purpose of carrying out the transmission of a communication over an electronic communications network.
Preferences
The technical storage or access is necessary for the legitimate purpose of storing preferences that are not requested by the subscriber or user.
Statistics
The technical storage or access that is used exclusively for statistical purposes.The technical storage or access that is used exclusively for anonymous statistical purposes. Without a subpoena, voluntary compliance on the part of your Internet Service Provider, or additional records from a third party, information stored or retrieved for this purpose alone cannot usually be used to identify you.
Marketing
The technical storage or access is required to create user profiles to send advertising, or to track the user on a website or across several websites for similar marketing purposes.