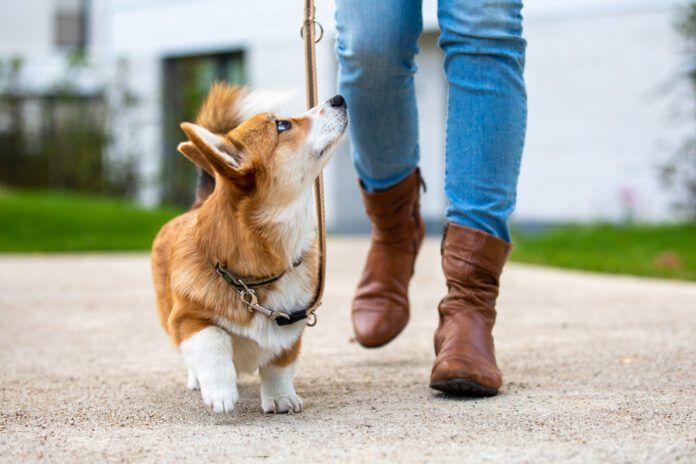
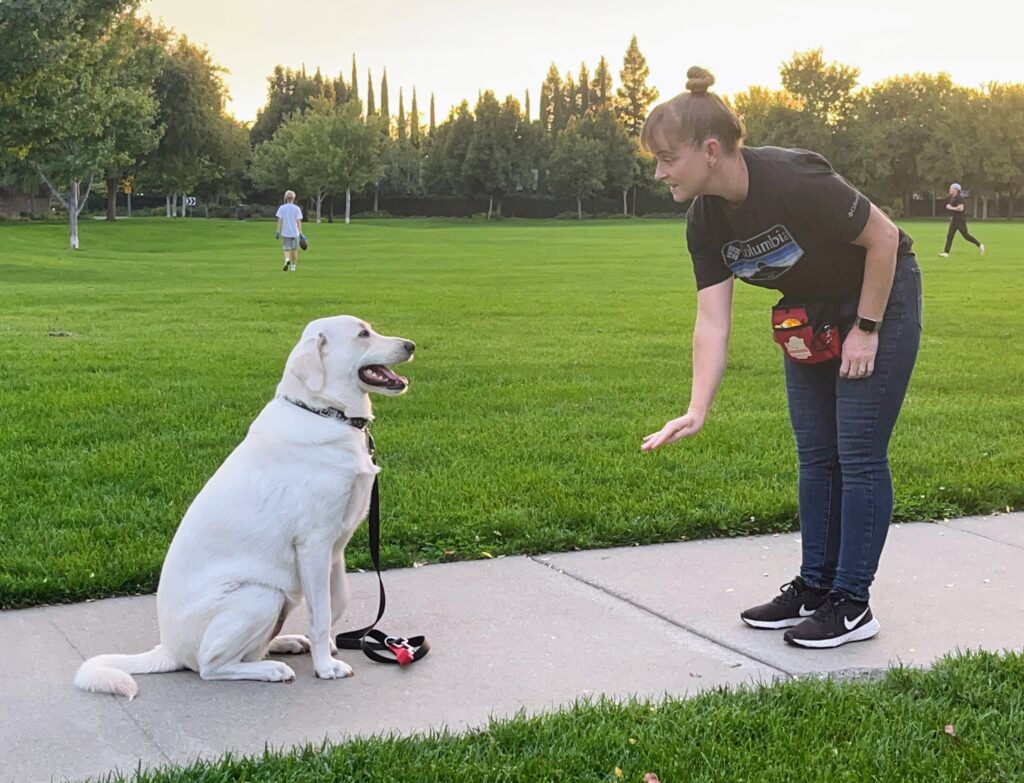
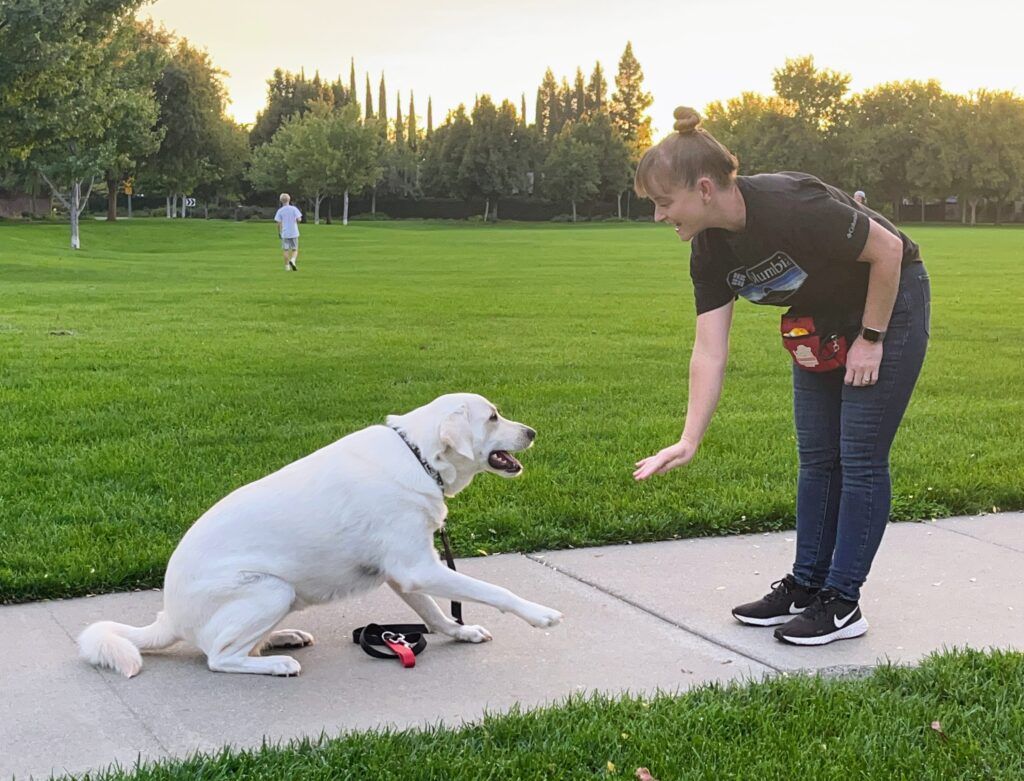
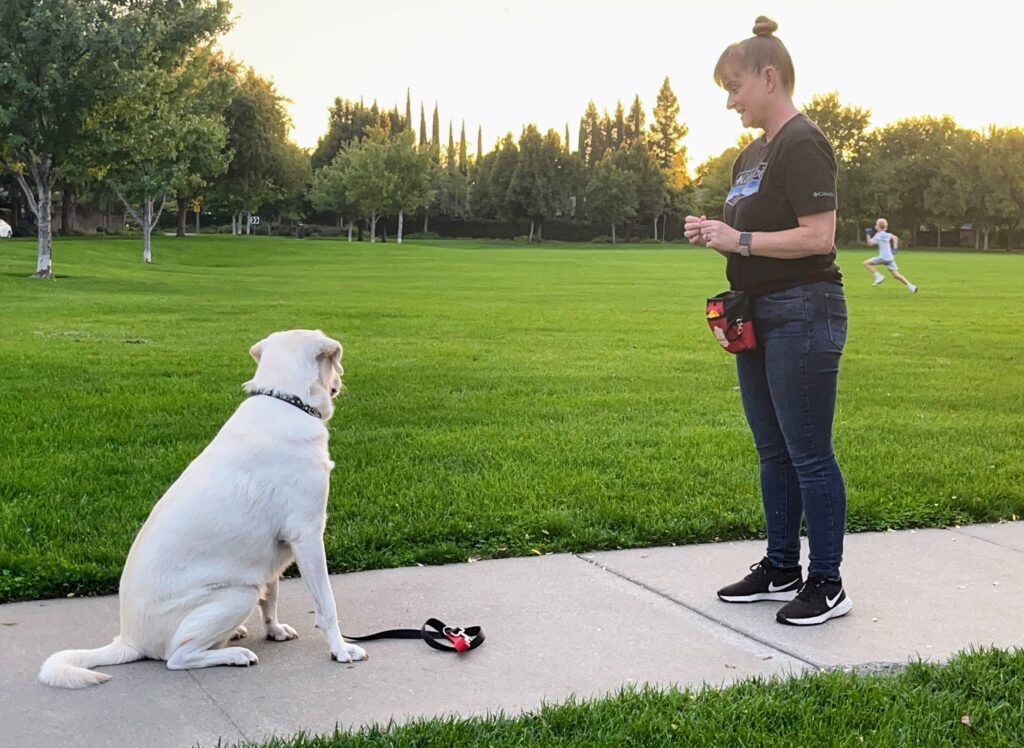
Walking more than one dog at a time requires training the dog to walk on leash, not pull, and ignore distractions. Credit: Ideeone | Getty Images
Of course, you can walk two dogs at once, or, as I do, sometimes three. If you can’t walk two of your own dogs at the same time, it’s a training problem and, usually, the problem is distractions—things the dog(s) want, causing them to get excited and out of control. That can be trouble with two dogs on leash together. You can only walk two dogs at once if they know each other and are both calm and trained to walk on leash.
Twenty years ago, I learned that the hard way—trying to manage my three Shelties in a frenzy due to a passing car! I learned what happens when your dog isn’t taught to ignore distractions when asked to do so. And now, I always include this lesson in my basic classes. Just imagine walking two dogs at once when one sees a squirrel . . . Let’s begin.
Pulling is sometimes part of the issue when walking two dogs, or with one dog for that matter. If you have a puller, work on that before walking two dogs at once.
For help with teaching your dog to disengage from things he finds distracting, see “Teach Your Dog to ‘Leave It’ Without a Cue.” Teaching your dogs, individually, to handle distractions and return their attention to you is worth every minute you can put into it. Do all these same training steps with your other dog, too. Take your time.
Putting Them Together
When your dogs have met your walking criteria individually, such as sitting on cue or returning their attention to you even when something tantalizing is nearby, take them for a walk together in a quiet area. Practice away from traffic, then gradually introduce triggers and distractions. They should both sit on cue and be rewarded. Make the intensity of the triggers gradually more difficult.
Not successful? Go back to square one. (Someone once said, “Don’t complain, train!” But no one ever said it was easy.)
I can often be seen in the neighborhood pushing a stroller with my elderly Sheltie inside, and a couple of Goldens or Shelties trotting alongside. Folks are amazed that I can do this with my dogs. I tell them, “No magic here … just training.”
To continue reading this article or issue you must be a paid subscriber. Sign in
If you are logged in but cannot access this content, a) your subscription may have expired; b) you may have duplicate accounts (emails) in our system. Please check your account status hereorcontact customer service.
Immediate access to this article and 20+ years of archives.
Recommendations for the best dog food for your dog.
Dry food, homemade diets and recipes, dehydrated and raw options, canned food and more.
Brands, formulations and ingredients all searchable in an easy-to-use, searchable database.
Plus, you’ll receive training and care guidance to keep your dog healthy and happy. You’ll feed with less stress…train with greater success…and know you are giving your dog the care he deserves.
Subscribenow and save 72%! Its like getting 8 issues free!
For the most part, your dog isn’t likely to be bothered by sand fleas, although digging in the sand could cause them to surface and bite. Credit: Rawlstock | Getty Images
After a fun day at the beach, you notice your dog is scratching and has small red spots that look like bites. It is possible, but unlikely, that sand fleas bites on the dog are the cause.
Sand fleas are small crustaceans, not insects like true fleas. They tend to come out on sandy beaches toward the evening, avoiding the hot sun. They vary in size from about a quarter of an inch to a full inch. However, unless you dig in the sand, you may not ever see them at a beach.
Sand Flea Bites at the Beach
Skin irritations like itchy bites or welts are more likely caused by biting sand flies or actual fleas, especially if your dog has explored vegetation near the beach where rabbits and other animals that might harbor fleas have been.
Sand fleas do jump like true fleas, but they prefer to eat seaweed, not blood. When they do bite a dog, they can cause a rash that appears to be many bites.
Treatment for Sand Flea Bites on Dogs
Treatment for irritation and bites from sand fleas is basic. Clean the area gently with water or a chlorhexidine solution. You can put an ice cube or ice pack on the red areas to reduce pain, itching, and inflammation.
Home remedies include aloe vera gel or a used tea bag held on the irritated skin. (Do not let your dog eat the tea!) Applying an apple cider vinegar and water solution (mix at 50-50) to wipe the area also may help with irritation and itching.
The biggest health concern with sand fleas is if your dog chews at his skin, destroying the natural protective barriers and leaving an opening for a secondary bacterial infection. Sand fleas also can cause tungiasis, a painful itchy condition where the flea bores into the dog’s paw pad (or human foot), but this is rarely seen in North America.
Keep your flea-and-tick repellent products up-to-date to help protect your dog.
Many dogs get clever and find new ways to resist taking medicine over time. Whether your dog needs to take pills for just a week or 10 days, or is on daily medication indefinitely, it helps to know several methods for administering the drugs. Photo by Chalabala/500px, Getty Images
Convincing a dog to swallow pills that smell suspicious, taste bitter, and feel unpleasant can be a challenge. Forcing a dog to swallow a pill can result in a bite or disrupt a human-canine relationship. What’s the best approach?
Whole Dog Journal is reader-supported. If you purchase through links on our site we may earn a commission. Whole Dog Journal does not accept money for its food and product reviews.
Hiding the medicine in food. Of course, you have to use the right food – and there are some tricks to hiding it convincingly.
Try a “pill gun” – a device that makes it easier to get the pill past your dog’s teeth and released into the very back of his mouth, where it will be more difficult to avoid swallowing it.
Mashed strongly flavored fish like sardines or mackerel
If using a prepared food, check its label to be sure it doesn’t contain ingredients that are toxic to dogs such as onions or xylitol.
How to Effectively Hide Pills in Food
Pack the cheese, meat, or other treat around the pill, but not while your dog is watching. Create a morsel large enough to surround the pill but small enough for your dog to swallow whole. Biting into a bitter-tasting pill can ruin your dog’s attachment to any treat, even a favorite.
Another strategy is to learn whether a pill can be crushed without harming its medicinal properties. If so, try crushing it in a plastic bag with a rolling pin or hammer, then mix the powdered bits into canned or pureed wet food.
Wash your hands after handling the medication. Dogs’ noses are so sensitive, your pup will recognize the medication’s fragrance if you don’t.
Tricks for Getting Your Dog to Eat the Hidden Medicines
Pretend to eat the medicated treat yourself. Everything you eat is of interest to your dog and he’ll want some, too.
If you have another dog, set up a rewards session and feed treats to both of them. Most dogs eat everything faster when there’s potential competition.
Give your dog five treats in quick succession with the treat that holds the pill somewhere in the middle. Your dog won’t have time to do anything but swallow the next treat.
If you use pill pockets, offer one from time to time that contains only a special treat with no pills. This will make pill pockets less suspicious.
Administer pills immediately before a fun activity like going for a walk, running in the yard, or playing an indoor game. Soon your dog will associate medication time with play time.
Try pill pockets
These hollow treats are designed to hold tablets or capsules. One popular brand is Greenies Pill Pockets, which come in four flavors (chicken, cheese, hickory smoke, and peanut butter).
For pockets with minimal ingredients, try making your own by mixing 1/4 cup water, milk, or bone broth with 1/4 cup peanut or almond butter (made without salt or sugar) and 1/2 cup wheat or gluten-free flour. Roll 1/2 teaspoon dough into balls and use the round tip of a wooden spoon or chopstick to form a pill-sized indentation in each ball. Refrigerate for up to 1 week or freeze for up to 6 months.
Pill Poppers or Pill Guns
To give your dog a pill without food, try a pill popper or pill gun. Available from vet clinics and pet supply stores, this syringe-like tool drops a tablet or capsule through a tube into your dog’s mouth. See the Lxnoap Pet Pill Gun at Amazon and other suppliers. Load it with a pill, gently open your dog’s mouth, and drop the pill at the back of the throat. Follow with a small amount of water and massage your dog’s throat to encourage her swallowing reflex. Then check her mouth to be sure it’s gone as some dogs are clever about hiding pills and then spitting them out when no one’s looking.
When All Else Fails…
If your dog is still resisting, ask your veterinarian for help. Vet techs are pilling experts and can give you a detailed demonstration, or your vet may be able to supply the medication in a different form, such as liquid or flavored, that is easier to administer.
A dog scooting along the ground, rubbing his behind, is likely telling you he is uncomfortable and needs anal gland expression. Credit: Pete’s Photography | Getty Images
Anal gland expression is the act of manually emptying the anal glands for the dog. While this is a procedure best left to a veterinary professional, some groomers offer the service and some pet owners do learn how to safely express their dog’s anal glands themselves.
Anal glands or anal sacs are gumball- to grape-sized sacks on either side of the dog’s anus that contain stinky secretions. If the anus were a clockface, the anal glands would sit at about 4 and 8 o’clock. Most dogs empty their anal glands a little bit naturally every time they have a bowel movement. The passing feces puts pressure on the glands and squeezes some of the secretions out. This keeps the glands at a comfortable size for the dog.
Uncomfortable Anal Glands
When a dog’s anal glands are too full, they are uncomfortable. Some dogs will drag themselves along on their bottoms or “scoot” to try to relieve the pressure. Others lick the area for the same reason. Sometimes owners notice the smell periodically as some of the stinky stuff leaks out from the overly full gland. Any dog showing these signs will feel better once their anal glands are expressed.
Reasons for a dog to be unable to successfully release secretions with bowel movements include:
Improper positioning of the gland and its opening duct (especially in overweight dogs)
Sometimes expressing the anal glands requires insertion of a gloved finger into the dog’s rectum, especially if the bulge of the overly full glands cannot be seen or felt from the outside. With this technique, the gland is squeezed between the index finger inside the rectum and the thumb of the same hand outside the anus. The process is then repeated for the gland on the other side.
If the bulge of the anal glands can be seen or felt from the outside, they can sometimes be expressed by applying pressure to the outside of one gland with your index finger, simultaneously applying pressure to the outside of the other gland with your thumb on the same hand. With this technique both glands are expressed simultaneously.
Anal glands should only be expressed when the dog shows signs of discomfort. Otherwise, allow the dog to naturally express the glands and decrease his dependence on manual anal gland expression. Adding fiber to the dog’s diet in the form of pumpkin or psyllium powder sometimes helps dogs achieve natural anal gland expression by bulking up passing bowel movements.
Perhaps the most interesting thing about Boone’s DNA test results is the fact that he doesn’t look anything like any of the breeds detected by any of the companies. Most people think he’s some sort of Doodle!
I recently received the results of my dog Boone’s mixed-breed DNA test from Darwin’s Ark, a nonprofit scientific research organization (which I previously wrote about here). I already had results from Wisdom Panel and Embark. Here’s what all three have reported finding in Boone’s DNA:
Embark
Wisdom Panel
Darwin’s Ark
42.0% American Pit Bull Terrier
36% American Staffordshire Terrier
59.4% American Pit Bull Terrier
29.1% American Staffordshire Terrier
29% American Pit Bull Terrier
21.1% Unknown
8.1% American Bulldog
6% Boxer
6.6% English Springer Spaniel
8.1% German Wirehaired Pointer
6% German Wirehaired Pointer
4.7% Boxer
8% Boxer
5% American Bulldog
3.1% Great Dane
4.7% English Springer Spaniel
5% English Springer Spaniel
3% German Shorthaired Pointer
4% Great Dane
2.1% Labrador
3% Australian Cattle Dog
2% German Shorthaired Pointer
2% Labrador
2% Chow Chow
I know it’s my dog, but I find these results fascinating, both for the similarities and for the differences in what they found and their estimated quantities of each breed. Not to even mention the fact that Boone doesn’t particularly look like any of the breeds suggested by any of the companies.
All three companies concur that Boone is mostly one or the other or both of the most common bully breeds. Embark and Darwin’s Ark agree that he’s more American Pit Bull Terrier than anything; Wisdom Panel thinks that he’s more American Staffordshire Terrier than anything. Embark and Wisdom Panel agree that he’s got both Pit Bull and Am Staff heritage, whereas Darwin’s Ark makes no mention of Am Staff at all – but the company does not include American Staffordshire Terrier among the list of breeds it can currently identify.
Embark and Wisdom Panel both think Boone has some American Bulldog genes. Darwin’s Ark did not report this – but, again, it doesn’t yet have American Bulldogs on the list of breeds it says it can identify. Also, unlike the other two companies, Darwin’s does not attempt to make its results add up to 100%; it reported a 21.1% “unknown” genetic contribution to Boone. So Am Staff and American Bulldog may well make up a goodly percentage of Darwin’s Ark’s 21.1% of “unknown” genes.
All three companies identified contributions from Boxers and English Springer Spaniels, and even their calculations regarding the concentration of those breeds matched fairly closely. The estimated contribution of Boxer genetics ranged from 4.7% to 8%. The estimated contributed from Springer Spaniels ranged from 4.7% to 6.6%.
All three companies identified at least one German pointer. Wisdom Panel suggested that Boone contains small amounts of both German Wirehaired Pointer and German Shorthaired Pointer. Embark reported only German Wirehaired Pointer. Darwin’s Ark reported only German Shorthaired Pointer.
Two of the three (Wisdom Panel and Darwin’s Ark) found some Great Dane genes (4% to 3.1%, respectively) and some Labrador genes (2% and 2.1%, respectively). Neither breed was identified by Embark.
Using just Boone’s results to draw conclusions about the three companies, it feels like they are all finding comparable results. Embark sells its Breed ID DNA Test for $109 to $129, depending on its various discounts. Wisdom Panel currently sells its Breed Discovery kit for $84 – the lowest price of all three companies, unless you submit your dog’s DNA to Darwin’s Ark for research purposes only, in which case the company will run your dog’s sample for free, but you may not receive the results for years. Darwin’s Ark uses these samples in its research; it has a number of scientists using the data it collects for some fascinating studies on obsessive-compulsive disorder, cancer, food allergies, the traits shared by working dogs, and more.
If you want to pay for faster (but not fast) service, Darwin’s Ark charges $149. The company will run your dog’s DNA in a batch of 20 when they receive 19 other samples to run. This took about four months for Boone’s sample. The for-profit companies are much quicker with their results – just understand that they, too, are likely including your dog’s DNA in their research studies, but without the transparency and invitation for you to participate in “citizen science” surveys about health and behavior offered by Darwin’s Ark.
It’s usually very easy to teach “Shake” to dogs like Boone, who are naturally “pawsy.” In this case, the photographer worked as a team with her grandson, Oliver. He gave the physical cues (holding out his hand) and she used a verbal marker (“Yes!”) when Boone lifted his foot. This prompted Oliver to deliver the treat to Boone. Photos by Nancy Kerns.
Several training techniques can be used to teach a dog to “Shake hands.” Here are four methods for teaching this amusing trick – capturing, shaping, lure-shaping, and prompting. Different dogs may respond better to one method than another; you should use whichever training method works best for your dog. We will describe which method tends to work best with dogs with different behavioral tendencies. Here’s how to use each of these training techniques to teach your dog to “give a paw” on cue:
“Capture” the Paw Lift
Some dogs are naturally “pawsy,” often using their feet to touch you or objects they are playing with. These are the easiest to teach to shake.If this describes your dog, try this method:
Just hang out with your dog (it’s best if she’s sitting) and wait for her to lift a paw.
When she does, “mark” this behavior with the click of a clicker (or other reward marker, such as a “thumbs-up” hand signal or a verbal marker such as “Yes!”) and give her a treat.
Repeat by marking any lifts of that same paw (chose left or right – but not both!) until your dog realizes she’s getting reinforced for the paw lift, and then add your “Shake” cue just before she lifts her paw. With enough repetitions she’ll offer her paw even every time you cue her to “Shake.”
Now start offering your hand so she can rest her paw on it for your final shake behavior.
At first, the team “captured” Boone’s behavior of shifting his weight, by using the verbal marker (“Yes!”) and giving him a treat when one of his front paws moved. Then, they raised the criteria, waiting for him to lift a paw off the ground before marking and giving him a treat. Because he’s been trained with these methods before, Boone knew to keep offering various behaviors as he worked to find what would result in a Yes! and treat. Within just a few tries, Boone waved his paw in the air. Yes! and Jackpot!
“Shape” the Shake
Shaping shake works well for dogs who move their feet often while otherwise sitting still, but don’t raise a paw high enough to shake. If this describes your dog, try this method:
Start by having your dog sitting in front of you. The instant you see a tiny movement with either foot, mark the behavior and feed her a treat.
Now focus on that paw only (if you randomly mark the movement of either paw you may get a shuffle instead of a shake!) and continue to mark and treat for any paw movement.
As your dog starts to move that foot on purpose in anticipation of reinforcement, very gradually raise the criteria you require in order to mark and treat. For example, only mark-treat if the paw moves at least one inch off the floor. When that happens consistently, raise the criteria to two inches. Continue raising the criteria slowly, add your cue, and you’re off and shaking!
Then the team raised criteria again: They waited for Boone to touch Oliver’s hand with his paw, or, in this case, his paw and wrist. No worries! It’s a closer approximation of the desired behavior, so he gets a “Yes!” and treat. Then they raise criteria again, waiting for him to more precisely put his paw in Oliver’s hand.
“Lure-Shape” the Shake
If your dog sits perfectly still with no paw movement at all, try this method, lure-shaping the paw lift.
Hold a treat at the end of her nose and slowly lift it until her nose is pointed almost straight up. Now move the treat slowly to one side so she shifts her weight onto one foot and the other paw lifts slightly. Mark and treat.
Repeat until the paw lift gets easier and she starts to offer paw movement without the lure, then continue as described in the shaping section, luring if needed while you raise criteria. Fade your lure as quickly as possible so that you can get your “Shake” on verbal cue.
When shaping, the dog will try a few behaviors, in an effort to discover which behavior gets the treat. It’s important to not mark and treat efforts that take him farther from the behavior you want. In this case, Boone tried putting both his paw and his nose on Oliver’s hand. The team didn’t say “No” or discourage him; they just waited for a closer approximation of what they were after.
“Prompting” the Paw
If the above-mentioned methods fail, you can prompt your dog to move her paw. We would rarely start teaching a behavior using a physical prompt, as dogs tend to learn best when their freely offered behaviors are marked and rewarded, rather than when they are pressured by a physical touch. However, some dogs are reluctant to offer behaviors (perhaps from being physically punished or intimidated for offering behaviors in the past); these dogs may benefit from a very gentle prompt.
Start by by lightly tickling or pressing gently on your dog’s pastern (the back of her ankle).
Mark and treat the moment her paw moves! Good girl!
Repeat until she starts to offer paw movement as you reach toward her paw – and if she does, don’t follow through with the prompt, but mark and treat for the movement. Then switch to shaping or lure-shaping as described above to get to your final paw-shaking goal.
Boone learned to touch the bellman’s bell within a minute of learning “shake” and high-five.
Paw Targeting
When your dog has learned that moving her paw earns treats, she can teach learn how to do other things with her feet. Teach her to touch her paw to a designated object to ring a bell, turn on a light, push a rolling toy – and these fun behaviors are just the beginning. Have more fun with your dog’s paws!
Once you’ve taught your dog to touch something with his foot, it’s easy to teach more behaviors, such as giving a high-five or simply waving his paw in the air.
It’s easy to make your own healthful bone broth for your dog. While the traditional method uses the stove top, Instant Pots reduce the time needed to prepare bone broth to a fraction of the stove-top time. Photo by Lorenzo Capunata, Getty Images
Bone broth is a simple soup stock made by cooking bones from beef, pork, lamb, goat, bison, poultry, fish, or other meats in water. Traditionally a convalescent food for humans recovering from illness, it has become a popular treat for dogs. Bone broth is promoted for the improvement of:
Digestion and nutrient assimilation
Skin, coat, and nail health
Immune function
Joint mobility
Detoxification support
Bone broth is rich in gelatin, a protein-rich substance that, when heated and cooled, forms a gel-like texture (think Jello). Gelatin added to other foods aids digestion and provides minerals such as calcium, magnesium, phosphorus, and potassium. Because it contains some but not all of the essential amino acids, gelatin is nutritionally incomplete and should not be used as a stand-alone meal substitute.
How much bone broth to feed
The recommended daily amount for dogs is 1 fluid ounce per 10 pounds of body weight, such as 6 fluid ounces (3/4 cup) for a 60-pound dog. Start with smaller amounts to be sure your dog tolerates it well and increase gradually.
Several bone broth products, including dehydrated powders, are sold as canine nutritional supplements or meal toppers. Some are made from the bones of pasture-raised or grass-fed animals, which are considered more nutritious than factory farmed animal bones. Examples include Open Farm Bone Broth for Dogs and Caru Bone Broths for Dogs and Cats. Products made from human-grade ingredients include Honest Kitchen Bone Broth and Solid Gold Bone Broths.
Made-for-dogs bone broths are a safer choice than broths sold for human consumption because they are less salty and don’t contain onions or other ingredients that can be toxic to dogs.
What’s the difference between “stock” and bone broth?
The term “bone broth” is often used interchangeably with “stock” and plain “broth,” but there are differences. Bone broth is made by simmering bones for extended periods so the result is rich in nutrients, gelatin, and collagen and often consumed for health benefits. Stock is prepared by simmering bones with vegetables and aromatics for a shorter period to produce a flavorful base for sauces, soups, and stews. Plain broth is made by simmering meat and vegetables in water for a short time for use as a light flavor base.
Bone broth recipe
Start with 3 to 4 pounds of raw or leftover bones with meat and connective tissue attached. In a large pot, slow cooker, or Instant Pot add enough filtered water to cover the bones by 2 inches. Add 1 tablespoon cider vinegar or lemon juice. If desired, add 4 cups chopped carrots, celery, pumpkin, green beans, or other dog-friendly vegetables. Let stand for 30 minutes before cooking to enhance the release of minerals.
Stovetop: Bring to a boil, reduce heat to a bare simmer, cover with the lid slightly ajar, and cook for 24 hours (poultry bones) or 48 hours (beef or red meat bones).
Slow cooker or crock pot: On low heat setting, cook for 24 hours (poultry) or 48 hours (beef, red meat).
Oven: Bring ingredients to a boil on the stove, then transfer to a large oven-safe ceramic or metal pot with lid and bake, covered, at 150ºF for 15 to 24 hours
Instant Pot: Close lid and set to cook on low pressure for 4 hours (poultry) or 5 hours (beef or red meat). Let pressure release naturally.
Strain broth through a fine mesh sieve or muslin fabric and transfer to jars for storage. Discard the layer of fat that collects at the top. Refrigerate for up to 7 days, freeze for up to 3 months.
Some dogs enjoy licking ice cubes – a refreshing, hydrating treat and time-consuming entertainment and enrichment. If your dog chews the cubes, however, provide softer and/or smaller cubes, as described below. Photo by K_Thalhofer, Getty Images
Dogs love ice cubes when temperatures rise, and even in cold weather, many dogs enjoy the satisfying crunch of ice.
Going too long without water causes dehydration, and consuming gently melting ice cubes helps prevent that condition. As a result, ice cubes are generally considered to be beneficial for dogs while the risk of health problems caused by their consumption of ice is extremely low.
However, the risk isn’t zero, for ice cubes can literally crack a dog’s teeth. According to Tennessee pet dentist Barden Greenfield, DVM, “Dogs have a tendency to chew too hard, and the force of breaking ice is substantial. This can lead to a slab fracture (broken tooth) of the upper 4th premolar, which many times exposes the pulp, leading to tremendous oral pain and discomfort. Treatment options are root canal therapy or surgical removal.”
The risk of breaking a tooth increases with the size of frozen cubes, so to avoid this possibility while satisfying your dog’s ice cravings:
Freeze small or miniature cubes instead of large ones.
Offer shaved ice instead of cubes.
Add ingredients that produce softer cubes, such as small amounts of honey or yogurt, to prevent a “too hard” freeze.
For added flavor and variety, try freezing:
Salt-free or low-salt bone broth.
Water pureed with a small amount of cooked meat or fish.
Broth or water mixed with unsweetened coconut milk.
A small treat added to each cube before freezing, such as a banana slice, blueberry, piece of cooked meat, or dollop of peanut butter, any of which can be a surprise present for your dog.
Contrary to what many believe, dogs don’t naturally know how to swim. When dogs “dog paddle,” it’s more of a survival mechanism than a swim stroke, and it’s a very inefficient way to move through the water. Here’s how you can help your dog develop a smoother swim stroke:
Practice safe swimming. Bodies of water pose numerous dangers to dogs: playing to the point of exhaustion or heat stroke, “water poisoning” (a frequently lethal condition that results from the body taking in more water than it can handle), or poisoning from toxic algae blooms are all possibilities when working around the water. Know where the nearest 24-hour emergency veterinary hospital is located – both near your home and when travelling. For more safety tips, see “Keep Your Dog Safe Around the Pool This Summer.”
Fit your dog with a life jacket. A well-fitting life jacket can help your dog relax in the water when he realizes he’s not sinking. The added buoyancy also helps support heavily muscled breeds and can make it easier for older or less athletic dogs to maintain their limited endurance.
Go slow. Not all dogs enjoy water and that’s OK. Never throw your dog in the water thinking he’ll figure it out. If you’re working around a pool, take time to build a positive association with the steps – where your dog will safely exit – so he knows how to get out. Feeding treats or offering a toy on the top step helps. You can also build your dog’s confidence by taking him to a natural body of calm water and letting him wade at his own pace.
Practice an effective swim stroke. Work in calm water where you can safely and comfortably stand. Once your dog is comfortable around the water, on the top step or wading in so long as there’s land below, carry him in and lower yourselves into the water. Using the handle on his life jacket or a hand gently supporting his midsection from below, point your dog toward the exit point and let him go once he’s relatively relaxed.
Don’t overdo it. Swimming is not only a good workout, learning to swim is a mental workout. Keep sessions short and positive and give your dog plenty of time to rest after a swim session.
Don’t snatch your dog’s fetch item away the moment he brings it to you. Praise him enthusiastically as he’s coming toward you, and back away to encourage him to keep coming. If he tries to keep the item from you, “trade” him a treat for the fetch item; he’ll drop the ball in order to eat the treat. Photo by Tomml, Getty Images
Any breed of dog can be taught to fetch an item, but some dogs, primarily those with “retriever” in their names usually come a bit more hardwired toward the tendency to chase an object and bring it at least part of the way back to the handler.
For many dogs, the following tips will help teach the game of fetch:
Use an object your dog wants and pique his interest before throwing.
Just because we think something makes a great fetch toy doesn’t mean your dog agrees and will join in the game. Using a favorite object makes it more likely your dog will want to go get it. For some dogs, that might be a favorite toy. For others, it might be an empty water bottle.
Before throwing the object, get your dog interested. Tease him a little bit. “You want it? Can’t get it!” as you wiggle the toy his direction and then make it skitter away as if it’s a small prey animal. Observe your dog’s reaction; it’s easy to overdo it, and if you come on too strong, your dog may disengage.
When your dog is showing excited interest in the object, give it a toss.
Keep your throws short in the beginning.
Avoid throwing the toy across the yard or even across the room to start. A toss of 6 to 10 feet is perfect. Once your dog understands and is excited about the game, you can make your throws longer.
Back away as your dog returns.
If your dog runs out and picks up the toy, offer praise as you back away and encourage your dog to come toward you. Avoid standing still, as that can create social pressure as your dog returns and sees you standing there like a wall. Backing away as you pat your legs and acknowledge your dog’s brilliance can encourage her to keep moving in your direction.
Maintain excitement about the fetch item.
Some dogs will chase the toy as it moves but lose interest once it lands. If your dog runs out to the toy but doesn’t pick it up, run out and snatch it up yourself! Celebrate with the toy and treat it like a special prize. Your attention to the toy can help increase its value and make it more likely your dog will show more interest on the next throw. Tease your dog with the toy and, when he seems especially interested, try another short toss.
Mistakes to avoid
One of the fastest ways to teach a dog to play keep away with the toy rather than return to you is to immediately snatch and re-throw the toy as soon as he returns. Your dog did all the work in running out and coming back with the toy, he should be able to enjoy the fruits of his labor for a bit. When your dog returns with the toy, offer calm praise and petting without so much as thinking about reaching for the toy for 15 to 30 seconds. Make sure you’re petting your dog in a way he enjoys – you’ll know you’re getting it right because he sticks around. If he releases the toy on his own, you can pick it up and toss it again. Otherwise, wait the full 15 to 30 seconds before asking him to release the toy and preparing for the next throw. Alternatively, offer to “trade” him a treat for the fetch item.
Quit while you’re ahead
Ending the game before your dog loses interest will strengthen your fetch game. Try to avoid the “just one more throw” syndrome, especially when your dog is getting tired. Leave him wanting more.
Excessive fetch can do more harm than good and can turn fetch into an obsession that makes it difficult for your dog to relax. That’s because of the hormones released in the brain during the chase. A prolonged adrenaline rush isn’t good for any living being. It’s also important to prevent injury when playing fetch. Torn ligaments are especially common among fetch-obsessed dogs.
Shaping a more formal retrieve
Some people prefer to teach “fetch” as a more formal behavior that can be used in dog sports or service dog work. Denise Fenzi, founder of Fenzi Dog Sports Academy, offers a great blog post where she explains her approach to teaching a structured retrieve and includes unedited videos documenting the process with a client’s Border Collie.
Small and succulent are keywords for the best training treats for puppies. Note: Make sure you deliver the pup’s treats right to his lips; holding the treat as shown in this photo will encourage the puppy to jump up, breaking his nice sit and establishing a bad habit (for both of you!). Photo by George Peters, Getty Photos
Here’s what you should know when deciding what treat to use as training treats for your puppy:
Smaller is better!
Puppies and dogs are more impressed by the number of treats they get, not by the size of each individual treat. In this case, bigger isn’t better! Using small treats – the size of your pinky finger or even smaller for toy-breed dogs – will allow you to reward often with less chance of your puppy getting full too soon.
Kibble works well in many cases.
If your dog is extremely food motivated (we’re looking at you, Labradors!) you can likely use your puppy’s kibble for training sessions around the house or other areas with low to moderate distractions. Set aside a portion of your dog’s daily ration of kibble to use as treats so you don’t accidentally over-feed by offering full portions in a bowl plus a significant number of extra calories in training. For training in more distracting environments, such as when training your puppy in public, use the higher-value treats described below.
Most of the time, soft treats are ideal.
While kibble often works for dogs who are highly motivated by food – who swallow it down before even realizing it’s in their mouths – most of the time, soft treats are preferred so you don’t lose time waiting for your puppy to crunch through a hard treat. With a puppy’s short attention span, it’s important to keep them engaged in the game.
Options to consider.
There are plenty of commercially available treats on the market. We recommend avoiding many of the brands commonly available in the petfood aisle of grocery stores and heavily advertised on television (no, that’s not really bacon you smell, Fido!), as they are often made from low-quality ingredients.
The key attributes to look for are small, soft, stinky, and easy to digest. I like to use the dog food rolls made by Happy Howie’s, Red Barn, and Lucy Pet Products. They’re packaged like giant salamis and are easily cut into pieces of any size you need. Plus, they’re meaty smelling and in all my years of training dogs, I’ve rarely come across one who isn’t interested in a piece of dog food roll. And, because it’s dog food, it has better nutritional value, which means I’m less concerned about using it often in training.
Another great option is an air-dried dog food like those made by Ziwi Peak and Real Meat. Both offer pre-cut pieces that look like small bites of jerky-style treats usually packaged in long strips.
Think outside the box when choosing treats
It doesn’t have to say “dog treat” on the package to work well in training. There are plenty of other foods to choose from. Some ideas:
String cheese or other cheese varieties cut into tiny pieces.
Turkey hot dogs (turkey dogs are less greasy than the beef or pork variety).
Pre-cooked meatballs are a great, high-value treat for when you need to pull out the “big guns,” and they can be easily pinched into small pieces.
Cooked meats (chicken breast, assorted cuts of beef, etc.) cut into small pieces.
When trying new treats with a young puppy, introduce one type at a time so you can keep track of how your puppy tolerates the new food item. Some puppies have more robust digestive systems than others. Also, be mindful of the amount of treats you’re using. A young puppy’s digestive reaction to a treat can be just as much about over-indulging as is about not tolerating the specific treat.
I’ve had a number of older owners book lessons with me lately—more than half a dozen individuals and couples in their 70s and even 80s, all wanting some training help with their new dogs or puppies.