


Impulse control is the ability to resist a temptation, urge, or impulse. It’s what allows you to stay on your diet, be faithful to your spouse, and quit smoking. It’s also what keeps your dog from counter surfing, chasing a fleeing squirrel, jumping on guests, darting out an open door, and doing a host of other behaviors that she finds very reinforcing – and you find annoying or worse.
When the use of aversives was the norm in dog training, we simply punished our canine companions harshly enough that they were afraid to do these unwanted behaviors. With the advent of positive-based training, its emphasis on relationship, and our appreciation for getting our dogs to do stuff, today’s more enlightened humans use a kinder, gentler approach to teach impulse control. We teach dogs that if they choose to control their own impulses, good things will happen!
This month, we will look at some of these useful behaviors and address several more in next month’s issue. Once your dog has learned the concept of impulse control – and how rewarding it can be – the applications for its use are almost infinite.
The “Wait” and “Stay” Cues: What’s the Difference?
It certainly comes in handy if your dog will stay put when you ask her to. While some people may use the “Wait” and “Stay” cues interchangeably, I find there is real value in making a distinction between the two. In my world, “Stay” means “Stay in the exact position I left you in until I ask you to get up,” while “Wait” just means “Pause.”
“Stay” is vital for rally, obedience, and other canine competition venues, and for the occasional “I really need you to not move until I release you” situation. I actually use “Wait” a whole lot more than I do “Stay” in everyday life. In fact, it’s probably my most-used cue.
Perhaps I’m heading out to meet a client. I say “Wait” as I open the door to tell my dogs Bonnie and Kai they aren’t going with me, but they are free to move around the house. If I said “Stay,” I would be asking them to freeze and not move until I return two hours later. I may have well-trained dogs, but that’s not going to happen!
Now I’m headed down the stairs, and I ask them to “Wait” on the landing until I get to the bottom, so I don’t trip over them. They can move around the landing, but not dash down the stairs until I give them permission with an “Okay!”
In contrast, I might use “Stay” to park Kai firmly in one spot when I’m speaking with a boarder in the barn and I don’t want him running around under horse hooves while we talk.
Train Your Dog to Wait – with Food!
My favorite to way teach “Wait” is to teach “wait for the food bowl,” then generalize it to other situations. Here’s how:
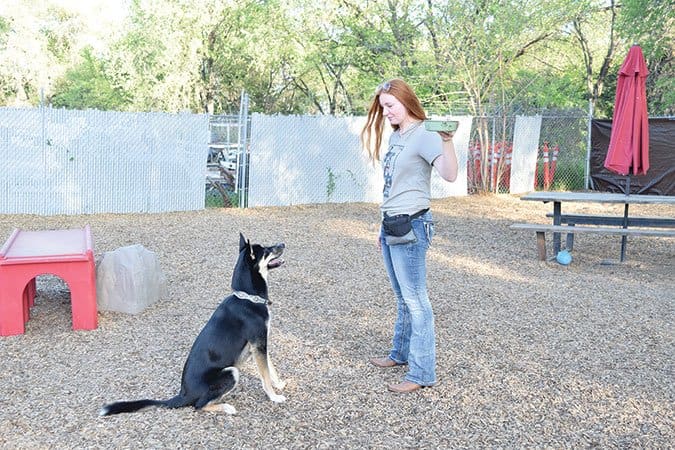
1. At meal time, have your dog sit by her feeding location, and tell her “Wait!” Hold her bowl at your shoulder level, click (or use a verbal marker of your choice), take a treat out of the food bowl and feed it to her. (Hold the bowl off to the side so you won’t be lowering it directly under her nose.) If she loves her regular food you can use that. If she’s not wildly enthusiastic, use higher value treats that you’ve put into her food bowl with her food. If she gets up before you click, tell her “Oops, sit!” and try again. If she gets up after you click and treat, just ask her to sit again before the next repetition. Repeat several times, telling her “Wait” for each repetition.
2. Start with the bowl at your shoulder level, tell her “Wait,” lower it a few inches, click your clicker if she’s still sitting and quickly raise the bowl back up after you click. Take a treat out of the food bowl and feed it to her. If she gets up when you lower the bowl, try again, and lower it only a fraction of an inch.
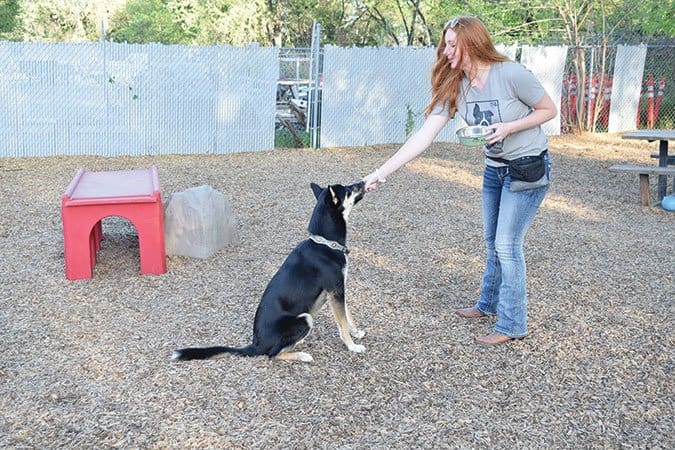
3. Gradually lower the bowl a bit more, still starting at shoulder level, telling her “Wait” each time, with several successful repetitions at each new position before going lower. If you get two “oopses” in a row, you’ve gone too quickly; back up to where she can succeed and proceed more slowly with your bowl-lowering.
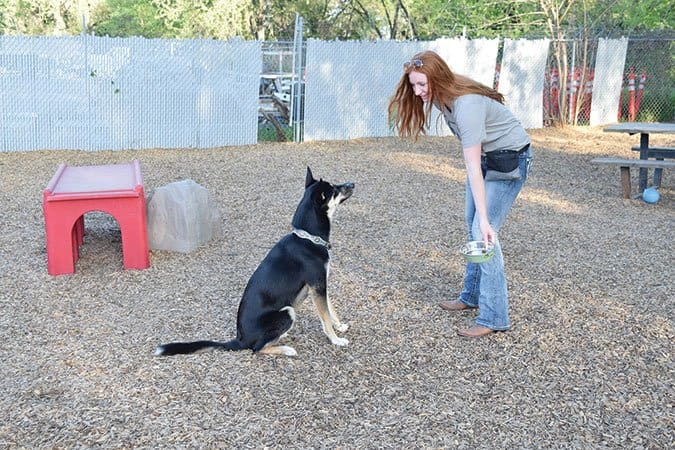
4. When you get the bowl all the way to the floor, set it down, click, and pick it back up before giving your dog the treat. Repeat several times, telling her “Wait” each time. (Be ready to raise it back up quickly if she tries to go for it!)
5. Next, when you get the bowl to the floor, click, but leave the bowl on the floor while you feed her the treat. Repeat several times, telling her “Wait” each time.
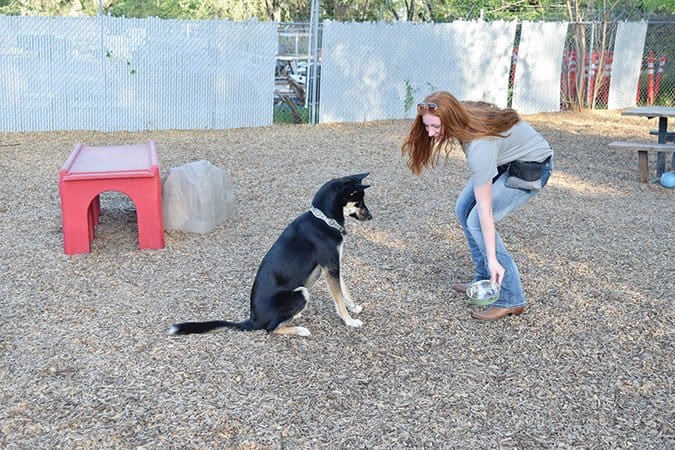
6. Finally, tell her “Wait,” set the bowl on the floor, click and treat, and tell her, “Okay, you can have it!”
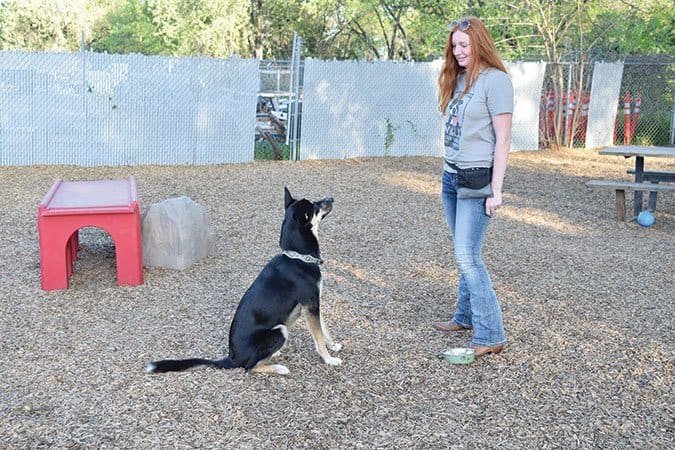
Some dogs will get it in just one session. These are dogs who naturally have better impulse control. Those who are more challenged by their impulses will need to practice over a period of several days or more before you can get the bowl all the way to the floor, depending on their energy level and attention span – and yours. At each meal-time session, practice as long as is practical for you and your dog, then just go ahead and set the bowl on the floor with an “Okay you can have it!” Eventually you will be able to just ask her to wait while you put the bowl on the floor, and you won’t have to click and treat, her meal is the reward!
A great thing about teaching “Wait” with the food bowl: Most owners feed their dogs twice a day, so you have two natural built-in practice sessions every day! Note: If you have multiple dogs, and they will invade each other’s dining space, you may have to separate them to teach this.
When your dog can wait for her food bowl reliably, it will be easy for you to generalize the behavior (and practice impulse control) in more challenging situations. You, like me, may come to find this is your most-used cue!
More Good Reasons to “Wait”
Circumstances arise every day where “Wait” comes in very handy:
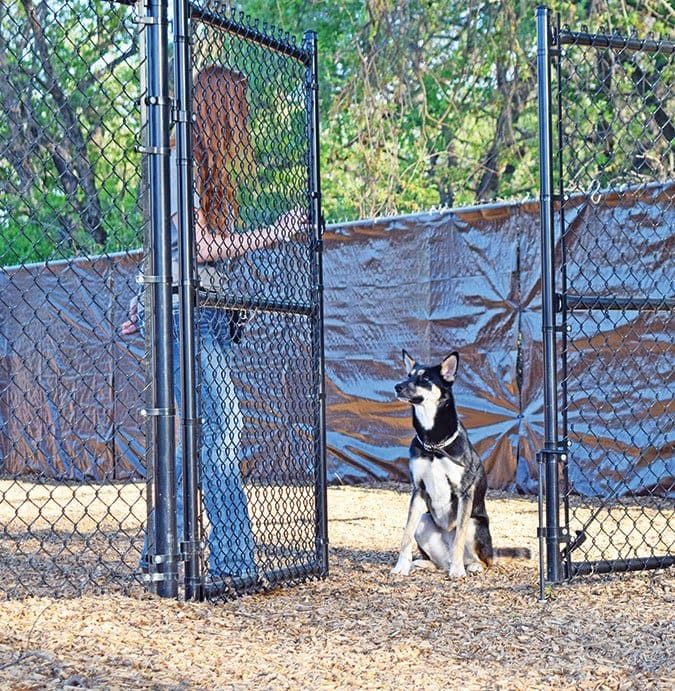
Wait at the Door: It’s important for your dog to learn that an open door doesn’t mean she gets to go running out, but rather, she needs to wait for an invitation. Start with her sitting at the door, ask her to wait, and reach a few inches toward the door knob. If she stays sitting, click, and treat. If not, “Oops” and start over, with even less of a reach toward the door. As she is successful, gradually reach closer and closer to the doorknob, eventually jiggling it, then opening the door a crack, then a bigger crack, until you can step outside without her following you.
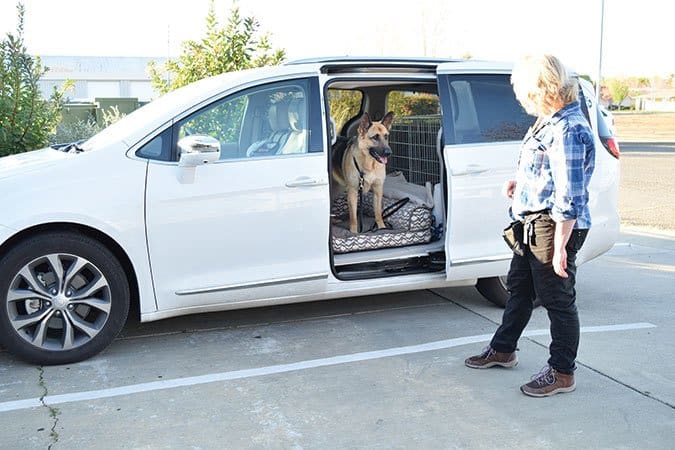
Wait in the Car: Practice “Wait!” in the car so she also understands that an open car door is not an invitation to jump out. This can be especially useful if your car ever breaks down on a busy highway. (Crates and seat belts are the best approach to keeping your dog safe in your car.)
Wait on a Hike: You can also use “wait” to ask your dog to pause if she’s wandering too far ahead of you when you’re on an off-leash outing. I use this one frequently on our around-the-farm hikes. Hearing the “Wait” cue, my dogs pause for several seconds, then continue their hiking fun. If I need a longer pause I just cue it again.
Wait to Greet: Your dog is very friendly and eager to dash up to greet that dog on the path ahead (or perhaps a senior citizen in the park) who looks less-than-enthused about a nose-to-nose encounter. A well-trained “Wait” will pause your dog long enough to let you grasp her collar, attach your leash, and orchestrate appropriate greetings.
Wait for the Leash: Because a leash is such reliable predictors of walks, lots of dogs get quite excited when their human picks it up. Ask your dog to sit and wait for the leash. If she jumps up when you pick it up say “Oops,” set the leash down, and ask her to sit and wait again. Repeat until she will remain seated and “wait” until her leash is attached.
Wait, It’s a Game!: Everything’s more fun if we make it a game, right? With your dog on leash, run with her a few steps, then say “Wait!” and stop moving. When she stops, pause several seconds, then say “Let’s go!” and take off running again. Encourage her to get excited! Then say “Wait!” and stop again. Vary the amount of time you pause so she never knows when the “Let’s go!” is coming. When she’s really good at stopping at your “Wait!” try it off leash running next to her (in a fenced area at first, if needed), and eventually with her farther and farther away from you.
How to Teach Your Dog to Stay
Stay is a more challenging behavior, since the criteria are less flexible. It takes more focus and concentration for both you and your dog. You have a greater responsibility; once you tell your dog to stay, you have to remember to subsequently release her from the stay.
Stay has three elements, often referred to as the three Ds: duration, distraction, and distance. In order, these refer to the length of time your dog stays, the reliability of your dog’s stay in the presence of distractions, and the distance you can move away from your dog while she stays put.
It is critical to work on duration and distraction before you work on distance. If your dog won’t do a reliable stay with distractions when you are standing in front of her, it’s wholly unrealistic to expect her to do it when you are across the room.
The most common mistake in teaching stay is advancing too quickly. If you ask your dog for too much and she makes a mistake, you may be sorely tempted to correct her for “breaking” the stay. Don’t. Remember that you want her to succeed so you can reward her for doing the right thing.
1. Ask your dog to sit, with your treats out of sight. Calmly praise when she sits and after one second, click and feed the treat (delivering it right to her mouth so she doesn’t jump up), then use a release word and encourage her to get up. (See “Choosing a Release Cue,” below.) You can praise her for getting up, but don’t click the release, since it’s the “stay” behavior that you want to reinforce and reward.
2. Gradually increase the length of time you expect her to stay. When she is staying for several seconds at a time, add the verbal “stay” cue in a pleasant tone of voice after you cue the sit. Remember, you aren’t trying to intimidate your dog into staying, you are using the word as information, a cue for a behavior.
3. As your stays get longer, you can click and treat during the stay, then give another verbal “stay” cue to remind your dog not to move, since she may think the click ends the stay. Reward with treats several times during the stay, then release her before she decides to get up on her own. You want her to succeed. If your dog does get up before you release her, just say, “Oops, sit!” and make your next stay shorter, to help her get it right.
4. When your dog will stay for 10-20 seconds you’re ready to add small distractions. Ask her to “Stay” and take one small step to the side, then step in front of her again. Click, reward, and release. Do another “stay” and take a hop on one foot. Click, reward, and release.
Gradually build distractions until she will stay as you hop up and down without stopping, do jumping jacks, clap your hands, sit or lie down on the ground in front of her, spin in circles, bounce a ball, have someone go by on a skateboard – or whatever other creative distractions you can invent. Gradually is the key. If you go directly from one hop to the skateboard you’re probably going to lose her.
Gradually is also subjective, depending on your dog. Bailey the Bloodhound may progress to a 20-second stay in the first session, while Chili Pepper the Chihuahua may excel at three seconds. Some dogs will achieve a solid “stay” at a distance with distractions within a few days; others will take longer.
5. When your dog can do 20- to 30-second stays with distractions you’re ready to work on distance. Lower your expectations for the other two elements: shorten the time and remove the distractions. Ask your dog to stay and take one step away. Click, return, reward, and release. Gradually increase distance, slowly, so your dog will succeed. Always return to your dog to reward and release her. You want the stay to be rock-solid.
If you start calling your dog to you from the stay, she may start breaking the stay in anticipation of the joy of running to you – and the reward. If she thinks the stay is never over until you return to her, the behavior will become solid as granite. Once her stay is very solid, you may occasionally call her from a stay. Even then, you will want to return and release at least 10 times for every one time you call her to you.
6. When your dog will stay at a distance, combine all of the elements. Again, lower the bar, adding distractions when you are one step, then three steps, then five steps away, always returning to reward and release. You can even leave the room while she is on a stay, briefly at first. Take one step out, step back in, return, reward, release. Gradually increase the length of time you stay out of sight. You can set up a mirror in the doorway to keep an eye on your dog, always remembering to return before she moves out of her stay position.
Remember, you want her to succeed. If she makes several mistakes in a row you are asking too much, and she is learning that breaking the stay makes you return to the room. Any time she starts making mistakes, return to an easier version of the exercise and get several successes in a row before you raise the bar again.
Choosing a Release Cue
The release cue is a word that means “Get up now, the stay is over.” Lots of people use the word “okay,” which is fine, but if you choose to use this as your dog’s release cue, be aware that it’s a word used frequently in conversation, making inadvertent and/or ill-timed releases a possible hazard. I use “okay” as my release word, but in a very specific, high-pitched, happy tone of voice, to distinguish from the “okay” I use in casual conversation.
Other commonly used cues are “Free!” “Free dog!” “Release!” Break time!” “At ease!” and “Go free.” You can use any word you want, as long as you keep it specific to mean, “The stay is over and you must get up now.” Be sure to encourage your dog to get up any time you use it.
Teaching Your Dog a Down-Stay
The down-stay is exactly the same, except you start by cueing the down position.
Whether your goal is to get your dog to park herself on a down-stay while you walk the final 20 feet to the end of the drive to fetch your newspaper, or you have visions of the two of you earning a perfect 200 score together in the rally ring, you can get there with a positive stay – no harsh words, no collar corrections, and no damage to the relationship of trust and respect that you and your dog both value so highly.
Author Pat Miller, CBCC-KA, CPDT-KA, is Whole Dog Journal‘s Training Editor. She and her husband Paul live in Fairplay, Maryland, site of her Peaceable Paws training center. Miller is also the author of many books on positive training. Her newest is Beware of the Dog: Positive Solutions for Aggressive Behavior in Dogs.


