


There are many times in your dog’s life when she needs to be able to control her impulse to engage in a behavior. Last month, we discussed “Wait” and “Stay” – but impulse control goes far beyond these “don’t move” cues.
“Leave it” is another impulse-control behavior that is very useful for your dog to know. The cue means, “Whatever you are focused on at this moment, I need you to leave it alone.”
Imagine the possibilities:
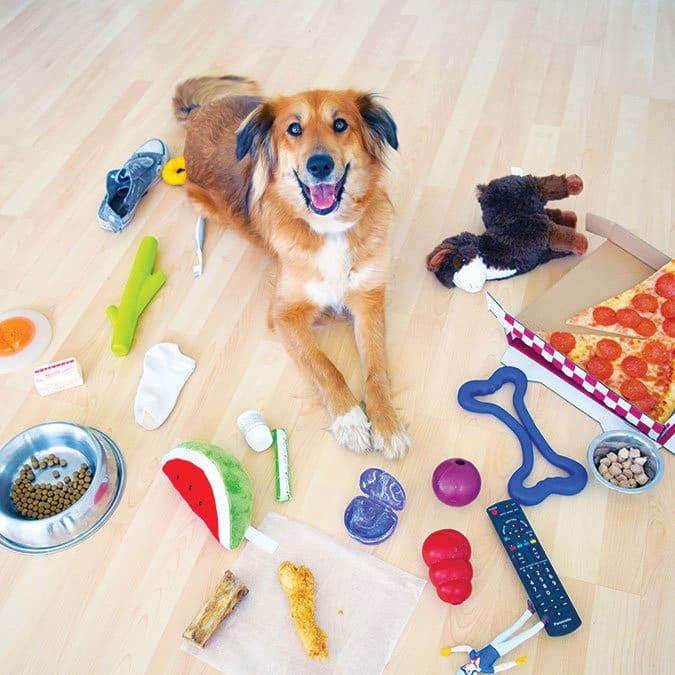
- You’re walking downtown with your dog on leash, and she spies a bag of Kentucky Fried Chicken remains in the gutter, bones and all. You cheerfully call out “Leave it!” and she promptly looks away from the bag as the two of you calmly walk past the temptation.
- You’re hiking in the woods and a skunk or a porcupine waddles into view. Your happy “Leave it!” cue draws your dog safely away from the hazard and the two of you walk on, unscented and unpunctured.
- Your grandmother comes to visit, and as she walks in the door your adolescent Labrador Retriever gathers herself to launch. Your well-timed, cheerful “Leave it!” keeps four paws on the floor, and leaves granny untouched and safe.
Seriously, the possibilities are endless. You’ll be amazed at the things you will be able to call your dog away from when she learns that the cue of “Leave it” means she has a terrific opportunity to earn a fantastic reward.
Differential Reinforcement for Other Behavior (DRO)
We teach “Leave it!” by setting up the training situation so the dog cannot access the temptation no matter how hard she tries, and then reinforcing her for any behavior other than trying to get the “forbidden object.” In behavior lingo, this is known as DRO, or Differential Reinforcement for (any) Other behavior. Here’s how it works:
Teach a Dog to Leave It
Level 1: Protected Leave It
In this, this initial stage of teaching this behavior, you introduce the concept in a carefully controlled protocol that is designed to set her up to succeed. You will carefully protect the treat so she can’t accidentally get it.
1. Show your dog the “forbidden” treat. I like to use freeze-dried liver cubes, as they are desirable (high-value) for most dogs, don’t smash easily, and can be easily hidden under my foot. You can use any small (1/2 to 1-inch square), durable, high-value treat.
2. Say “Leave it!” in a cheerful voice before you put the cube on the floor, and then position it under your shoe. The cheerful tone is important. You are just giving your dog information – not trying to warn or intimidate her into leaving the treat alone.
3. Wait. You dog will probably lick, chew and/or paw at your foot to try to get the treat. (Wear sturdy shoes!). Do not reprimand her for this, and do not repeat the “Leave it!” cue. Just wait. If her tongue is sliding under your foot and tasting the treat, tip your shoe forward so she can’t lick the cube.
4. As soon as she looks away from your foot for any reason, click and feed her a treat. Remember, you are using DRO; you will click and treat any behavior other than trying to get the treat. If she looked away because she heard a dog bark, click and treat. If she glances at a bird flying by, click and treat. If she looks up in confusion or frustration, click and treat.
5. Continue to click and treat for anything other than paying attention to your shoe. She doesn’t have to look at your foot again and then look away; in fact, ideally, she will continue to look away while you click and treat several times. We don’t want her to think she has to look at your foot and then look away each time to get the click and treat. We want the “look away, look away, look away” behavior, not “look then look away; look then look away; look then look away.”
6. If your dog seems to have totally forgotten that the treat is under your shoe, carefully uncover it and tap your foot next to it to draw her attention back to it. Be ready! When she sees the treat and dives for it, calmly cover it again with your shoe – do not reprimand her, and do not repeat the “Leave it!” cue. Then do a series of reinforcements for “look away, look away, look away, look away” before uncovering it again.
7. Eventually your dog will glance at the uncovered treat and, realizing she’s not going to get it, she will look away to get you to click and treat, without diving for the cube. This is a huge moment – she’s beginning to understand and she’s beginning to exercise impulse control! “I see it. I want it. And I’m not going to try to get it.” The best way to get a treat is to not try to get the treat. Kind of Zen!
8. Now you can gradually leave the treat uncovered for longer and longer, always ready to cover it again with your shoe if she has a relapse and tries to go for it.
9. Occasionally pick the treat up, show it to her again, say your “Leave it!” cue, and place it back down under your shoe. (When you pick it up and put it back down on the floor it’s a new “trial,” so you do repeat the cue.)
10. When your dog will consistently and reliably leave the cube alone even when uncovered, say “Leave it!” and then place the treat on the floor near your shoe. Be ready to cover it if necessary. When you can do this consistently without your dog trying to eat the treat, your dog is starting to develop significant impulse control, and you are ready for Level 2.
Important:When your training session is done, do not just leave the treat on the floor or invite your dog to eat it. You just spent 20 minutes telling her she couldn’t have it – and you want “Leave it!” to mean forever! Don’t undo all your good work! If you want to feed her that treat, pick it up, move several feet away to a new location, and feed it to her from your hand.

Level 2: Generalizing Leave It to Real Life
In this level, you are starting to ask her to Leave It in circumstances that more closely approximate real life.
1. Warm up with your Level 1, Step 10 protocol (or lower if needed).
2. Now say “Leave it!” in a cheerful tone, and carefully drop the treat so it lands slightly off to the side and behind you. Try not to let it take a bad bounce and land under her nose! This is harder, as our dogs are pretty accustomed to being able to eat treats that we drop. Be prepared to body block and/or cover it with your foot if necessary.
If she doesn’t try to get it, click and give her a treat from your hand and tell her how wonderful she is! If she does try to get it, wait for her to look away from the cube – click and treat. Repeat until you can easily drop the treat after your Leave It cue, without having to body block or cover it.
3. Next, drop the treat first, followed immediately by your “Leave it” cue. (This simulates a real-life – oops! You dropped your blood pressure pill – or whatever – on the floor and you don’t want her to grab it.) Be ready to cover the cube with your foot if she dives for it! Click and treat when she leaves it alone. Repeat until you can follow the dropped treat with your “Leave it!” cue and she will reliably and consistently leave it alone.
Level 3: Temptation Alley
This level replicates real life and generalizes the “Leave It” cue to a variety of tempting objects your dog might encounter around the house and while out for a walk.
1. Leave your dog in the house while you set up your Temptation Alley (TA). On a paved or gravel surface (driveways work well) or on bare dirt, lay out several items that your dog will likely be attracted to, such as a tennis ball, a stuffed squeaky toy, a pile of tasty treats, a stuffed Kong, and a bowl of kibble. Items should be placed eight to 10 feet apart.
2. Bring your dog out of the house on leash and walk toward your TA. As soon as your dog sees the first item and wants to move toward it, say “Leave it!” in a cheerful voice, stop moving, and restrain her with the leash so she can’t reach the item.
3. Wait. Do not tug on the leash, do not reprimand, and do not repeat the “Leave it!” cue.
4. When your dog eventually looks away from the first item for any reason, click and treat, and move forward. As long as she looks away from the item, click and treat for attention and good leash walking as you move forward. Use a high rate of reinforcement (lots of clicks and treats – she’s doing great!) Stay far enough to the side of your TA that your dog cannot access the items as you pass them.
5. If your dog looks at or moves toward the item again once you are in motion, say “Leave it!” again and stand still. Wait for her to look away, click and treat, and move forward again. Attention to each new item gets a new “Leave it!” cue. Repeat until your dog can move at a safe distance past each item without even looking a second time after she hears “Leave it!”
Level 4: Real Life
You can certainly use this cue at any point in real life during this process – if you can control your dog’s access to the tempting thing/person, thereby setting her up to succeed. For example, if she’s on-leash and pulling you toward a baby in a stroller, give your “Leave it!” cue and use your leash to gently prevent her from having access to the baby. When she looks away, click and treat.
Conversely, if she’s not yet reliable with her response, avoid using the cue when it’s likely that it won’t work. Otherwise, you will inadvertently reinforce her for not responding to your “Leave it” cue.
When you have practiced all the various setups to the point you are confident that your dog is skilled and fluent in her impulse-control behavior, you’re ready to move on with real life, using the cue successfully in situations where you need her to resist the temptation to eat or greet some real life stimulus: chicken in the gutter, another dog, a passing senior citizen – you name it, she can leave it! People will be impressed. Kudos to you for your investment in having a happy, responsive, well-behaved dog!
“Leave It” FAQs
Q: In Level 1, why do I need to say “Leave it” before I place the cube under my shoe?
A: You want to give your dog the information before she makes a mistake. Imagine you are giving a cocktail party, and you are about to place a tray of appetizers on the coffee table. You want to cue your dog to “Leave it!” before her nose is in the guacamole.
Q: Why do I not repeat the “Leave it!” cue while my dog is doing her best to try to get the treat out from under my shoe?
A: You want your dog to understand that “Leave it” means forever; you shouldn’t have to constantly nag her to remind her. Back to your cocktail party -now that the appetizers are on the table, you don’t want to have to remain there for the entire party, reminding your dog to “Leave it!” every time she looks at them.
Q: Why do I need to say “Leave it!” cheerfully? Why can’t I use a “warning” tone?
A: As always in force-free training, we want our dog’s voluntary and happy cooperation in the behaviors we ask of her. It’s why we use cues instead of commands. A commanding tone of voice may intimidate her into leaving the treat alone, but it also adds stress to the activity, has potential for damaging your relationship with your dog, and may make it less likely that she will do what you ask in circumstances where she realizes she has a choice. We want her choice to be happy cooperation!
Author Pat Miller, CBCC-KA, CPDT-KA, is WDJ’s Training Editor. She lives in Fairplay, Maryland, site of her Peaceable Paws training center. Miller is also the author of many books on positive training.


this very use pitcher
This is very informative and useful post. Thanks for sharing!