Subscribe

The best in health, wellness, and positive training from America’s leading dog experts

Home Blog Page 301

How to Conduct a Home Health Exam for Your Dog

0

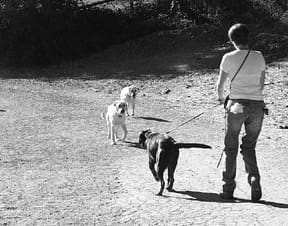
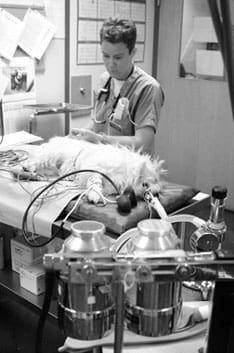
Everybody knows that early detection and treatment of disease is vital for a quick and successful recovery. That’s why humans and their canine companions are supposed to see their doctors at least annually for a complete physical examination.

Of course, if a human happens to notice a strange lump or other abnormality on his own body, he can (and should) get on the phone and make an appointment to see his doctor right away. The doc could check out the abnormality, and either put the person’s mind to rest that it is nothing to worry about, or order tests and/or treatment.

In contrast, if a dog happens to develop a lump or other abnormality, it might take quite a bit of time before anyone notices it – least of all, the dog! And, unfortunately, there are numerous health conditions that can develop and present a real danger to your dog in between annual veterinary examinations.

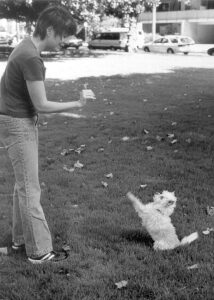
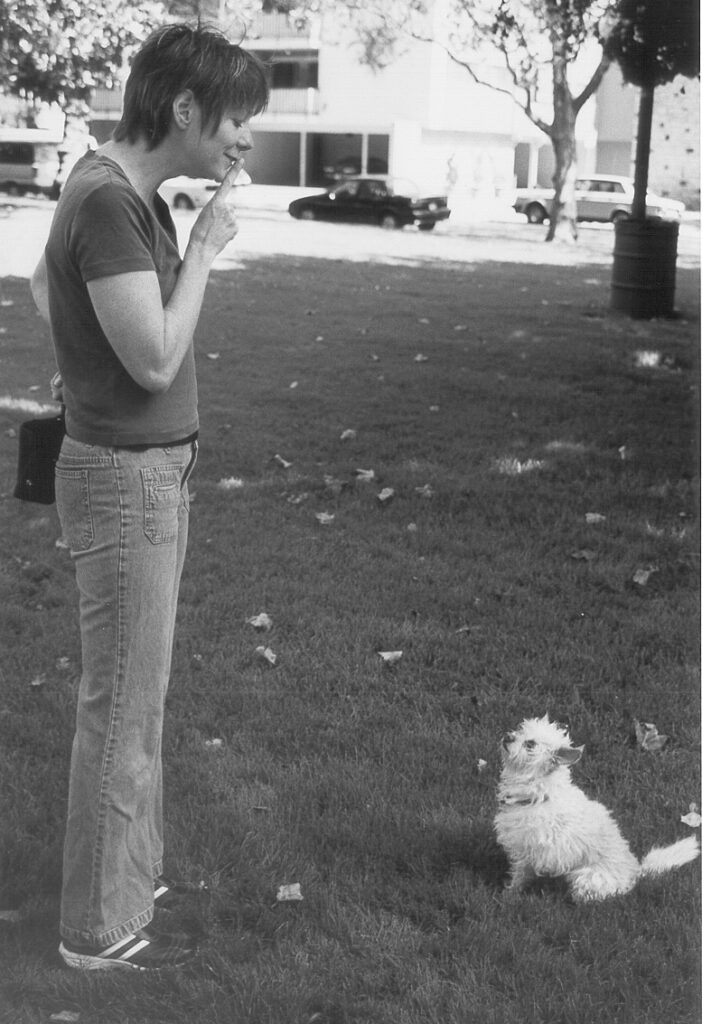
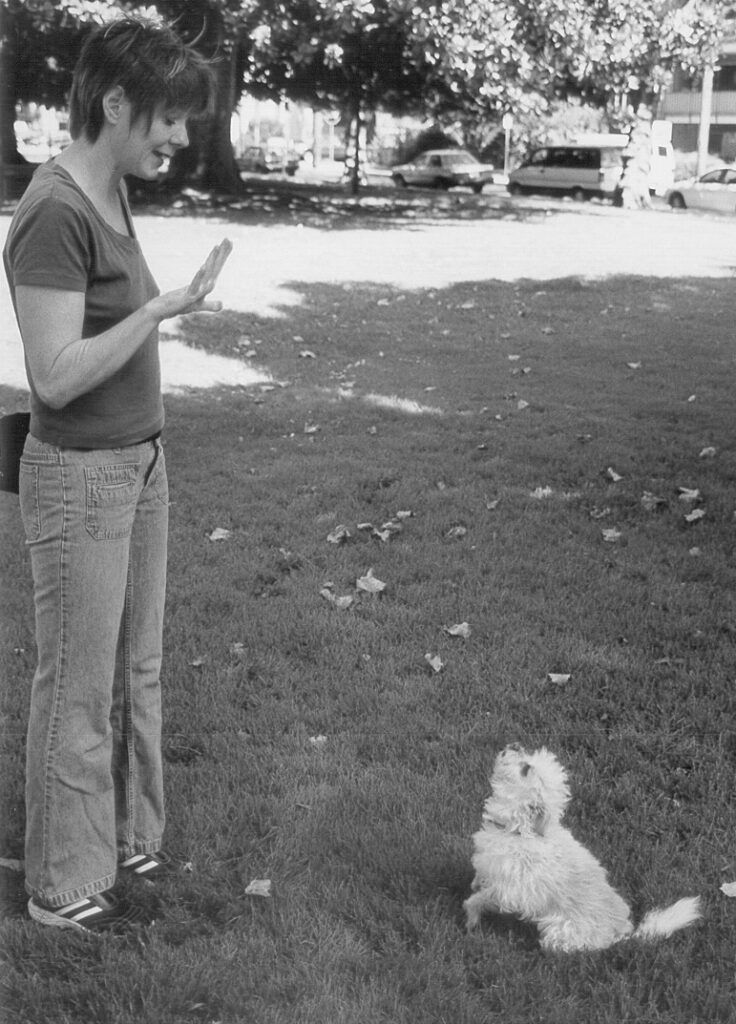
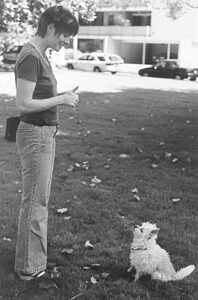
The good news is that you can detect many early signs of disease if you know how. By performing a quick but methodical monthly physical on your dog, you can monitor ongoing problems (or things that may become problems) and be alerted to any new issues. This examination can take as little as 10 minutes, helps you and your dog bond, prepares him for veterinary attention – and, if he is developing a dangerous health condition, it just may help save his life.

Do the same thing
It’s best to follow a consistent routine, so your dog becomes comfortable and relaxed with the procedure, and to increase your familiarity with his body, lumps, bumps, and all. Write out and follow a short outline, to remind yourself about each part of the dog’s body you want to check.

It would be ideal to devote a small notebook to chronicling the results of your examinations, as well as your veterinarian’s findings. Dated notes about any abnormalities can help your vet diagnose or monitor ongoing problems.

While the monthly examination should take only about 10 minutes, allow for half an hour or so for the first exam, so you can write a brief descriptive note about the location and appearance of each abnormality you find. This will serve as a baseline from which you can compare any new developments. Try to describe each finding in terms you will immediately understand the next time you undertake the exam. For example, if your dog has a growth on her eyelid, try to think of something that is the same size, and note the comparison: “Growth on left side of right eyelid, about the size of the head of a pin but oval-shaped. Same color as her skin.”

Sit in a well-lighted area for optimum viewing. Make sure both you and your dog are comfortable and relaxed. Gather all the materials you need so you don’t have to get up several times. A good supply of treats for rewarding cooperation and a notebook and pen are the bare minimum. You can add some ear cleaner, cotton balls, a thermometer, and a watch with a second hand and a stethoscope, if you want your exam to be as complete as possible.

We recommend starting your examination at the front of the dog and working your way back.

Mouth
To check your dog’s mouth, start by rolling her upper lip back. You want to see clean, white, whole teeth and nice pink gums, and the dog’s breath should be tolerable. If you see a dark or brown tooth, rub it with your finger to determine whether it is simply discolored or whether it is caked with calculus. A buildup of tartar will result in inflammation of the gums, called gingivitis, which will make the gumline appear a darker red color along the teeth.

A buildup of tartar, especially if the dog is already showing signs of gingivitis, should prompt you to make an appointment with your veterinarian for a teeth-cleaning, because the periodontal disease that can result from tartar buildup and gingivitis can profoundly affect a dog’s health.

According to Frank Verstraete, DVM, and a Diplomate of the American Veterinary Dental College, periodontal disease can cause bacteria and toxins to enter the bloodstream with potentially destructive effects on the dog’s internal organs. Conversely, overall poor health may exacerbate periodontal disease.

In addition to tartar accumulation and gingivitis, you should also look for any broken or cracked teeth. Like humans, dogs have highly sensitive tissue (pulp) inside their teeth, and if a tooth cracks or breaks, exposing the pulp, the dog can suffer excruciating pain and distress. If you find any broken or cracked teeth, you should have your dog seen by his veterinarian as soon as possible for treatment.

Any unusual tissue growth in the mouth should also trigger a call to your veterinarian. Oral cancer is fairly common in dogs, but can be treated successfully if caught in its early stages. Oral tumors may appear as a prominent mass, or as an ulcerated sore that just won’t heal.

Old dogs may have teeth that are worn right down to the gumline. Generally, this condition does not cause a dog any pain or sensitivity or result in infection. Unless the dog’s breath is very bad, the gums around the worn teeth are very red, or he exhibits sensitivity when you press on the teeth, this is not cause for alarm. Ask your veterinarian what he thinks about the teeth at your dog’s next annual examination.

Nose
The saying that a dog’s nose should always be wet and cold is just an old wives’ tale. In the course of a normal day, a dog’s nose will vary quite a bit, from warm and dry, to wet and cold, and other possible combination. Seasonal temperature and humidity changes may affect your dog’s nose as they do yours; you just want to check your dog’s nose for discharge that’s more than transient, again noting any changes from the usual.

That said, if your dog’s nose is always dry and cracked, scabbed, crusty, or raw, he should be seen by your veterinarian. There are numerous dermatological conditions that can cause the nose to appear this way, and most of them will worsen without treatment. A thick or greenish discharge could indicate your dog has a respiratory infection or a foreign body in his nose or sinus.

Eyes
Bright, clear eyes are a sign of good health in any species. There are several conditions that can cause dogs to develop cloudy eyes as they age; ask your veterinarian what condition is causing your dog’s eyes to cloud at your dog’s next annual exam. Then, just monitor the progress of the clouding.

Check for growths on your dog’s eyelids. Briefly lift the dog’s upper eyelid to look at the sclera, the white part of the eye. While some blood vessels may be visible, the sclera should be nice and white. Scleral injection, or colored sclera, could indicate metabolic changes. Yellow sclera may indicate jaundice, an indicator of liver dysfunction. These signs, or blood vessels that suddenly appear larger than normal, are things you should ask your vet about at your dog’s annual exam.

Many dogs – especially breeds with bulgy eyes – have more or less constant “tearing” or eye secretions. This is not a cause for concern, but any sudden change in the amount or quality of the tears should be investigated. If your dog suddenly begins to rub at her eyes, if the lids become red and inflamed, or if the discharge becomes thick or green, your vet will need to examine her. These signs may indicate something as trivial as seasonal allergies or blocked tear ducts, something that requires a quick surgical procedure (such as inward-growing eyelashes or turned-in eyelids), or something that may require ongoing treatment, such as glaucoma or keratoconjunctivitis sicca (KCS, or “dry eye”).

Ears
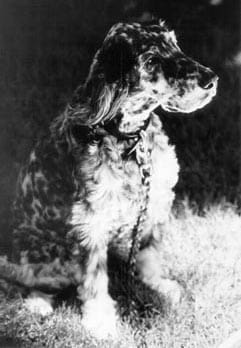
Dogs with upright or sparsely furred ears seldom seem to have “hidden” problems with their ears, but breeds with ears that hang down or have lots of hair on, in, and/or around them seem to suffer lots of ear infections. You want to lift the ear and find pink, clean, non-smelly ears. In contrast, discharge, lots of waxy dirt, and strong smells could indicate foreign bodies or infection, changes that need further veterinary attention.

If your dog frequently has goopy ears, you should clean the outer parts of the ear with some soft cotton balls and a commercial ear cleaner to prevent a buildup that can cause infection. For routine ear care, we especially like gentle cleaners such as Halo’s “Natural Herbal Ear Wash” (www.halopets.com) and Ark Naturals’ “Ears All Right Gentle Ear Cleaning Lotion” (www.arknaturals.com). Both of these products may be found in or ordered from better pet supply stores or health food stores. They contain herbs that soothe irritated, inflamed skin and seem to promote a healthy ear environment.

Dogs with long or thick hair can sometimes develop mats behind their ears, which can interfere with the normal movement of their ears or cause a sore on the skin. Check the hair around the back of the ears carefully, and clip away any mats you find.

Body
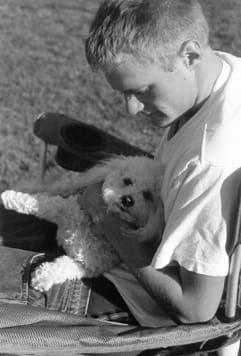
Checking the body of a dog with a short coat is a lot easier than a thick- or long-haired one. Thin-coated dogs such as Weimaraners or German Shorthaired Pointers are easy to stroke, feeling with the fingers for any bumps, changes in the normal musculature, and sensitive spots.

On dogs with long or thick coats, you will have to proceed more slowly, deliberately feeling every inch of the dog’s neck, shoulders, back, ribs, abdomen, and back legs. Pay special attention to places that are difficult to see, such as the armpits, under the tail, and under the dog’s collar. As you progress, look and feel for bumps, swellings, lumps, or hardenings.

Lumps and bumps can be any number of things, including benign, slow-growing fatty tumors or fast-growing malignant tumors. By making a note of the location, size, and growth rate of the lump, you’ll be able to give your veterinarian good information so he can decide whether or not urgent removal of the lump might be necessary.

As you palpate your dog’s body, remove any plant materials, such as burrs, sandspurs, foxtails, or other stickers that may be lodged in your pet’s coat. All of these stickers can cause matting or migrate through the dog’s coat, irritating ears, noses, toes, and “armpits.” If not removed, these plant materials may cause local, then systemic infection.

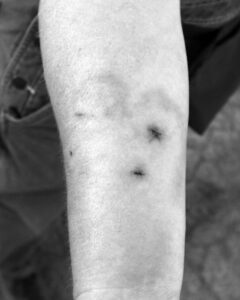
Little bumps may be revealed to be ticks, biting parasites that can transmit Lyme disease, ehrlichiosis, or Rocky Mountain Spotted Fever. Fortunately for us, the insects take their time finding attachment sites, and even then, take a while to inject the disease vector. Comb through your dog’s hair to spot and remove loose ticks as soon as possible after a hike or walk.

Attached ticks can be removed with a pair of tweezers or a special tick-removing tool, by grasping it firmly as close as possible to the dog’s skin. Look carefully at the tick after you’ve removed it; if it appears to be missing its head, keep an eye on the site of attachment on the dog for a week or two, using dilute Betadine solution or other antiseptic scrub to ward off infection.

Feet
Examine each one of your dog’s paws individually. Hold each paw in both of your hands, spreading the toes to look and feel in between them. This is a common location for sores caused by stickers or aggravated by excessive licking. Turn her foot to see the pads, feeling for invasive stickers or unusual roughness.

If your dog has long hair on her feet, make sure you pull it back and take a good look at her nails. Many long-haired dogs develop excessively long nails, because no one looks closely enough to realize they need to be clipped. If your dog has dewclaws – the little vestigial “toes” high on the inside of his ankles – be sure to check the nails on them to ensure they are not too long. Because these nails don’t come in contact with the ground, they will sometimes grow inward and irritate the dog’s skin.

If you don’t regularly trim your dog’s nails, you should at least take him to a groomer every month or so to have someone else trim them. But it’s not that difficult to do yourself. See our review of various nail clipping tools in “You Nailed It!” WDJ February 1999, and directions on how to train your dog to tolerate nail trimming on page 22 of this issue.

Under the tail
Last, but not least, run your hands over and around the rump area, and down the tail. This is a private area, and some dogs don’t relish having their anal area examined. Lift the tail and look for redness, irritation, swelling, or other signs that your dog is paying unusual attention or licking a reddened area on or near the genitals or anus.

If you see little white things that resemble grains of cooked white rice, remove them with a paper towel (or wearing rubber gloves) and dispose of them. Then, go ask your veterinarian for a dewormer. The little white things are tapeworm eggs. Dogs acquire tapeworms by ingesting fleas, usually in the act of biting themselves in an effort relieve itching fleabites. To thoroughly control tapeworms, you must control fleas. (See “Eliminate Fleas Without Poisons: Integrated Pest Management,” WDJ March 2002.)

Methodical approach is best
Many of us are shocked when we take our dogs to the veterinarian and she points out troubling signs of disease or illness. “My gosh,” we are embarrassed to admit, “I never noticed that!” We feel even worse to learn that the dog’s condition could have been prevented or treated much more easily had it been discovered earlier.

By looking closely at your whole animal on a regular basis, singular physical, attitudinal, or behavioral changes should be more noticeable to you, which can help you and your vet narrow down potential sources of problems. By consistently and routinely examining their pet, establishing a health baseline of normal for that individual, guardians may be able to further narrow down the timing and physical origin of problems.

-by Susan Eskew

Susan Eskew is a freelance writer (and wife of a veterinarian) currently living in North Carolina. She wishes to thank Kristen Chaney, a senior veterinary student at Colorado State University, Ft. Collins, College of Veterinary Medicine and Biomedical Sciences and a community practice help-line volunteer, and Kim Hombs, DVM, a holistic veterinarian from Charlotte, NC, for their help in preparing this article.

How to Safely Break Up a Dog Fight

Hang around with dogs long enough, and sooner or later you’re likely to encounter a dogfight.

It might be a battle over resources – food, toys, territory, or your attention – or one dog taking offense at another’s physical communication style. It could be a struggle for position within the social status hierarchy, or simply a matter of a dog being in the wrong place at the wrong time.

Perhaps it’s a case of redirected aggression – Fido really wanted to attack the stray dog on the other side of the fence but couldn’t get to him, so he turned on Snoopy instead. Or you may have the misfortune of experiencing one of the most frightening dogfight scenarios – when an aggressive stray dog attacks yours while the two of you are taking a simple walk on leash around the block.

strange dog attacks
It pays to think about what you would do if a strange dog attacked your dog when you were out walking together – before an attack actually happens. If you are mentally prepared and equipped with some kind of tool that can help, the odds are good that you will be able to get you and your dog away from trouble without injury.

Dogs fight. Despite the genetic programming that generally allows dogs to live harmoniously in groups, from time to time the harmony is shattered and a real fight occurs. When it does, it can be terrifying and dangerous – to the humans as well as the canines who get involved in the fracas.

Your first instinctive response may be to yell at the top of your lungs to try to break up the battle. Your second is often to reach in and attempt to bodily rescue your canine pal – especially if it appears he is getting the worst of it. Neither of these actions is likely to be effective. Yelling often adds fuel to the stress and arousal that led to the fight in the first place, and only intensifies the battle. Reaching into the fray more often than not results in your receiving multiple lacerations – sometimes inflicted by your own dog, who is too engaged in the battle to recognize or respect his own person’s hand, arm, or face.

Of course, you can’t just stand back and watch when a ferocious dogfight is in progress, especially if your tiny teacup Poodle is getting mauled by a Mastiff. So, what should you do?

Dog Fight Prevention: Manage and Train Your Dog

I’ve lost track of how many times we’ve said this, but as always, prevention beats cure. It is imperative that you manage and train your own canine family to minimize the risk of serious dogfights. Identify situations that are likely to light the dogfight fuse, such as fence-fighting or resource guarding, and figure out how to avoid them and/or modify the behavior that causes them.

In addition, you must establish a calm home atmosphere. Dogs who live in a structured environment – where it is clear which behaviors are allowed and which are not – are much more likely to live in harmony than those who live in homes where chaos reigns. Something as simple as requiring all dogs to sit politely before the door is opened to the backyard can help instill order in the pack and respect for you as the benevolent leader of the family.

It’s fine to allow your dog to play in groups at places like dog parks, daycare, and neighborhood dog romps, as long as you make sure that members of the social groups are appropriate playmates in terms of size, personality, and play style. Play group opportunities help to keep dogs well-socialized, which helps prevent dogfights.

Most dog parks have rules that require their canine park users to “be nice.” Politely ask human guardians of inappropriate members to remove their dogs from the group. If they refuse, remove your own dog(s), and report the offender to the users’ group or other authority responsible for monitoring dog park use. If your dog has trouble being “nice” around other dogs, then you will need to take a pass on these social outlets.

If you live in an area where aggressive stray dogs are common, request that your local animal services agency step up their patrol efforts so that you can safely walk your dog. If Animal Services is reluctant to step in, speak with your elected officials about what needs to be done to make the agency more responsive to community needs. If you can identify owners of the errant dogs and feel comfortable approaching them, explain that their dogs are causing problems, and politely ask them to keep the dogs at home where they belong.

Protecting Your Dog Against Other Dogs’ Aggression

You can’t always predict and prevent incidents of serious dog-dog aggression. You can, however, be prepared to intervene safely to protect your dog – and yourself – should the necessity arise. Familiarize yourself with various tools and techniques that have the greatest chance of successfully quelling doggie disputes with the least injury to all parties. Then determine which are most appealing to you, and be sure to have them on hand (and in your head) should the time come when you need them.

These tools and techniques range from small and simple to big and bold. It is important to remember that none of them are foolproof; they all involve some inherent risk to the dogs who are fighting and to the humans who are trying to intervene, and they all can be applied with varying degrees of success. You will need to weigh the odds and decide, in each case, if the risk outweighs the potential for injury from the fight itself.

The topic of breaking up dogfights came up recently during a discussion between Association of Professional Dog Trainers (APDT) members, and generated an interesting list of suggestions. Let’s look at some of them and see how useful they might be (or not!) for the average dog on the street.

Avoiding Dog Fights Altogether

Prevention means making wise decisions about dog husbandry that will keep you in the best position to avoid dangerous conflict.

Beverly Hebert, of Sugar Land, Texas, no longer walks both of her German Shepherds at the same time, so she can better manage a situation if it does arise. She realized that having more than one dog on leash puts her at an impossible disadvantage if she and her canine friends are approached by an unfriendly dog – or pack. She feels much more confident about her ability to use appropriate tools and techniques to protect one dog than two.

umbrella for blocking dog
While shopping for a plain umbrella that we could paint big eyes on (to make a scary or surprising aversive), we found this umbrella in a children’s clothes shop.

She also tries to use good sense about when and where to walk her dogs. She says, “When we were on vacation with our dogs in Taos, New Mexico, my husband wanted to go for walks with the dogs down a mountainside road in an area filled with dogs. He thought I was a ‘Nervous Nellie’ because I wouldn’t do that, but every time we passed a home with no fence and a loose dog I heaved a sigh of relief that our dogs weren’t with us.”

Using Aversives to Stop Dog Fights

Aversives are tools that a dog finds offensive to the senses – smells, sounds, and other stimuli that are strong enough to stop a behavior. In general, aversives can be most effective if used to interrupt fighting dogs prior to full arousal in an altercation; their effectiveness decreases as arousal levels increase, although they may still succeed in stopping many full-scale fights. Aversives should also be considered primarily a tool for crisis intervention – I don’t recommend using them as basic training tools.

Marni Fowler, of Gainesville, Florida, reminds us that blasting dogs with water from a nearby hose is a tried and true method of separating fighting dogs. She’s right – and it often works – assuming a hose happens to be nearby with a powerful enough spray to do the job. A good tool to keep in your arsenal for the right time and place – like your own yard. Not particularly useful, however, when there’s no hose handy!

One of the easily-portable aversive sprays, such as Direct Stop™ (citronella) or Halt!™ (pepper spray) might be an effective alternative to the hose. Of the two, Direct Stop, available from Premier, is the safer choice, since pepper spray products are more corrosive, and the spray can drift and affect innocent bystanders – humans as well as dogs. There are laws in some jurisdictions requiring that users of pepper spray products complete a training course and carry a permit. In a pinch, even a fire extinguisher, while not easily portable, might just happen to be a handy and effective aversive tool.

Debi Davis, of Tucson, Arizona, trains service dogs from her wheelchair, and is always accompanied by one or more of her own service-trained Papillions. The dogfight topic is of great interest to her, both because her dogs are small and more vulnerable than many others, and because her own mobility and ability to protect them is limited.

Davis has an air horn attached to her chair that makes 10 different sounds, including sirens, horns, barnyard animals, etc., and she can crank the sound up to a deafening level. Air horns (available at boating supply stores) can be effective at warding off attacking dogs, but your own dog has to be desensitized to the cacophony, or you are likely to lose him as well! You can also risk damage to eardrums, both canine and human, and you do take a chance of frightening your own dog beyond repair.

Nicole Wilde, of Gentle Guidance in Santa Clarita, California, says that she had good success most of the time with air horns when she worked at a doggie daycare center several years ago. Wilde says they were quite effective in breaking up fights in a majority of the cases.

Using Physical Objects to Stop Dog Fights

A number of trainers suggested intervention with a physical object of some kind. If fights are a regular problem in your household you might attach a handle to a sheet of plywood so you can lower it between two sparring dogs and force them apart.

Dogfighters – and some pitbull owners who don’t fight their dogs but know the breed’s potential – carry a “parting stick” or “break stick” with them wherever they go with their dogs. This is usually a carved or whittled hammer handle, tapered to a rounded point at one end. When two dogs are locked in combat, the parting stick can be forced between a dog’s teeth and turned sideways, to pry open the jaws. Parting sticks can break a dog’s teeth, and a dog whose jaws have just been “parted” may turn on the person doing the parting. Like many other techniques offered here, this method should only be considered for dire emergencies.

A blanket can also be a useful tool. Tossed over the fighters (one over each works best), it muffles outside stimuli, thereby reducing arousal. This also allows the humans to reach in and physically separate the combatants by picking up the wrapped pooches with less risk of a serious bite – the blanket will also cushion the effect of teeth on skin if the dog does whirl and bite.

Laura Van Dyne, CPDT, of The Canine Consultant, LLC in Carbondale, Colorado, suggests a defensive technique she saw demonstrated at a conference by Trish King, Director of the Behavior and Training Department at the Marin Humane Society in Novato, California. King paints big eyes and teeth in bright paint on an umbrella – the kind that explodes open at the touch of a button – them carries it, folded up, when walking in places where stray dogs are a threat. When an aggressive dog approaches, whoosh!, the “Defend-A-Brella” leaps into action and wards off the threat. You would, of course, need to desensitize your own dogs to the umbrella action prior to using it in real life. This is not as likely to stop a fight in progress, but may well forestall an attack from an approaching dog.

Keep in mind that your goal is to avoid getting bitten, at all costs. Dog bites can cause pain and deep bruising (as seen above in the picture of a week-old bite on the forearm) as well as nerve damage and other long-term effects.

Janet Smith, Behavior Program Manager for the Capital Area Humane Society in Lansing, Michigan, offers a somewhat drastic technique, reminding us that when a dog’s life and limb are at stake, drastic measures may be called for. Smith says, “You can wrap a leash around the aggressor’s neck or get hold of a collar and twist to cut off the dog’s airflow, until he lets go to try to get a breath of air, then pull the dogs apart.”

Of course, this could be more difficult than it sounds. It might be a challenge to get a leash around the neck of a dog who is “attached” by the mouth to another dog without getting your hands in harm’s way, and grabbing a collar to twist also puts hands in close proximity to teeth.

Using Your Body to Intervene a Dog Fight

Jackie McGowan, of Click Start Dog Training in Calgary, Alberta, Canada, attended a seminar given by Turid Rugaas, and reports that the highly respected Norwegian trainer had few suggestions for magic techniques for breaking up fights. According to McGowan, Rugaas said that she usually gives dogs a chance to work it out, but if it is apparent that this is not going to happen, she will try and walk between and/or gently pull one dog away by his collar. Rugaas also cautioned seminar attendees that she would not recommend this to others handling a fight because the risk of injury to the human is high.

Carla Baker of A to Z Training in Olympia, Washington, recalls a rather drastic technique she observed in action at a dog show some 20 years ago. “Two dogs got into it and were going to cause some major damage,” Baker says. “The elderly judge was a very tiny woman, and she had the handlers both grab their dogs and hold on tight. Then she went up and took the dog on top by the tail and jammed her thumb up his rectum. He let go in an instant and whirled around to see what the heck was happening. The judge excused the two dogs, calmly washed her hands, and then continued her classes without a hitch – just as if it happened every day.

“Don’t know that I’d try this myself,” Baker concluded, “but it sure did work!”

Valerie Poulton, of Val’s Good Dogs in Omaha, Nebraska, offers one more approach to physical intervention; one that could be a little difficult if the aggressor is a 150-pound St. Bernard, but sounds worth trying with a smaller dog. This method was demonstrated at Poulton’s training club last year by author and trainer, Suzanne Clothier. Poulton has since tried it herself and reports that it worked for her on two separate occasions with her own dog – but only in a one-on-one dog brawl; she would not recommend it in a multi-dog fight situation.

“Lift the rear of the clearly-identified aggressor so that he is suspended with his forefeet barely touching the ground,” Poulton explains. “The dog lets go, and the target can scoot free. ”

Poulton cautions that her dog is dog-aggressive only, and will not turn on a human. “Supposedly, in this position the dog is not able to turn on the human suspending him, although I cannot say I have used it with a dog who might try.”

Equipment for Dog Fight Break-Ups

Now, all you need to do is stuff a canister of Direct Stop in your pocket, hang an umbrella over your arm, attach a parting stick to your belt, carry a blanket over your other arm, balance a sheet of plywood on your head, wear an air horn around your neck, and be sure you have at least two friends with you to hold dogs while you put your thumb in private places, and you are ready for anything.

Seriously, if and when that next fight happens, take a deep breath, resist your instincts to yell or leap in the middle of the fray, quickly review your available options, and choose the one – or ones – that are most likely to work in that place and time. When the fight is over and no one is being rushed to the hospital in an ambulance, remember to take a moment to relax and breathe, and then congratulate yourself for your quick thinking.

Fight-Stopping Resources

Air horns

Parting sticks

PetSafe Shield (citronella)

Halt! Dog Repellent (pepper spray)

An umbrella with a face

BREAKING UP A FIGHT: OVERVIEW

1. Train your own dogs to respond to your cues, even in the face of a chaotic melee.

2. When walking your dog, or when playing with him at leash-free parks, carry some tool (umbrella, etc.) that you feel comfortable with and capable of using in case of an emergency. The tool you choose should be suited to the environment; pepper spray is not appropriate for use in dog parks, but perfect for defending yourself from the stray fighting dogs that wander in some urban neighborhoods.

TTouch Practitioners Explain Canine “Body Wrapping”

[Updated August 10, 2017]

BODY WRAPPING FOR DOGS OVERVIEW

– Give it a try! We know it looks kooky – but we’ve seen it work again and again.

– Start with the least restrictive wrap. Use treats, whatever sort of touch your dog enjoys, and a reassuring tone of voice to reassure your dog.

– Find a TTouch practitioner near you for guidance and hands-on instruction.

Does anything feel better than a perfect hug?

Temple Grandin, Ph.D., is an expert on the therapeutic benefits of hugs. As an autistic child, she felt overwhelmed by most of the hugs she received from people, but crawling under sofa cushions soothed her. The pressure felt even better if her sister sat on the cushions.

Grandin visited a relative’s ranch and noticed how the pressure of a squeeze chute into which cattle were herded for branding quickly calmed them. Realizing that similar deep pressure might help her own over-stimulated nerves, she designed a padded box into which she could climb and press a lever to bring its side boards together. Now known as the Hug Box or Squeeze Machine, Grandin’s invention has calmed autistic children and adults around the world.

While developing her famous Tellington TTouch (pronounced “tee-touch”) therapy, Linda Tellington-Jones explored the calming effects of gentle pressure on animals, especially dogs and horses. Most TTouch work is performed with the hands by making large and small circles all over the body, but to provide consistent pressure for longer periods, she wrapped the animals in elastic bandages.

Karen Doyle, a TTouch practitioner for companion animals in Chester, New York, appreciates the behavior changes that wraps produce because her first TTouch clients were aggressive dogs.

“They all had tight muscles in the legs and rear,” Doyle says. “Not enough blood in the brain and too much in their ready-to-launch hind ends prevented these dogs from thinking or learning. They were on automatic pilot, reacting on instinct alone. Gentle TTouch and body wraps interrupted this energy flow and reconnected the front and hind ends, which helped bring their minds and bodies into balance.”

In addition, Doyle worked with dogs that were timid, afraid of being left alone, afraid of loud noises, sore from injuries or arthritis, or uncoordinated. The most dramatic improvements occurred when the dogs’ owners made the wraps part of their regular routine in combination with TTouch circles, lifts, and slides. “At first they did it daily,” she says. “Even 10 minutes at a time made a difference, and for dogs who were afraid of thunder or had separation anxiety, the wraps could be worn for longer periods. As the dogs gained confidence, became more relaxed, or showed increased coordination or flexibility, the wraps were used for maintenance once a week or whenever it seemed appropriate.”

Like all of the TTouch patterns and exercises, body wraps have a cumulative effect. “It’s a gradual process,” says Doyle. “The neurological system receives information and stores it like a computer, so even small doses are effective. Be sure to use a reassuring tone of voice and be generous with praise or treats to help the dog relax and adjust. Even those who aren’t familiar with TTouch can massage the dog’s ears to help make the wrap more effective.”

Start at home or wherever you and your dog are most comfortable, she suggests, and when you feel ready, move to other areas and activities, including outdoor walks and training classes. Even wearing the wrap for short periods, like 5 or 10 minutes, can produce positive results. For more information, see Linda Tellington-Jones’s new book, Getting in TTouch with Your Dog, which describes several exercises that incorporate body wraps.

The T-Shirt Wrap and Half-Body Wrap are recommended for dogs who have never worn a wrap, as well as dogs who have painful hips or knees, which might be difficult to wrap on the first try. Full-Body Wraps connect front and back ends, which can improve coordination as well as behavior. Full-Body Wraps that hug the hind end stay in place on dogs who have short coats, sloping hips, or no tail.

“Before you start,” says Doyle, “write down all of your dog’s noticeable symptoms, habits, and behaviors. Check the list after a few days, then in a few weeks. You may be surprised at the changes that take place. Continue using a wrap as long as it keeps producing improvements. When you reach a plateau, switch to a new configuration and see if it makes a difference. When you’re satisfied with your dog’s condition or behavior, discontinue the wraps or use them occasionally for maintenance.”

There is no official “right way” to do a body wrap as long as the bandage is kept flat and comfortably snug and as long as the dog is safe. Never leave a body wrap on a dog who is unattended. “Check to be sure that the bandage doesn’t interfere with blood circulation or body movement,” says Doyle, “without being loose or baggy. The whole point of wrapping is to provide snug support. Be careful with the male anatomy and be sure the wrap doesn’t obstruct elimination in either gender. With these guidelines in mind, you can create any kind of wrap and it will be good for something.”

Benefits of Wrapping Your Dog

Wearing a body wrap can improve or increase:

– Body awareness and coordination
– Athletic performance
– Self-confidence
– Focus and concentration in training classes and life
– Recovery from illness, injury, or surgery
– Friendliness and sociability
– Mobility and range of motion despite arthritis, old age, or injury

Wearing a body wrap can reduce or decrease:

– Effects of physical or emotional trauma
– Fear of thunder and loud noises
– Motion sickness
– Hyperactivity
– Behavioral problems like chewing, barking, and jumping
– Anxiety, including separation anxiety
– Touch-sensitivity
– Fear of nail trimming, ear cleaning, or grooming
– Antisocial behavior
– Aggressive behavior and fear biting

Dog Body Wrapping Methods

T-Shirt Wrap

This is the simplest body wrap. Use an appropriate size, such as a child’s T-shirt for small dogs, an adult medium or large for mid-size dogs, and extra large for large dogs.

Place the T-shirt over the dog’s head backward, with the front of the shirt facing up. Guide the dog’s front paws through the arm holes. Gather fabric at the hem and tie the ends in a knot at the waist.

Variation: Cut an X in a plastic can lid, thread the hem through, and pull it comfortably tight. The lid will hold the fabric in place.

Elastic Bandage Wraps

Most TTouch instructors use Ace bandages, which are very stretchy and beige in color. They come in 2-, 3-, 4-, and 6-inch widths and 4.5-yard lengths. The 4- and 6-inch-wide bandages also come in 10-yard lengths. Bandages are held in place with diaper safety pins. When fastening wraps on the back, do not pin directly on the spine.

Use a 2-inch bandage for small dogs, a 3- or 4-inch bandage for large dogs, and a 4- or 6-inch bandage for giant breeds. Small dogs need only one 4.5-yard length, large dogs need two, and giant breeds may need three. Trim excess elastic as needed.

Half-Body Wrap

Place the center of the wrap at the center of the dog’s upper chest. Bring the ends up on either side to cross over the shoulders, then down behind the front legs, crossing under the belly, and up to the center of the back. Fasten the ends with a safety pin.

Variation: As the dog adjusts, pull the pinned portion back to the lower spine. Later, pull it back around the hips at the top of the tail. These adjustments provide some of the benefits of a Full-Body Wrap and help the dog accept that configuration.

Variation: Place the Half-Body Wrap over a T-shirt.

Full-Body Wrap

Leaving the Half-Body Wrap in place, fold a second bandage in half to find its center. Slip one end under the pinned part of the Half-Body Wrap and pull it through until its center is under the pin. Fold it over so it is two layers thick and moving from the waist straight back toward the tail. Remove the pin and use it to secure all four layers at this intersection, or use a second pin to do this, avoiding the top of the spine.

Separate the two ends and pull them under the abdomen on either side in front of the hind legs, back between the legs, then up on either side of the tail. Secure the ends on the lower back with another safety pin.

Alternative Method: Use a single length of elastic or two bandages pinned together. Place the center of the wrap over the center of the dog’s chest. Pull the ends back and up to cross over the shoulders, down to cross under the belly, up to cross over the small of the back, then through the inner thighs from front to back and up on either side of the tail to the cross at the small of the back. Secure the ends at this intersection with a safety pin.

Variation (either method): Instead of pulling the ends up on either side of the tail, wrap the left end around the left hind leg and pin it in place at the top of the thigh; wrap the right leg the same way. This variation engages the hind legs. The wrap should be snug but not tight enough to interfere with walking.

Variation: Use a single length of elastic or two bandages pinned together. Holding one short end, tie a loose overhand knot around the dog’s neck Pull the rest of the bandage straight down the spine to the base of the tail. At the right side of the tail, bring the bandage down inside the right rear leg and toward the front of the leg, then up and across the small of the back to the left side. This creates a flank-to-flank cross-piece.

Thread the wrap through the inner thigh of the left hind leg, front to back, and up the rear on the left side of the tail. Tuck the wrap under the flank-to-flank cross-piece and bring it up to the neck. Untie the temporary knot. Pull the ends to the front on either side of the neck, cross them in front of the chest and continue around the shoulders on each side. Pull the ends to the middle or lower back, just in front of the flank-to-flank cross-piece. Pin the ends of the wrap to the elastic that runs under the flank-to-flank portion. The final wrap resembles a figure 8 with the safety pin at the center of the 8.

Variation: As above, but leave the knot in place and fasten the second end at the shoulder with a safety pin.

The Anxiety Wrap

When Indiana dog trainer Susan Sharpe discovered correction-free training methods, she studied clicker training, TTouch, behavior modification, acupressure, and massage. She was already familiar with Temple Grandin’s Hug Box and had recently read Molecules of Emotion, in which Candace Pert, Ph.D., explains that neuropeptides and their receptors are the biochemicals of emotion, carrying information in a vast network that links the material world of molecules with the nonmaterial world of the psyche.

“All of these things converged for me when I looked for ways to help my German Shepherd, who became aggressive during a serious illness,” says Sharpe. “I also wanted to help the dogs I train and those that vacation at my doggie resort.”

Sharpe tried T-shirts, then added duct tape to see if a snugger, more secure fit would make a difference. “The dogs became much more relaxed,” she says. “I continued using this method until one day a man thought his dog had been in an accident because of the way he was wrapped.”

Sharpe decided to design a garment that would work like the duct-taped T-shirt but would look more attractive. “I wanted to engage the dog’s hindquarters, too,” she says, “which the T-shirt didn’t do.”

For help she turned to Joyce Walker, a friend who rescues Greyhounds and sews coats for them. Together, they tested more than 80 prototypes before perfecting the Anxiety Wrap, a sturdy, stretchy vest that hugs the torso like a body stocking. An adjustable panel under the belly enhances the fit, as do strategically placed draw-strings, and elastic threaded through the vest at the back can be attached to the hind legs or crossed over the tail for a snug fit at the rear. It comes in black in nine sizes, from toy breeds at $65 to XXL at $75, with wholesale discounts for shops, trainers, dog clubs, shelters, and rescue organizations. Custom fitting is available as well.

How can wrapping a dog cause lasting behavior changes? According to Indianapolis neurobiologist Shereen D. Farber, Ph.D., any type of trauma can damage nerve receptors, leading to exaggerated responses to stimuli. “Applying constantly maintained pressure provides an unchanging, quieting stimulus that causes the receptors to adapt and modify their thresholds in a cumulative manner,” she explains.

For more than four years, thunder, gunshots, construction equipment, and acorns landing on the roof triggered panic attacks in Caroline Farr’s eight-year-old Pharoah Hound, Kody, who lives with her in Pennsylvania. Kody was also extremely touch-sensitive and did not enjoy petting or massage. Then the Anxiety Wrap arrived. “Kody loved it from the moment it went on,” says Farr. “On the 4th of July, just after it arrived, he wore it at a large open house, and everyone noticed his transformation. All the mothers said, ‘Swaddling, of course!’, referring to the ancient custom of calming unhappy babies by wrapping them closely. He stayed relaxed during the fireworks, and thunder no longer sends him running.”

In Michigan, seven-year-old Chase, a Golden Retriever, suffered from severe thunder phobia and separation anxiety. After he injured his mouth demolishing a camper door, Chase’s vet prescribed Valium and offered euthanasia as the only option. As a last resort, owners David and Kay Snell tried the Anxiety Wrap. “Within the first five minutes of wearing it,” says Kay, “he laid down, totally relaxed. He no longer pants and paces during storms or climbs into bed with us.” After a month of use, Chase still has separation anxiety during camping trips, but as long as he’s wearing the wrap, he stays calm. “Once we went on a 20-minute bike ride and forgot to put it on,” she says, “and when we returned, the screen door was ripped out. We learned our lesson and will always use his Anxiety Wrap when he’s left alone.” Unlike elastic bandages, the Anxiety Wrap can safely stay on dogs that are left unattended.

Lyda Long, MD, of Oklahoma City, Oklahoma, bought an Anxiety Wrap for her Siberian Husky, Karma, whose traumatic experience at a dog show left the six-month-old puppy fearful, shy, and anxious around strangers. For the next eight months, Dr. Long used desensitization techniques, counter-conditioning, herbal remedies, and other natural treatments with slow and limited success. “The Anxiety Wrap gave us amazing and almost immediate excellent results,” she says, “and Karma continues to improve each time she wears it.”

Susan Sharpe encourages people to introduce the Anxiety Wrap before anxiety-causing conditions are present. “You don’t want the dog to associate wearing the Anxiety Wrap with something that causes distress,” she explains. “For thunderstorms, put it on when the animal begins to show signs of bad weather approaching, then remove it after the dog no longer shows these symptoms. If a storm has been forecast and you have to leave for the day, put the Anxiety Wrap on your dog before you go and take it off when you get back or after the storm has ended. Some dogs will calm down immediately, while others may go through three or more storms before they respond.”

For improved training, she recommends putting the Anxiety Wrap on before class, using lots of positive reinforcement during the class, and removing the wrap after. For hyperactivity, reward the dog with treats, calm praise, or petting as soon as he or she begins to show signs of calmness.

A regular contributor to WDJ, CJ Puotinen is also the author of The Encyclopedia of Natural Pet Care, Natural Remedies for Dogs and Cats, and several books about human health including, Natural Relief from Aches and Pains, published in summer 2001. She lives in New York.

Download the Full November 2002 Issue

0
To continue reading this article or issue you must be a paid member.

Join Whole Dog Journal

Get full access to Whole-Dog-Journal.com – more than 4,000 articles – for just $20.
Join today and save 30% off our full price.
Already a member?
| Forgot your password? | Activate Web Access

Dogs Living with Humans 101

0

There are certain basic behaviors that all dogs need to know if they are going to survive in human society. Generally, the only ones who are likely to live happily ever after in their original homes are those dogs who are regarded as “good” by their owners.

The definition of a “good dog” depends on the defining party. If you could ask a dog, he may say something like, “Oh that Jake! He’s a darned good dog! He can knock over any garbage can or jump on any counter for food, he trees cats with ease, he can chase most cars until they stop, and he can hear strangers coming from miles away and bark until they are gone! What a great dog!”

But if you asked a human to describe a “good dog,” chances are they would not mention any of the life skills that a real dog’s dog might display, such as an ability to scavenge for food or hunt and kill small animals. Rather, most people tend to regard good dogs as those who have learned to trade (or at least modify) many of their natural canine behaviors in favor of those that are acceptable to the human members of their families.

While some (or all!) of the Top 10 Things we describe below might seem overly elementary to an experienced and responsible dog owner, many dogs I meet in training classes – and animal shelters – lack several or many of the following skills. Certainly, a committed canine caretaker should be willing to manage or overlook her dog’s shortcomings; we are not perfect, nor should we expect our dogs to be. However, the less you have to manage or overlook, the more pleasant life will be for the both of you in the long run.

Put a check mark next to each of the 10 life skills that your dog has already successfully mastered. If you can check all 10, congratulations! You and your canine pal are well on your way to a lifetime of happiness and good times together. If you have to skip some, you might want to get to work and help your dog become an even better companion for you.

1: How To Live and Play Well With Humans
This may seem like a pretty broad topic. It is, in fact, the root of many of the ones that follow. Specifically, however, this means that your dog needs to accept that many human rules simply make no sense from a canine perspective. For example, humans have this incredibly bizarre habit of leaving food around uneaten. Really good food! Large chunks of prey animal – right out in plain view, on the kitchen counter, on the coffee table . . . what creature in his right mind would not eat high-value food when the opportunity presents itself?

Yet humans do just that, and expect their dogs to do the same. Although this exceptional example of canine self-control is often taken for granted, the dog who leaves the roast beef sandwich unmolested on the coffee table when his human takes a potty break in the middle of the Rose Bowl Parade deserves to be held in high esteem by his human caretaker.

Other examples of bizarre human rules include a taboo on drinking water from the freshest water source in the house (a thing humans call a toilet), and an expectation that their dogs not perceive an open door as an open invitation to dash through.

Our dogs also must adapt to what probably seems to them to be very odd human play behavior. Dogs play with tooth and claw – jumping up, biting, body-slamming – while most humans want their canine playmates to keep their teeth to themselves, and to refrain from jumping up and body-slamming, even in play, unless expressly invited.

Dogs are capable of learning these eccentric human rules, and they learn best when their humans understand that it is a dog’s nature to eat available food, drink fresh water, go through openings at will, and roughhouse in play. In each of these cases, proper management – not allowing the dog to be rewarded by the natural but undesirable behavior – and consistent reinforcement for alternative, preferable behaviors can get the job done.

For more information, see “Upper Level Management,” WDJ October 2001.

2: How To Accept Intimate Contact From Family, Friends, and Relative Strangers
Throughout your dog’s life, you will expect him to happily accept being touched and handled by all sorts of people: family, friends, strangers on the street, children in the schoolyard, veterinarians, groomers, and more. Dogs, however, do not come already programmed to love attention and touch. While some seem more naturally inclined to like human contact than others, all dogs must be socialized – ideally from a very early age – and taught to accept, even enjoy intimate touch. Even something as apparently innocuous as a pat on the head is foreign to a dog’s natural instincts and nonverbal communication style.

The best puppy raisers begin an intensive socialization program starting when pups are four weeks (or even younger), by exposing them to gentle handling and touch from an increasing number and variety of humans as the days and weeks pass. Handling ears, touching paws, examining teeth and private parts should all be accompanied by rewards – treats, toys, praise – so the pup comes to believe that humans and human touch make very good things happen. This concept should be instilled in his little dog brain well before he reaches the advanced age of four months.

Dogs who are stressed by human contact are far more likely to bite, and bite seriously, at some point in their lives. If your dog missed that all-important socialization period between four weeks and four months, you will need to work hard to make up for lost time. At this late stage, you can probably improve his willingness to accept contact, but he’s not likely to be as social as he could have been. A strong commitment to a program of counter-conditioning and desensitization is in order, and you may need the assistance of a behavior and training professional to maximize your success.

For more information, see “Canine Social Misfits,” WDJ February 2000.

3: How to Share
In the dog world, possession is generally nine-tenths of ownership, and even a small, lower-ranking pack member can often successfully fend off other dogs’ threats to her food and other valuable objects. Dogs will share with each other – when they choose to. You probably expect your canine family members to share happily and willingly, each and every time you decide that what’s hers is yours. Resource guarding is, in fact, a relatively common behavior with dogs, ranging from mild tension when folks are playing in the dog’s food bowl, to serious aggression with potential to maim.

You can start early in a puppy’s life to insure against food guarding by teaching her that your approach is not a threat to her possessions, but actually brings more good stuff. When she’s eating, approach her bowl and drop several high-value treats, one at a time, into her bowl. When she has something she shouldn’t, trade her for something better, instead of chasing her around in anger, scaring her and putting her on the defensive. If she consistently gets something wonderful when you approach, and rarely loses the good thing she has, she will not resort to resource guarding – she won’t need to!

If your dog is already a resource-guarder, seek the help of a qualified positive professional to help you work with it. This is a dangerous behavior, and one that should be addressed by someone who is confident and capable.

For more information, see “Thanks for Sharing,” WDJ September 2001.

4: When and Where To Go Potty (and where and when not to)
Dogs do come genetically programmed not to soil their own dens, so this is one human rule that makes pretty good sense to them. They may wonder why we insist on living in such large dens when small ones are so much cozier, but once they realize that the whole house is a den, housetraining usually comes along with relative ease.

The trick is to manage the dog’s behavior through crates, pens, tethers, leashes, and direct supervision, so he doesn’t have the opportunity to get in the habit of using any part of your house/den as his bathroom. Meanwhile, take him outside frequently and consistently enough so that he gets in the habit of relieving himself outdoors.

Remember, it’s a much simpler training challenge to teach him to go in one right spot than it is to teach him not to go in an almost infinite number of wrong spots.

For more information, see “Minding Your Pees and Cues,” WDJ December 2001.

5: How To Be Alone
To a wild dog, “alone” is synonymous with “danger.” A puppy, especially, is at high risk for being eaten if he is left without the protection of the pack. Although they are thousands of years from their wild ancestors, many of our domestic dogs still experience a residual anxiety when they are left alone. In extreme cases, dogs can develop a condition known as separation anxiety – the equivalent of a panic attack when left alone – and can cause great damage to their environment and injury to themselves. While crates can be used with some destructive dogs to safely contain them while unattended, crating is rarely a solution for unfortunate dogs with separation anxiety, as close confinement can send them into a panic frenzy.

To prevent separation anxiety, accustom your new puppy or dog to being left alone gradually during the first few days he is with you, perhaps crated or tethered while you move around the room, occasionally returning to him when he is calm and quiet. Calm departures and returns will also help him learn to be matter-of-fact about your comings and goings.

When this procedure causes him no discernible stress, begin stepping out of the room – for just a few seconds at a time, then longer and longer as he shows that he can handle it. Avoid returning to him when he is fussing – if he learns that fussing makes you return, you will teach him to fuss harder and harder, until he develops a full-blown anxiety attack when you are out of sight.

If your dog has signs of mild separation anxiety, the above program can also work, although it may take longer than a few days. If your dog has a serious anxiety condition, you will probably need the assistance of a professional, and perhaps anxiety relieving drugs, to see improvement.

For more information, see “Learning to Be Alone,” WDJ July 2001, and “Relieving Anxiety,” WDJ August 2001.

6: When, Where, and How to Use Teeth
There are lots of uses for a dog’s teeth, and all of them are acceptable, if properly directed. Dogs eat the meals you give them with their teeth; obviously, that’s okay. The best way to keep dogs from eating what they shouldn’t is to manage their behavior to prevent access and reward for counter-surfing, and to train a positive “Leave it” exercise.

Dogs also chew with their teeth. This, too, is normal behavior, and it behooves you to provide your pup with plenty of appropriate chew objects (a stuffed Kong being our favorite) while he is developing his chewing preferences. Once he zeroes in on suitable chew objects and matures past the experimental puppy stage, your own personal possessions should be reasonably safe. For this reason, I keep all new dogs crated when I can’t supervise them until they are at least a year old, gradually giving them increased house freedom as long as they show me they can handle it.

Dogs play with their teeth. Since canine teeth on human skin is generally an unacceptable behavior, I redirect that play-bite urge to tug-of-war toys, complete with rules designed to make it a safe and rewarding game for both tug partners. Dogs should be free to engage in tooth-play with other dogs, as long as both dogs are willing participants.

And finally, dogs bite aggressively with their teeth. There are rare circumstances when this is acceptable behavior – for trained protection and police dogs, and for the untrained family dog who wisely bites a criminal intruder – but most companion dogs need to not bite humans if they want to live happily ever after. The best way to accomplish this is to go back to the socialization work of Top Thing #2 (Accepting Intimate Contact).

Most aggression is caused by stress. A good socialization and positive training program reduces the number of things that might cause a dog to be stressed, thereby decreasing the likelihood that he will ever bite. All dogs are capable of biting, however, no matter how well socialized, if the situation is stressful enough – which is why the extreme stress generated by a stranger’s attack on his human companion can cause even a very well-socialized and well-mannered dog to bite – as well he should!

For more information, see “Upper Level Management,” WDJ October 2001; “Pin Sharp Puppy Teeth,” November 2000; “Play (and Train) By Tugging,” March 1999.

7: How To Come When Called
A very reliable recall is the key to a dog’s supervised freedom outdoors. While I would never counsel you to just open the door and turn your dog loose, if your dog has a solid “come when called” you can have him with you off-leash in many suitable outdoor environments – gardening in your yard, hiking on dog-legal trails, playing in dog parks – without worrying that an errant deer will entice your dog into the woods and beyond your control. Very reliable recalls don’t happen all by themselves. It takes a lot of training to end up with a dog who will turn his back on Bambi bounding across the meadow and return to you at a happy gallop instead.

One of the keys to achieving this milestone in dog training is to manage your dog so he doesn’t have the opportunity to take off and romp in the woods with you screaming at him to come back. This means keeping him on a long line – and training him in the face of ever-increasingly-enticing distractions – until you know his recall is rock-solid.

It takes an average of three years to train a dog to come to you in the face of extreme distractions. This means some dogs will get it sooner, and some will take longer, but plan on three years. Remember, that’s three years of committed training, not just three years of sitting around waiting for the dog to get older!

For more information, see “Total Recall,” WDJ December 2000 and “Long Distance Information,” WDJ February 2001.

8: How To Do An Emergency WHOA!
No matter how well-trained, no dog is perfect. Even the most rock-solid recall may someday fail, and when it does, you’ll be glad to have an emergency brake.

I like to train a long-distance down for emergency stops. Many dogs, while unwilling to turn their backs on a chase object and return to you, will happily drop to a down position, as long as they can keep their eyes glued to their prey. Once the prey is out of sight, the dog’s arousal decreases, and she is willing to return to me when I call her.

I also teach a “Wait” cue, which can stop a dog in her tracks, but she’s still standing, which makes it more likely that she will pick up the chase again before I can get her to return to me.

Some trainers use “NO!” or a “STOP!” in a loud roar to stop a dog from whatever behavior she is engaged in. This can work, but my preference is to tell the dog to do something rather than nothing.

9: How To Walk Politely On A Leash
Walking on leash, along with other important good manners behaviors such as “sit to greet people,” can greatly enhance your enjoyment of your canine companion’s presence. If he walks happily on a leash by your side instead of dragging you down the street, and politely greets people he meets on his outings, you are far more likely to take him places with you. The more places you take him the more socialization and exercise he gets, the better behaved he is likely to be. The better behaved he is, the more likely you are to take him places, proudly, as a well-loved and full-fledged member of your family.

For more information, see “Loosen Up!,” WDJ November 2000.

10: How To Play And Live With Other Dogs
You may have only one dog, so what’s the difference if he gets along with others? For one thing, dogs are naturally social animals, and you can enhance the quality of your dog’s life if you socialize him with other dogs and provide him with opportunities to play with his dog pals, at dog parks, doggie day care, or arranged play-dates in his own backyard. A day of dog-play will eat up his excess canine energy and leave you begging for more play outlets. A tired dog is a well-behaved dog.

In addition, when you take your four-legged family member out in public, he will inevitably encounter other canines. If he is well-socialized to dogs, he can handle these encounters with equanimity. Dogs who don’t know how to act around other dogs may become fearful or overly excited – both of which can lead to aggression. Either way, if your dog acts out around other dogs you are likely to limit his exercise and socialization, which can give rise to other behavior problems, including destructive behavior and aggression. (For more information, see “Plays Well with Others,” WDJ March 2000.)

Time to tally
So, how’d you and your dog do? If you checked 9 or 10 of the items, you should be proud of the work you have done with your dog, and the relationship you share.

If you have a lot of unchecked ones, you’d better get a move on! Even if you are comfortable working around the gaps in your dog’s knowledge, his lack of social or behavioral graces may be a source of friction between you and your roommates, spouse, or neighbors. Why not improve relations between the species, and teach him a few more vital skills? He’ll be far more safe and welcome in human society if you do.

-by Pat Miller

Pat Miller, WDJ’s Training Editor, is also a freelance author and Certified Pet Dog Trainer in Chattanooga, Tennessee. She is the president of the Board of Directors of the Association of Pet Dog Trainers, and recently published her first book, The Power of Positive Dog Training.

Dog-Safe House Cleaning Products

[Updated December 10, 2018]

Editor’s note: We mentioned several issues ago that we were preparing an article about nontoxic household cleaning products. Shortly afterward, we received a message from Sue Bozinovski and Valerie Robson, who described themselves as fans of WDJ, raw feeding proponents, and concerned mothers, who educated themselves about the dangers of household chemicals – and mastered the art of making effective nontoxic alternatives! They enthusiastically volunteered for the job of writing the article, and we were more than happy to turn it over to these competent “reader experts.”

SAFE CLEANING PRODUCTS FOR DOGS: OVERVIEW

1. Start shopping for ingredients listed on the next page. Many nontoxic cleaning components are available in any large supermarket. Others may be found only in health food or specialty stores.

2. Mix up a safe replacement for your most toxic household cleaning products first. Or focus initially on areas that can affect your dog the most, such as floors and carpets.

3. Use essential oils sparingly if you have a cat or toy dog; these animals are more sensitive.

Most people, even those who do not like to clean, enjoy the feeling of a sparkling fresh home. We take pride in the way our home looks and smells after we have spritzed, scrubbed, wiped, polished, vacuumed, and mopped. But for many of us, we have simply exchanged the dirt and grime for a coating of some of the most dangerous chemicals on the planet. And these chemicals are undoubtedly harmful to ourselves, our families, and our pets.

Take a look at those household cleaners under your sink and in your laundry room. Many of them list a plethora of toxic ingredients including petroleum distillates, mineral spirits, formaldehyde, and others that have been proven carcinogenic and mutagenetic (see below).

As concerned consumers we can try to purchase safe and healthy products, but it is not always easy. Many products on the market today are considered proprietary and closely guard their formulas as trade secrets, making it impossible for us to judge their contents. Did you know the words “nontoxic” and “biodegradable” have no standard definition under the law? Often, they are used simply as advertising gimmicks! (For more information about product labeling, see “How To Select Safe Dog Care Products and Cleaners for Your Home“.)

About 18 months ago, after reading a number of studies and articles about the dangers of cleaning products, we decided to practice “Natural Home Cleaning” – not only for our families, but also for the benefit of our pets. After all, our dogs and cats spend most of their time on the carpets, on their laundered beds, or eating food we’ve prepared on kitchen counters.

We have learned it is possible to clean our homes naturally, making a much safer place for our children, our pets, ourselves, and the environment. We have also learned that making our own cleaning products does not have to be time-intensive. Both of us have homes, management-level jobs, families, pets, and numerous outside activities. We discovered that with a few simple and cost-effective ingredients, we could make a diverse group of cleaning products. And, by adding essential oils chosen because we like their aromas or other properties, we can personalize our cleaning products.

Believe it – natural home cleaning is healthier, less expensive, and much more fun than doing it the way most of us were taught. In fact, natural home products can even extend the life of our expensive home investments (such as the wall-to-wall carpeting, ceramic tile floors, etc.), in addition to being healthier for our loved ones.

Natural Cleaning Supplies – Safe for Dogs

As we experimented and learned about the cleaning qualities of natural products, we developed a list of supplies that are most useful to have on hand. These items include:

White vinegar – Used in many formulations to clean and disinfect.

Baking soda – We recommend buying the largest box available.

Washing soda – This product is often found near the laundry detergents in supermarkets and health food stores.

Borax – Great for strengthening cleaning power!

Mild soap – Available in flakes and liquid – NOT detergent! Many products today are detergents made from petroleum distillates, which are both toxic and nonrenewable. Vegetable-based soap made from coconut or olive oil is known as castile soap and may be found in health food stores and some supermarkets. It is sometimes difficult to find unscented, but if you want to use your own favorite essential oils this is critical.

Essential oils – These differ from fragrance or perfume oils. Essential oils, found in health food stores, some specialty shops, and on the Internet, are volatile oils of plants.

(Note: If you have cats or toy dog breeds, skip the essential oils in any of our recipes until you have checked with your holistic veterinarian; these animals are particularly sensitive to essential oils. Also, the use of essential oils may interfere with the action of homeopathic medicines. If you use homeopathy, check with your homeopath before using any essential oil in your home.)

Containers – Spray bottles and other storage containers come in plastic and glass (we prefer the latter) in a variety of sizes. They can be found in supermarkets, health food stores, and container stores at very low cost.

Carpet and Floors

Our dogs spend much of their day on our carpets. Having no carpet to collect all the day-to-day gunk is probably the healthiest option, however, many homes have wall-to-wall carpeting or large room-sized rugs. So our job is to clean our carpets in the healthiest, but also in the least destructive, manner. You can deodorize, disinfect, or clean carpets depending on your current need.

If you just need to freshen your carpet, a simple mixture of baking soda and borax (equal parts) sprinkled on the carpet and vacuumed up will do the trick. To make this even more effective you can add several drops of your favorite essential oil to the powdered mix. Lemongrass and citronella oils are excellent choices if you are concerned about fleas. To make a safe carpet shampoo, the following recipe (from The Naturally Clean Home by Karyn Siegel-Maier) will cover a 10′ x 13′ room.

Rosemary-Lavender Dog-Safe Carpet Shampoo

2 cups baking soda
½ cup soap flakes (you can substitute with Borax)
20 drops lavender essential oil
8 drops rosemary essential oil
½ cup white vinegar
2 cups warm water

Loosen dirt by vacuuming or sweeping carpet. Combine baking soda, soap flakes, and essential oils in a large glass or stainless steel bowl, breaking up clumps. Sprinkle this mixture on the carpet. In a bucket, mix the vinegar and warm water. Dip a clean sponge mop into the bucket, squeezing out the excess liquid. Go over the carpet with the sponge mop working in sections. Wait one hour and vacuum.

For wood floors, the best cleaner is a mixture of equal parts warm water and white vinegar. Combine in a spray bottle; spritz a small section and dry mop. To three cups of this mixture you can add 15 – 20 drops of an essential oil of your choice. We like peppermint since it smells great, will kill germs and keeps mice away!

For cleaning tile or vinyl floors, mix a gallon of hot water and 2 – 3 tablespoons of a liquid Castile soap. To this mix you can add either lemon (great in the kitchen), or pine essential oil. Use 10-20 drops of oil and feel free to mix oils.

Dip your mop into the mixture, squeeze out the excess water and mop in small sections. The best part of this mix is there is no rinsing involved and the residue won’t hurt your dog if she happens to lick the floor when you are done.

Cleaning Kitchen Counters

Especially important are the areas where we prepare our own, and our dogs’ food. About a year ago, Valerie switched Samson and Carmel, both rescue Golden Retrievers, over to a raw food diet. For a time she went into disinfectant overdrive, cleaning the kitchen countertops with all sorts of commercial preparations. She was extremely excited on the day she discovered lavender and lemon essential oils. These oils are antibacterial, antifungal, antiviral, and antibiotic.

To clean counters, all you need is hot water, white vinegar, borax, and the essential oil(s) of your choice. For each cup of hot water use one tablespoon of vinegar and a scant teaspoon of borax. Add about 10 – 12 drops of essential oil. Remember, essential oils are potent; use sparingly.

To scour and disinfect wood chopping blocks, mix a couple of tablespoons of salt (any salt will do, but sea salt is grittier) and a like amount of fresh lemon juice and vigorously rub the mixture into the wood (it helps to wear gloves). Let this soak for 10-15 minutes, then rinse while scrubbing under hot water. Allow the wood to dry thoroughly.

Safe Bathroom Cleaning Supplies

Who among us has a dog that has never taken a drink out of the toilet? Given the ingredients in most toilet bowl cleaners, you invite long-term health problems for your dog with even the occasional lapper.

Instead, make your own germproof toilet bowl cleaner by combining the following in one of your spray bottles: one cup water, three tablespoons of liquid Castile soap, 20 drops of tea tree oil, and 7-10 drops of eucalyptus oil. If you have a hard water ring in the bowl, combine borax and vinegar with lemon essential oil, mix in a container and pour into the bowl. Let it sit undisturbed for about 12 hours and the stains should be gone.

Laundering Dog Bedding

Keeping our dogs’ beds clean whether we live in the city or the country is an ongoing chore. Since our dogs spend a lot of time lounging or snoozing in their dog beds, any cleaning agent is easily transmitted to the dog’s skin and coat. We recommend the use of natural laundry soap easily made at home. For example, the recipe for basic laundry soap powder is quite easy and smells wonderful when essential oils are added: Mix equal parts washing soda, baking soda, and real soap flakes (grated pure Castile soap). For top loading washers, use ½ cup of the mix; for a front loader use ¼ cup.

To deodorize and soften the fabric, use ¼ cup white vinegar scented with a few drops of your favorite essential oil. See the essential oils chart for properties and scents of the various oils. Experiment with different oils! When extra whitening power is needed, for instance, to remove a urine or food stain, mix up some chlorine-free bleach. Mix one part hydrogen peroxide to 8 parts water. Soak the item for 5-30 minutes. Rinse and wash if needed.

Cleaning Product Conclusions

In case you haven’t sensed it by now, we are very excited about the possibilities that natural products offer in the way of home cleaning. We can still get our homes spic and span, while keeping our families, our pets, and the environment safe.

It’s easy to switch gradually to natural cleaning products. As you run out of existing supplies, start buying natural products such as borax, hydrogen peroxide, vinegar, and baking soda. The quantities needed for home cleaning will be somewhat greater than normal use, but purchasing larger quantities costs less per unit.

We suggest you pick one or two areas that you want to focus on, for example, your dog’s bedding and the kitchen countertops, and get the items needed for making natural cleaning products. Start by purchasing two or three essential oils that have the cleaning and disinfecting power or the scents you like.

And if you don’t feel you have the time to create your own home cleaning products, there are several companies now offering environmentally friendly cleaning products. It is better, we feel, to purchase nontoxic pre-made cleaning products, than to continue to buy the usual toxic cleaning products we have used for decades. Check the shelves of your local health food store for products made by companies such as Seventh Generation, Ecover, Life Tree, and Naturally Yours.

Anybody can do this. We owe it to ourselves, our families, and our pets to make our homes as toxin-free as possible. We want to spend as many years with our loved ones as we can. A naturally cleaned home will help us toward that end.

Need some tips on cleaning up the messes dogs make? Click here!

Sue Bozinovski and Valerie Robson are Whole Dog Journal subscribers who live in Conifer, Colorado.

Get Online

0

Frequently I’m asked about the WDJ Web site (whole-dog-journal.com). What does it cost to access articles online? Do the articles posted online differ from what’s presented in the print version of the magazine? And why aren’t the “old” articles free? Let me take this opportunity to explain.

Online access doesn’t cost the reader any more than a conventional subscription; neither does it cost less, since at present, our publisher does not offer an “online version only” subscription. Right now, the online version is a bonus; when you pay for a regular subscription, you are given the option of registering for online access. You provide an e-mail address, confirm your subscription status, and choose a password; then you can view articles in the current issue online and in print.

This offers a few advantages. One is that the online version is published before the print version is mailed, giving you early access to the newest issue. Another is that you can read the current issue while at the office (say, when your paper copy is at home). You can also click on hyperlinks for Web sites referenced in the articles – too cool!

However, only the current issue is available online. If you want to read past articles, you have to refer to your old print copies, just like before. Or, if you are really desperate to read something from a past issue right away, you can pay for the privilege of immediately downloading an Adobe Acrobat (pdf) file with the article you want.

Given the fact that I already have each issue on my computer (where each issue originates), I don’t really need to access articles online. However, I do constantly use the “search” feature on the Web site. I used to refer frequently to the indices that we print in each December’s issue, the ones that list all the articles from the past year, arranged by topic category: training, health, nutrition, etc. Now, with my “always on” cable modem and a bookmark set to the search page, I can locate past articles by topic or keyword almost instantly. Once I know in which issue an article was published, I can grab my binder of print issues from the correct year and turn right to the article I want.

Of course, if you prefer, you have the option of having a regular, printed copy of a past issue mailed to you. This way, you receive the entire issue in which the article appeared.

Why don’t we just give away old articles and issues, or allow everyone to read WDJ online? Because subscriptions and back issue sales are what keep us in ink and pixels. By shunning advertising sales and income, we can maintain an independent editorial view, keeping us free to discuss topics the ad-dependent magazines are pressured not to print.


-Nancy Kerns

What You Should Know Before Your Dog Receives Anesthesia

0

This procedure will require general anesthesia.” There are few statements that a veterinarian can make to a dog owner that causes more alarm and misgiving, sometimes greater than the anticipated procedure itself. Throughout the years, companion animal guardians have come to suspect that general anesthesia presents a threat to all but the most robust animals, and should be avoided if at all possible.

However, modern advances in all phases of veterinary medicine, including anesthesia, enable today’s veterinarians to significantly improve the length and quality of our companion animals’ lives, and perform lifesaving and life-enhancing treatments previously considered too risky or too complicated.

As in human medicine, however, veterinary healthcare consumers must choose from a variety of options for the surgical care of their dogs. Understanding the issues surrounding the use of anesthesia, the needs of their particular dogs, and the complementary or holistic care practices that can support an animal undergoing anesthesia will enable companion dog owners to provide the best possible guardianship of their animals.

Types of anesthesia
The definition of anesthesia is “without pain,” and anesthetic agents enable veterinarians to perform medical procedures on animals safely and humanely.

Local anesthetics, such as an injection of lidocaine to perform a skin biopsy, provide for the short-term “deadening” of a small site on a patient that remains fully conscious. Regional anesthesia requires the injection of the anesthetic into the nerves or around the spinal cord to cut off the sensation of pain from the surgical site. Regional anesthesia blocks only pain impulses from the part of the body being anesthetized. The patient is fully conscious and her vital signs normally remain unaffected.

Although extremely safe, local and regional anesthesia do have their drawbacks. Mostly useful in treating minor problems of the skin, the dog is awake and can struggle during the procedure. Physical restraints may further excite an already agitated dog, and complications arising during surgery may be difficult for the doctor to control or treat.

General anesthesia produces a state of complete unconsciousness and the total loss of feeling in the entire body during its administration, and for a time thereafter. Although general anesthesia does carry some risk of serious, adverse reactions, it has revolutionized the safety, quality, and range of surgical treatments offered to dog owners.

General anesthesia
The process of administering general anesthesia in anticipation of a surgical procedure includes several distinct phases or steps:

Preparation and premedication, when the doctor evaluates and treats the dog prior to the surgical procedure, and the owner prepares the dog for the surgery.

Induction, when the veterinarian administers a general anesthetic and takes the dog to a level of unconsciousness suitable for the surgical procedure.

Maintenance, when the veterinarian or the anesthesia technician maintains the dog in a state of unconsciousness, and the doctor completes the surgical procedure.

Recovery, when the dog returns to consciousness, begins to heal from the procedure, and eventually resumes normal activity levels.

Let’s discuss the elements of each of these phases of the process of administering general anesthesia, and discuss the options available for the care of your dog.

Preparation, premedication: Countdown to surgery
Suspend the use of all herbs at least 48 hours before the surgery, and advise your veterinarian if you use these remedies. Some herbs may thin the blood or interfere with the proper administration of anesthesia.

Prior to administering an anesthetic and performing an elective surgical procedure, a veterinarian will examine your dog completely to determine if she is in general good health. Usually, the veterinarian will draw blood before the day of surgery, especially if the patient is an older dog, or one whose health is compromised by injury or illness. The doctor will check the blood count for signs of anemia or a high white blood cell count that may indicate the dog has an infection.

A blood chemistry profile indicates to the doctor if the dog’s kidney and liver functions are normal. These tests are particularly important for dogs seven years or older, dogs with a recent history of kidney infection or other illness, and young dogs with congenital defects, such as a heart murmur. The veterinarian will refer to these test results before selecting the anesthesia protocol for your particular dog.

Although many veterinarians do not insist on performing a preoperative blood test for young, apparently healthy dogs, it’s worth the investment (about $70) to screen closely for any indications of hidden health concerns before scheduling surgery.

Follow your veterinarian’s instructions about giving food and water to your dog at home, before and on the day of surgery. Most doctors require owners to make food and water unavailable to the dog at least 12 hours before the surgical procedure. An empty stomach will prevent vomiting if the anesthesia makes the dog nauseous.

If your dog is particularly anxious at the veterinarian’s office, or suffers from separation anxiety, ask your vet whether you can bring the dog to the hospital just prior to the scheduled surgery, to reduce any time she may have to spend caged in a holding area before surgery. Although most veterinary hospitals have “drop-off” times early in the morning, even for dogs whose surgeries are scheduled for hours later, your good relationship with your caring veterinarian should encourage the doctor to permit you to bring your dog to the hospital just before the procedure, and to accompany her up to the time of surgery.

Some veterinarians may give the dog a mild sedative to relax the dog before the procedure. A particularly anxious dog may benefit from receiving a mild tranquilizer while you are still with him, before he has a chance to get “worked up” in your absence.

A tranquilizer called acepromazine is commonly given to dogs prior to anesthesia induction. “Ace” (as it is commonly known) should not be given to epileptics or other dogs who are susceptible to seizures, as it can lower the seizure threshold and cause seizure activity. Make sure you let your veterinarian know if your dog has ever had seizures so he can avoid using this drug.

The doctor may clip a patch of hair on the dog’s leg and insert an intravenous (IV) catheter, which will administer intravenous fluids to support the animal during surgery. Especially beneficial for older dogs, IV fluids help keep the dog’s blood volume and blood pressure stable. Fluids also help the dog replace lost blood quickly, and assist in flushing toxins from the dog’s system.

Induction
The act of creating a state of unconsciousness, muscle relaxation, and analgesia (freedom from pain) through the administration of a general anesthesia is called induction. Most commonly, veterinarians use a quick-acting, injectable anesthetic drug to swiftly “knock out” the dog before moving on to the next phase of anesthesia, which is maintenance.

Sometimes, injectable anesthetics are used as a sole agent to induce a short period of restraint for minor, non-painful procedures, such as radiology and ultrasound examinations, but in surgery, the injectable agents are most often used to quickly bring the animal to the “surgical plane” of unconsciousness, after which inhalant (gas) anesthetics are used to maintain anesthesia.

Once an injectable anesthesia enters the dog’s body, it remains in the fatty tissue until the liver metabolizes it, or the dog receives a reversal agent. Not all injectable anesthetics have reversal agents and, in the case of an overdose, the doctor can only provide supportive care until the agent leaves the dog’s system, usually in 40 – 60 minutes.

Some dog owners and veterinarians have concerns about using the combination of injectable and inhalant anesthetics in certain breeds. Brachycephalic (flat-faced) breeds such as Pugs, Bulldogs, Boston Terriers, and Shih Tzus are reportedly prone to complications such as respiratory depression when subjected to the anesthetic combination.

Greyhounds and other sighthounds (Whippets, Afghans, Salukis, Borzois, Wolfhounds, Deerhounds) sometimes exhibit a delayed drug metabolism, with prolonged anesthesia resulting from a combination of anesthesia drugs. Some have attributed this to a low percentage of body fat (where anesthetic drugs are stored before being processed and excreted by the liver and kidneys); other speculate that these dogs lack the oxidative enzymes in the liver that are needed to metabolize the drugs normally.

Guardians of these dogs sometimes ask their veterinarians to forego the use of the injectable drug, and “gas down” their dogs with inhalant anesthetic alone. This practice is controversial, however. Many animals panic when an inhalant anesthetic is used to induce unconsciousness, since a mask must be placed over their faces and the anesthetic they breathe may concern them. Struggling during gas induction raises the heart rate of the dog and causes the animal unnecessary discomfort. Also, escaped gas from mask inductions is wasteful and may be dangerous to the hospital personnel attending the dog, so many veterinary practices avoid this type of induction.

Again, communication with your veterinarian is key. Talk to her about your concerns, and ask about her anesthesia protocol for the type of dog you have. If you feel your concerns are being brushed off without full consideration or explanation, find another veterinarian to work with.

Propofol is the newest injectable anesthetic, used in human medicine and introduced into veterinary practice in 1987. For induction purposes, Propofol works rapidly and the dog slips into unconsciousness quietly and with little excitement. The drug is metabolized quickly by the dog’s body, and offers a short, smooth, and high-quality recovery. Many practices use this agent for outpatient surgeries. However, propofol is short-acting and difficult to adjust when used for hours at a time, so it is not appropriate for lengthy procedures.

Older types of injectable agents, such as ketamine, are less expensive, but may cause some spontaneous muscle activity upon induction and dogs tend to experience a rougher recovery period. Ketamine is usually mixed with diazepam (Valium) or another sedative or tranquilizer to control these effects.

After inducing the animal, the veterinarian places a tube through the dog’s mouth and into the trachea (windpipe). The doctor then connects the tube to a machine that delivers an inhalant anesthesthetic for the maintenance portion of the process; then he prepares the surgical site.

Maintenance
Sevoflurane is the latest inhalant anesthetic available for use in veterinary medicine. Isoflurane and, to some extent, halothane are most widely used. More expensive than the older agents, sevoflurane is noted for creating a speedy induction and recovery, and its relatively pleasant odor. However, due to the preference for IV inductions, the speed of induction with sevoflurane is not clinically important.

The anesthetist can titrate (adjust the strength) of gas anesthetics much easier than injectables, so it’s easier to manage the dog’s unconscious state using this method.

Dogs should be kept warm during surgery, especially extended procedures. Many clinics place their patients on special pads that contain circulating warm water to keep them from getting chilled. At a minimum, the dog should be covered with warm towels or blankets for a long surgery.

One of the most important factors in the maintenance phase of general anesthesia is the monitoring of the patient, both by the presence of an anesthetist and the utilization of various pieces of operating room equipment.

An anesthesia technician should watch the dog during surgery, looking for good, pink color in the dog’s gums and skin, and take the dog’s blood pressure periodically to check for proper circulation of the blood. Most doctors rely on a non-invasive pulse oximeter, which measures the oxygen saturation in the dog’s arterial blood. An electrocardiogram (EKG) monitors the electrical activity in the dog’s heart and indicates if the animal’s heart beats too quickly or too slowly or develops arrhythmias. An audible apnea (suspension of respiration) alarm may be used, but some consider it unreliable and inaccurate.

Ventilation equipment is often used during extended surgical procedures. Under anesthesia, animals do not breathe as deeply, nor do they fill their lungs and “sigh” as regularly as they do when they are awake. In effect, their lungs collapse slightly under general anesthesia. By occasionally squeezing the breathing bag attached to the ventilation equipment for the animal, the anesthetist can periodically fill the animal’s lungs, keeping them healthy and the dog’s blood properly oxygenated.

The services of a veterinary technician or anesthetic nurse and the utilization of monitoring equipment all add cost to the surgical procedure. However, they significantly contribute to the safety of your dog while under general anesthesia.

Lore Haug, DVM, and a member of the Department of Small Animal Medicine and Surgery at Texas A&M’s College of Veterinary Medicine, states that the minimum monitoring support she would personally require for one of her own animals about to undergo surgery is the presence of an anesthesia technician to watch and ventilate the animal, a pulse oximeter, and an EKG machine. She adds that the more ill an animal is at the time of surgery, the more different types of monitoring it will require during the procedure.

Inhalant anesthetics also provide analgesia, or pain relief. Pain is a sensory and emotional response to the stimuli that results from damage to bodily tissue. As a result of mechanically manipulating the tissue and organs, as in a surgical procedure, or by enduring thermal or chemical damage, the body reacts with the sensation of pain.

The American College of Veterinary Anesthesiologists’ position paper on the treatment of pain in animals suggests that the need for adequate pain relief is more compelling now than ever before, as modern anesthetic practices provide for rapid recoveries after surgery. Most surgical practices provide for initial postoperative pain relief through the administration of inhalant agents administered during surgery.

Recovery
The dedicated care of a veterinary professional to manage the dog’s recovery from general anesthesia until the end of the anesthetic period is as important as the surgical skill of the operating veterinarian. Some anesthetic agents take more time to clear from a dog’s system, and a recovering dog may show signs of lethargy, loss of appetite, or diarrhea. A dog must be monitored carefully and kept warm and hydrated for a prompt, smooth recovery.

Assuming the absence of complications during surgery, arrange to visit your dog as soon as possible after surgery; bring him home as soon as possible when cleared to do so. Your presence will calm your dog and reduce his stress and discomfort.

Some veterinarians apply a fentanyl patch to the dog’s chest to deliver pain medication through the dog’s skin and directly into his blood stream. Consult with your veterinarian about pain relief medications that may be needed during recovery at home.

Adjuncts to conventional care
Perhaps the most valuable aspect of holistic medicine is as a support for the animal’s life force or spirit during a health crisis. Many complementary care methods have an “energy medicine” component that can boost a compromised animal’s healing response. These include acupuncture and acupressure, Reiki, homeopathy, flower essence therapy, and aromatherapy, as well as herbal medicine.

Many holistic practitioners have a protocol for dealing with the psychic and physical effects of anesthesia.

Deborah Mallu, DVM, a holistic veterinarian in Sedona, Arizona, focuses on the psychic effects. Dr. Mallu reminds her clients that the external world is a reflection of the mind. Therefore, she favorably affects a dog’s external, or bodily, world by bringing peace to his inner world. She creates a positive, supportive space in her operating room by playing relaxing or spiritual music during the procedure, and engaging in only positive conversations, focused on the patient.

Dr. Mallu also assumes that the dog retains some level of consciousness even during general anesthesia, and speaks positively about the outcome of the procedure and the health of the dog at all times. She visualizes herself on her patient’s team, working with the dog to improve his health, rather than as a repairman attacking the dog’s body.

Dr. Mallu encourages her clients to visualize and explain to the animal what’s going to happen during the procedure. Rather than comforting the animal by describing what will not happen (“Don’t worry, it won’t hurt for long, you aren’t going away forever . . . ”) she suggests telling the animal what will happen (“You’ll be in the hospital for a short time, relaxed and pain-free during surgery, and home again before long. We can help you to feel only a little pain after the procedure.”). This approach short-circuits fear-based thinking and creates positive and emotionally stable interactions with your dog.

She keeps a flower essence remedy known as Rescue Remedy available for herself, her clients, her patients, and her staff members to settle the mind. During surgery, she may ask her technician to administer a homeopathic remedy to her patient, such as phosphorous to decrease bleeding and to help alleviate the effects of anesthesia following the procedure. Dr. Mallu may give aconite or arsenicum album to a very fearful animal.

The occasional use of single remedies, as described by Dr. Mallu, is not in keeping with the tenets of classical homeopathy, where remedies are selected based upon a comprehensive understanding of the entire animal. However, Dr. Mallu considers the above-mentioned remedies broadly functional for such as wide range of conditions that their use is occasionally warranted under her supervision. She does not administer these remedies if the animal is already under the care of a classical homeopath.

Dr. Mallu may administer acupuncture while the dog is asleep to control pain, bloating, and nausea following the procedure. She also strongly emphasizes the importance of “gentle tissue handling” during surgery, and minimizes postoperative pain by being particularly mindful that much of that pain results from the harsh handling of the dog’s tissues and internal organs. Dr. Mallu always closes with absorbable, subcuticular (under the skin) closures to maximize comfort at the incision site and discourage the dog from licking or biting at the sutures. In more than 20 years of veterinary surgery, Dr. Mallu has never used an Elizabethan collar to prevent a dog from biting at his incision, and makes minimal use of analgesics after surgery. She has a small cottage adjacent to her surgical suite in which the dog’s guardian can hold the animal, wrapped in a blanket, while the dog regains consciousness.

Dr. Mallu rarely uses aromatics to help with recovery after surgery because the dog has already received inhalant anesthesia. However, when indicated, she may fill a half-pint spray bottle with 3 drops of lavender oil, 10 drops of Rescue Remedy, and pure water, and spray the mixture lightly around the dog.

At home, she advises her clients to keep the dog comfortable and their own mind stable to help with the emotional recovery of the animal.

Acupuncture and acupressure
Chris Bessent, DVM, a Milwaukee-based holistic veterinarian, acupuncturist, and herbalist specializing in sports medicine for horses and dogs, concentrates more on the physical aftereffects of anesthesia.

In Dr. Bessent’s opinion, the anesthetic process is not over when a dog regains consciousness after general anesthesia. “Holistic doctors know that the anesthesia process often continues on for weeks after the treatment,” she says.

She explains that many dogs develop a liver qi (pronounced “chee” and understood as the energy or force associated with life and life processes in living beings) stagnation from the effects of general anesthesia. Anesthetics are toxins that the liver must eliminate, with a significant effort.

Dr. Bessent usually treats a dog one to two weeks after it receives general anesthesia. She performs a “pulse diagnosis” by taking the dog’s pulse at 12 positions on the dog’s femoral arteries in the hind limbs. After anesthesia, 90 percent of the dogs she examines have a “superficial” pulse that feels taut, like a wire. A “normal” or “balanced” dog’s pulse is moderate and not too tight.

Dr. Bessent also performs a “tongue diagnosis” and finds that 90 percent of dogs that have recently received anesthesia have a purple to red tongue, indicating a condition of “heat” caused by a liver imbalance. A healthy dog’s tongue is pink.

A few dogs are capable of “righting” themselves completely after anesthesia, but most show mild to significant long-term reactions to the anesthesia process. “Remember,” Dr. Bessent explains, “these reactions are not the direct result of the general anesthesia itself, but the result of the reaction of the dog’s liver to the anesthesia, which can then be treated.”

To correct liver qi stagnation, Dr. Bessent uses acupuncture and combinations of Chinese herbs, including coptis and scutellaria, or, sometimes, long dan xie gan tang. Dr. Bessent may recommend the herbal combination “Great Mender” to help speed healing for traumatized tissue. (Visit Dr. Bessent’s Web site at herbsmithinc.com for more information about herbal remedies.)

Normally, after a single acupuncture treatment and dose of herbs the dog is back to normal, as Dr. Bessent confirms with a follow-up pulse and tongue diagnosis. Older dogs, who are more difficult to “balance” following anesthesia, may require a second course of treatment 10 days to two weeks after the initial treatment.

Dr. Bessent points out that if guardians do not fully resolve the aftereffects of anesthesia on their dogs, a number of conditions may plague the dog afterward, mostly inflammatory in nature and settling into one place in the dog’s system. These conditions include the beginnings of allergies, gastrointestinal upset (vomiting and diarrhea), inflamed eyes, anal sac problems, vaginitis, seizures, and even irritability and aggression.

On occasion, Dr. Bessent will examine a dog before it undergoes anesthesia. She performs a preoperative pulse and tongue diagnosis, and balances the dog, if necessary, with acupuncture. She advises her clients not to administer any herbs to their dogs within 48 hours of surgery.

“General anesthesia is a necessary and safe process,” Dr. Bessent says. “But animals need more supportive care surrounding the event to reduce or eliminate imbalances following treatment.”

Keep in mind
Modern general anesthesia provides the veterinarian with one of her most useful health care tools. Guardians can embrace anesthesia as an important aid in their dog’s lifelong health care, providing for less apprehension and better overall outcomes for your dog.

Become informed and share your desires about general anesthesia with your veterinarian. If she is not sensitive to your concerns, consider selecting another practitioner. Incorporate traditional and holistic practices into your support regimen for your dog, and enjoy the longer and healthier life your canine companion can experience with the help of today’s sophisticated veterinary medical techniques.

Also With This Article
Click here to view “What You Should Know About Anesthesia Before You Schedule Your Dog’s Procedure”

-by Lorie Long

Lorie Long is a frequent contributor to WDJ. She lives in North Carolina with two Border Terriers, Dash (a three-year-old female and agility queen) and Chase (a five-month-old male with an agility future).

Download the Full October 2002 Issue

0
To continue reading this article or issue you must be a paid member.

Join Whole Dog Journal

Get full access to Whole-Dog-Journal.com – more than 4,000 articles – for just $20.
Join today and save 30% off our full price.
Already a member?
| Forgot your password? | Activate Web Access

Training Dogs with Hand Signals

dog hand signal for stay

[Updated February 5, 2019]

Does your dog know what “Sit!” means? Most people think their dogs do, because when they stand in front of their dogs looking down at them, pointing toward the ground, and saying, “Sit! Sit! Sit!”- their dogs sit! Voila!

I would argue that, in fact, the average dog who sits in that situation does not know the verbal cue, “Sit!” What he understands is that he should sit when he is confronted by his person standing in a certain position in relation to him, with a certain expression on her face, making a certain sound. If he really understood, “Sit!” he would sit (most of the time) when he heard anyone around him, in any position or posture, say, “Sit!”

You can test my theory. Say “Sit!” to your dog when you have your back to him and are looking up at the ceiling or with your arms crossed over your chest, or when you are hopping on one foot. If he sits when you do these things, then he really does understand the verbal cue, “Sit!”

An important goal of my Level 1 training classes is to teach people to use verbal cues with their dogs. Getting the dogs to perform various behaviors by using a combination of verbal cues, body language, and lures is easy. Getting the dogs to do the behaviors without the prompts, on just a verbal cue, is more challenging, but it’s of the utmost importance. After all, there are numerous situations where you have only your voice to communicate with your dog. There are times when your hands are full – of groceries, school books, laundry baskets, the baby. There are times when your dog cannot see you; he may be behind you, in another room, or behind a tree and about to cross a road. At some time in his life he may become visually impaired, no longer able to see and respond to your body language.

I teach hand signals in my Level 2 class. My students are generally delighted when they discover how much easier it is to get their dogs to respond to distinct body language cues for specific behaviors – much easier than it is to teach verbal cues. It’s easier because dogs are primarily body language communicators, and they have a large body vocabulary. The twitch of an ear, the shift of an eye, a slight turn of the head – these are just a few canine expressions that are rich with meaning to other dogs.

dog waving from hand signals
Trainer Sandi Thompson has taught Tater Tot, her 10-year-old “Rat-weiler,” about 30 different tricks, each with a visual cue. Sandi flexes her fingers toward her palm for “Wave!”

I teach hand signals because there are also times when visual cues are the communication tool of choice. You may be talking to someone – on the phone or in person – and do not want to interrupt the conversation in order to ask your dog to lie down. The new baby may finally be sleeping, and you don’t want to risk waking her by talking to your dog. As your canine pal ages, he may lose his hearing and no longer be able to hear and respond to verbal cues. And you may simply love the way your relationship is enhanced when you can communicate silently with your dog.

To review: If a dog is going to be taught just one clear cue for various behaviors, I think it’s most important to teach him an auditory cue. If a person takes his training further, he should learn visual cues, too. In the best of all possible worlds, a dog should know both types of cues for almost every basic behavior you want him to perform.

In past WDJ articles, I’ve mostly discussed teaching dogs verbal cues for various behaviors. Here, I’ll concentrate on how to teach him visual cues.

Training Your Dog with Hand Signals

There are two philosophies about hand signals. Some people like to use small, subtle signals, barely visible to the human eye. A tiny finger movement cues the dog to lie down. Another elicits a sit. A small wave sends the dog into heel position. Impressive – it appears that the dog is mind-reading!

The other school of thought advises that hand signals should be BIG, so the dog can see them from far away. If you want your dog to lie down on the opposite side of a pasture, he won’t be able to see a finger flick.

I advocate teaching both. While a dog cannot learn two different behaviors for the same cue (“Down” means either lie down, or don’t jump on me – it can’t mean both), they are perfectly capable of learning two (or more) different cues for the same behavior. My Scottie knows the cue for “Down” in several languages – a result of his role as a demonstration dog in my classes. When he learned to lie down on the verbal cue “Down,” I had to use a new word in order to be able to show the class what to do when a dog does not lie down for the verbal cue. Dubhy will now lie down in English, French, German, Spanish, and in response to a hand signal.

To teach your dog a new cue for a behavior that he already knows how to perform, first decide what your new cue is going to be. Pick a discrete motion that you can replicate easily; consistency is the name of the game here. Your dog will learn to associate the new signal with the old signal more quickly if the new signal looks the same each time.

Now begin working with the two signals together. Give the new cue (hand signal) a second or two before the cue that he already knows, until he begins to anticipate the second cue upon seeing the first. “Mark” his behavior the moment he does the right thing (I strongly recommend using a clicker or a verbal marker, such as the word “Yes!”) and then give him a tasty reward. This sequence, in essence, tells your dog, “This new cue means the same thing as the old cue.”

How to Start Using Silent Cues

Here is how I initially teach hand signals for Down, Sit, and Come. I encourage my students to start with big hand signals, like the ones most people use in obedience competitions. No one wants to risk having their dog miss the signal from across the ring!

Down: Hold a treat in your right hand. With your dog sitting in front of you, stand with both arms relaxed at your sides. Raise your right arm straight up. A second after your arm reaches its full height, fingers pointed toward the ceiling, say your verbal “Down” cue. Pause for another second. If your dog does not lie down, lower your right hand to his nose and lure him down with the treat. Click! (or “Yes!”) and treat. Repeat this exercise until he will lie down for the hand signal and verbal cue without the lure.

When he has done at least a half dozen downs without the lure, give the hand signal (arm raised) without the verbal cue. If he goes down, Click! and Jackpot! That is, feed him lots of treats, one at a time, in special recognition of his accomplishment. If he doesn’t lie down, do another dozen repetitions with both cues, and then try again with just the hand signal. You will probably be surprised by how quickly he does it.

Say you are talking on the phone with your boss and your dog starts barking playfully at your cat. A finger held to your lips can be used to tell your dog to “Shush.” But if that caller is someone you don’t want to talk to, you can also use a signal (Sandi rapidly opens and closes her hand) to ask your dog to bark like mad, then excuse yourself to “go catch that dog

Sit: Hold a treat in your left hand this time. With your dog lying down in front of you, stand with both arms relaxed at your sides. Bring your left arm up in a circular motion in front of your chest with your elbow bent, then straighten it out to your left side, parallel to the ground, in a “ta-da!” sort of flourish.

A second after your arm straightens, say your verbal “Sit” cue. Pause for another second. If your dog does not sit, bring your arm down and lure him up with the treat in your hand. Click! (or “Yes!”) and treat. Repeat until he will sit for just the hand signal and verbal cue without the lure.

When he has done at least a half dozen sits without the lure, give the hand signal (arm raised) without the verbal cue. If he sits, Click! and Jackpot! If he doesn’t, do another dozen repetitions with both cues, and then try again with just the hand signal. Keep repeating until he gets it. Then practice this from the “Stand” position as well.

Come: If your dog is well trained, you can leave him on a sit- or down-stay and walk five feet away. If his stay is not rock-solid, have someone hold him on a leash while you walk away.

Turn and face him, with your arms at your sides and a treat in your right hand. Fling your right arm up and out to your side, as if you wanted to smack someone standing behind you. A second after your arm is out and parallel to the ground, say your verbal “Come!” cue. If he does not come, hold your arm parallel to the ground for another second, then bend your elbow and sweep the treat past his nose, ending up with your hand in front of your chest. If necessary, take a step or two back to encourage your dog to get up and come to you. Repeat this exercise until he will come for the hand signal and verbal cue without the lure.

When he has done at least six or so recalls without the lure, give the hand signal without the verbal cue. If he comes, Click! and Jackpot! If he doesn’t, do another dozen repetitions with both cues, and then try again with just the hand signal. When he starts responding, begin practicing the hand-signal “Come” from increasingly greater distances.

Subtle Hand Signals

You may need to approach the task of teaching tiny cues a little differently. Because a lot of our moving and twitching is not meaningful communication for our dogs, they learn to tune out or ignore most of our small movements, unless we take the time to teach them that a particular small movement has meaning. You may have to start with bigger signals and gradually shrink them down to “mind-reading” size.

Down: If you train using positive methods, you probably taught your dog to lie down by moving a treat or toy lure toward the floor in front of his nose. He already knows that your hand moving toward the floor is a cue for “Down.” You can teach him a finger-point “Down” by gradually reducing the motion you have been using, but without the lure, until it morphs into a finger point. Or, if you have dog who is very observant, you can simply start with the finger point. In either case, give the signal, give him a second to respond, then say your verbal “Down” cue, and finally, lure him down if necessary. Click! and treat.

Sit: Similarly, you may have taught your dog to sit from the down position by luring him up with a treat. It’s easy to turn your lure motion into a small upward finger twitch, the same way you did with the “Down” cue. Either gradually shrink the lure motion until it becomes tiny, or start right in with the final motion that you want to use. Remember the sequence: hand signal, then verbal cue, then lure if necessary. Remember to Click! and treat.

Come: You probably don’t need to lure your dog to teach him to come – you more likely used body language such as moving backward to encourage him to come running to you. Give him a small hand signal such as holding your hand with your palm facing your stomach and beckoning to him with all four fingers. A second later, give your verbal “Come” cue and take a step backward if necessary. Of course, Click! and reward him when he comes. He’ll probably get this one very quickly!

Remember that in order for you to be able to communicate with your dog nonverbally, he has to be looking at you. You may want to teach him a nonverbal “pay attention” cue such as a finger snap, so you can get him to focus on you without interrupting your phone conversation. Just pair that snap with a tasty treat (snap, and then feed him a treat) and he’ll be happy to look at you when he hears that sound.

Also remember that you don’t need to limit yourself to hand signals. Any part of your body can cue a behavior. You could teach your dog to lie down when you duck your chin toward your chest, or tap your foot on the floor. You could teach him to come when you shrug your shoulders, or to sit when you raise your eyebrows. Just follow the three-step process to teach any signal for any behavior: Give the signal you have chosen for the behavior, say the verbal cue, then lure if necessary.

Hand Signals for the Deaf or Hearing-Impaired Dog

Hand signals are an obvious training tool for deaf dogs. Lure and reward training is also a natural for deaf dogs – they will follow your hot dog treat just as easily as any other dog.

giving dog thumbs up hand signal
A visual signal, such as a thumbs up, can be used to replace a
Click! or verbal marker such as
“Yes!”

The difference is that you must use a visual reward marker rather than an audible one. Instead of a Click! or a “Yes!” to mark the rewardable behavior (followed by a treat), do something that your dog can see – such as a “thumbs-up” sign – and follow it with a treat. Some trainers recommend a hand “flash” – a closed fist rapidly opened with all fingers extended – as a highly visible deaf “Click!”

Once your dog understands that a juicy piece of hot dog always follows the hand flash, he will be able to learn that whatever he is doing when he sees the hand flash has earned him a reward. He will then offer that behavior more often, in hopes of winning a hand flash and treat.

As long as you remember to signal and reward – very frequently at first, then with reduced frequency later on, if you wish, he will do appropriate behaviors, such as sitting to greet you, easily and consistently.

Training “regular” dogs to respond to verbal cues alone can be challenging. With a deaf dog, you never have to worry about that; you will depend on visual cues only to communicate with your dog and elicit the desired behavior responses.

While some deaf dog advocates recommend learning American Sign Language as used with hearing-impaired humans and using that with your dog, it isn’t necessary. You just need to create a set of clear hand signals for the behaviors you want to teach your dog, and be consistent in how you use them.

Just like words, visual signals mean absolutely nothing to your dog until you associate them with a behavior. Whatever signals you use, be sure to be patient and positive, and take the time your dog needs to help him understand what they mean. Punishing him for not responding will only confuse and frighten him.

TRAINING WITH HAND SIGNALS: OVERVIEW

1. Think about which behaviors you would like your dog to perform without an audible cue. Make up a discrete physical cue for each behavior. Be creative!

2. Teach your dog each visual cue in this order: Use the new cue, wait a second; use the old verbal cue, wait a second; and then lure the behavior, if necessary. Reward him for each success.

3. Be cheerful and patient and make sure your cues are consistent. Your dog will quickly learn to anticipate the old cue after seeing the new one, and begin offering the desired behavior after the new cue only.

Pat Miller, WDJ’s Training Editor, is also a freelance author and Certified Pet Dog Trainer in Chattanooga, Tennessee. She has served as the president of the Board of Directors of the Association of Pet Dog Trainers and is author of The Power of Positive Dog Training.

Thanks to Sandi Thompson of Sirius Puppy Training in Berkeley, California, for demonstrating hand signals for our camera.

Veterinarian-Prescribed Dog Foods

1

[Updated March 15, 2017]

Recently, we explored the explosion in the numbers and kinds of canine commercial foods aimed at capturing consumers on the basis of their dogs’ age, size, and breed (see “A Special Food for Every Dog?” WDJ June 2002). But as we will see, even “medical” diets seem to have multiplied like rabbits!

Medical diets are the ones formulated for dogs with health problems, from vexing but garden-variety conditions such as itchy skin or digestive issues, to more serious health problems such as cancer or kidney disease. Some of these foods are what we’ll call “veterinary diets” (available only from veterinarians); the rest are over-the-counter (OTC) products, available in any pet supply store.

The number of products available in both types of medical categories has dramatically increased. OTC foods claiming to “promote” healthy coats or “support” digestive function are ubiquitous in pet supply stores and even grocery stores. Hill’s Pet Nutrition was once the only maker of foods that are available only with a veterinarian’s prescription; there are now several major manufacturers offering competing product lines, including Eukanuba, Innovative Veterinary Diets (IVD), Purina, and Waltham.

Vet-Prescribed and OTC Dog Foods: What’s the Difference?

While all of these medical diets claim to benefit dogs with certain health conditions, there are some significant differences between veterinary and OTC products.

Veterinary foods are available only from veterinarians. In theory, a dog would receive a “prescription” for one of the foods following a specific diagnosis, and the vet would monitor the effect the diet had on the dog. If a manufacturer wants to claim that its product can prevent or treat disease, the Center for Veterinary Medicine (CVM), a branch of the Food and Drug Administration (FDA), requires research that proves this. The maker must provide extensive documentation that the food is both safe and efficacious – that it does what it says.

In contrast, OTC food labels are couched in very general terms. They can’t say their products “prevent” or “treat” anything; those are medical claims. Instead, they use vague verbs such as “support” or “promote.” Because they do not make medical claims, the makers of these foods are not required to prove that their products actually do what they say they do.

Another difference is that while the Association of American Feed Control Officials (AAFCO) sets the standards for OTC pet foods, and the individual state feed control officials regulate the manufacturers in their own states, veterinary diets are solely within the purview of the FDA’s Center for Veterinary Medicine. The labels on veterinary foods must still comply with AAFCO’s general guidelines, but the CVM oversees and enforces the medical claims.

Below, we examine the products – both veterinary and OTC – aimed at each major category of medical conditions. Keep in mind that the differences among foods in each of these categories – especially the products made by the five big veterinary diet makers – are more subtle than the differences we noted between products made for dogs based on age, size, or breed. The parameters for conventional treatment of a particular disease tend to be narrow, necessarily making these diets similar in theory and content.

Vet-Prescribed Kidney Diets

Hill’s founder Mark Morris pioneered the concept of “prescription diets,” as well as Hill’s methodology of naming its products with lowercase letters (so annoying to editors!). Hill’s k/d (kidney diet) was Morris’ first prescription diet, a low-protein, low-phosphorus food he created to save a guide dog named Buddy who was suffering from kidney failure.

Today, there are at least eight different foods promoted for dogs suffering from chronic renal failure. The thing to note here is that these diets are beneficial only to dogs that have already been diagnosed with this condition. There is no proven benefit to feeding such a diet to older dogs that have normal kidney function; these diets do not prevent kidney disease, and are so low in protein that they may actually be detrimental to healthy dogs.

That said, these diets are excellent for managing the symptoms of kidney failure, and at least one study claims that life expectancy is increased in dogs fed such diets. According to representatives from Hill’s, its h/d (heart diet) formula can also be used for chronic renal failure, since it is also relatively low in protein and phosphorus as well as sodium. One competitor claims that Hill’s l/d (liver diet) also falls into this category, though Hill’s does not – l/d is low in protein but not restricted in phosphorus.

Eukanuba makes two kidney formulas, Early Stage (which contains somewhat less protein than its normal foods, at 18 percent as fed), and Advanced Stage (containing 13 percent protein as fed). IVD’s offering in this category is Select Care Modified, which can do double duty for kidney and heart disease. Purina NF (kidNey Failure) is similar to Hill’s k/d, and Purina’s CV (CardioVascular) is similar to Hill’s h/d. Waltham has one kidney formula, Low Phosphorus Moderate Protein, which is referred to in its advertising as “Restricted Protein,” maybe just to confuse us.

There are no OTC foods made to address kidney failure, although some weight loss or senior formulas may contain lower protein than many maintenance foods.

Vet-Prescribed Urinary Tract Diets

While we’re on this tract (sorry!), we should also mention that there are a number of veterinary diets designed to minimize, prevent, dissolve, or otherwise have an effect on the formation of bladder stones. Interestingly, this concept has yet to be realized in the OTC market for dogs, though there are many such diets for cats on your grocery store shelves.

In dogs, stones are usually either struvite or calcium oxalate, though there are a few other more unusual stones such as urate and cystine, and stones may contain combinations of mineral types. This is a case where a vet’s reading of your dog’s test (urinalysis) results would be critical for effective prescribing. Some breeds are prone to one or more types of stones (for example, urate in Dalmatians, struvite and calcium oxalate in Schnauzers). Hill’s makes three types of stone diets: s/d (intended to dissolve struvite stones by extreme acidification of the urine), c/d (also acidifying but intended for prevention), and u/d (for urate and cystine).

IVD’s Select Care provides Control (for struvite), Modified (for calcium oxalate), and Vegetarian (for the “metabolic” stones, urate and cystine). Oddly, Purina only makes a struvite diet (UR) only for cats, and Waltham has only one struvite diet, S/O Lower Urinary Tract. Perhaps Hill’s is so entrenched in this market that its main competitors don’t think it’s worth trying to steal its market share.

Vet-Prescribed Cardiac Diets

Once again, Hill’s was the early entry in this field with its h/d. Hill’s also claims cardiac benefits for its k/d and g/d (geriatric diet). Eukanuba’s contribution to this category is its Advanced Stage kidney diet; IVD’s offering is its Select Care Modified kidney diet. Purina does have its CV formula, but allows that its NF formula can also be used. Waltham has just come out with an “Early Cardiac Support” diet.

The main feature of cardiac diets is low sodium – even though there has never been any real evidence that sodium has any effect on hypertension or heart disease in dogs. Even for human health, the latest research shows that unless you are sensitive to sodium, salt may not raise blood pressure – and salt sensitivity is rare, even among individuals with high blood pressure.

However, manufacturers are catching on to the connection, long known in felines, between taurine, carnitine, and heart disease. CV, h/d, and Early Cardiac Support all contain added taurine and carnitine; the levels of taurine and carnitine in CV are somewhat higher than in h/d. Early Cardiac Support is a rice and fish-based food using menhaden (a kind of herring) meal, which is a good source of Omega 3 fatty acids. Foods with more carnitine and taurine may be better for a dog with heart problems, and the antioxidant and other health-promoting properties of Omega 3 fatty acids may also be helpful.

We’ve not yet seen any OTC entries in the cardiac care category.

Joint Health Diets for Dogs

Numerous studies have shown glucosamine and chondroitin to be beneficial supplements for people with arthritis for relieving joint pain and improving mobility. Numerous OTC adult and senior dog foods, as well as a few large breed puppy foods, now include glucosamine and chondroitin with the advertised purpose of promoting joint health, implying (but not claiming) that they can prevent arthritis.

In the veterinary diet arena, Eukanuba has introduced Senior Plus, which includes glucosamine and chondroitin as well as added antioxidants, Omega 3 and 6 fatty acids, carnitine, and chromium.

Waltham also has a veterinary diet (Joint Support) which contains perna mussel powder from the New Zealand green-lipped mussel, Perna canaliculus. This shellfish contains large amounts of glycosaminoglycans similar to glucosamine and chondroitin as well as the Omega 3 fatty acids EPA and DHA. At least one study showed dramatic improvement in arthritis pain in people taking perna mussel; however, there is no evidence that it will prevent arthritis.

While glucosamine and chondroitin (and probably green-lipped mussels) appear to be safe in the numerous studies examining them, few dog foods contain them at an amount that could reasonably be expected to have any effect at all, and few makers of these foods even tell you how much is present in their products.

Also, believe it or not, inclusion of these ingredients has never been approved for use in animals and is currently considered illegal by the FDA and AAFCO, although only a few states have attempted to stop the sale of foods containing them. A petition was recently introduced to AAFCO to approve a definition for glucosamine, but no action has been taken as yet.

The most significant problem with these “joint support” foods is that there has never been any scientific evidence that supplemental glucosamine or chondroitin will prevent arthritis. Virtually all studies of these ingredients were done in humans who already had arthritis. Also, we are not aware of any evidence demonstrating that these supplements arrive in the dog’s bowl (or in her tummy, let alone her joints) in a form or at a level that has been proven to be beneficial to either prevent or treat arthritis.

Oral/Dental Health Dog Foods

Hill’s Science Diet and Nutro are currently the primary makers of OTC dental care formulas. Hill’s actually makes another, more convincingly proven dental formula called “t/d,” which is available only through veterinarians. Hill’s claims that its OTC “oral care” formula will actually remove tartar from the teeth.

If the lack of visible tartar on the teeth gives you a false sense of security to the point of not brushing your dog’s teeth, or not visiting a veterinarian at least annually, these foods may ultimately do more harm than good. Other scientific research on the subject suggests that some “oral health” dog foods merely produce less tartar than other dry foods, certainly not zero tartar. In one study comparing an unspecified oral health diet to regular dog food plus a special chew, dogs on the oral health diet had more tartar, and worse, lost weight and condition.

Vet-Prescribed Diabetes Diets

Who knew so many dogs were diabetic? There must be a lot of them, because there are a lot of these diets.

The mainstay of diabetes treatment in pets has always been a high-fiber diet, which theoretically slows digestion and maintains a steadier blood glucose level. Recent research in cats has dramatically reversed this thinking, with high-protein, high-fat, very low-carbohydrate/fiber diets such as Purina DM or even canned kitten food providing the best results in terms of reduced insulin levels, normalization of weight, and symptom control. Canine research has yet to catch on to this concept. Most diets making a claim for diabetes management are also used for weight loss.

Eukanuba has taken the boldest step into this arena with its frankly named Glucose Control diet, with 25 percent protein, 5.5 percent fat, and 5 percent fiber as fed. Its Restricted Calorie diet (generally considered a weight reduction diet at 22 percent protein, 5 percent fat, and 7.5 percent fiber as fed) also qualifies.

Hill’s makes two diets that take the prize for fiber: r/d (reducing diet) at 20 percent protein, 5 percent fat, and 26 percent fiber, and w/d (weight diet) with 15 percent protein, 6 percent fat, and 20 percent fiber, as fed, on the theory that if a little is good, a lot must be really good – but it doesn’t seem to leave much room for actual food!

IVD’s Hifactor comes in at 23 percent protein, 10 percent fat, and 13 percent fiber. Purina makes DCO (Diabetic/COlitis diet), which comes in at 23 percent protein, 10 percent fat, and 10 percent fiber, and OM (Obesity Management) diet at 26 percent protein, 4 percent fat, and 16 percent fiber as fed. Waltham offers its High Fiber with 18 percent protein, 6 percent fat, and 5 percent fiber as fed.

We’re not aware of any OTC diets for diabetic dogs.

Veterinary Foods for Dog Obesity

We discussed OTC “light” foods in “A Special Food for Every Dog?” (June 2002). But the list of veterinary diets for treating obesity is almost the same as the diabetes diets. This should come as no surprise; most dogs who get diabetes are overweight, and the treatment for both is traditionally the same.

These veterinary foods all provide between 200-300 calories per cup of kibble, compared to 300-400 for most maintenance-type foods (including most other veterinary diets). Eukanuba’s Restricted Calorie contains 238 calories per cup, and its Glucose Control has 253 calories per cup, as fed. Hill’s r/d contains 220 calories, and w/d 243 calories, per cup as fed. IVD’s Hifactor contains 230 calories per cup.

Waltham has two special entries in this category in addition to its High Fiber (227 calories per cup as fed): Low Fat (19 percent protein, 4 percent fat, 2.5 percent fiber, and 264 calories per cup as fed) and Calorie Control (27 percent protein, 4.5 percent fat, 3.5 percent fiber, and 212 calories per cup as fed – the lowest of all).

Vet-Prescribed Geriatric Dog Food

Again, we discussed OTC “senior” foods in the June 2002 issue. The OTC market in mature and senior foods is booming as our dog population becomes larger and older over time. In general, these foods are lower in fat and calories than maintenance foods, but you have to watch the labels, as some makers seem to be formulating their senior dog foods for skinny old dogs, not fat ones.

Veterinary diets for obese old dogs include Eukanuba’s Restricted Calorie and Glucose Control diets; Hill’s w/d also falls into this category. IVD has Select Care Mature (289 calories per cup as fed).

Hill’s g/d (Geriatric Diet) contains 358 calories per cup as fed, making it a better choice for skinny old dogs. This food is specifically intended for dogs “at risk” for heart and kidney disease.

Dog Foods for Allergies and Gastrointestinal Disease

This is where things really get complicated! If we look at all the veterinary diets intended to treat all types of allergies including Inflammatory Bowel Disease (IBD), we find 16 basic diets, with several additional variations on the theme. Some are promoted to treat allergic skin disease, while others address food intolerances, true food allergies, and a variety of GI ailments, but there is a great deal of crossover in these categories so we will consider them all in this section.

Food intolerances and allergies in dogs tend to manifest in two primary ways: skin disease and gastrointestinal disease. Allergic skin disease (such as rashes, itchiness, ear infections, and lick granulomas) is most commonly caused by inhalant allergens (dust, pollen, etc.), but dogs can be truly food-allergic. Diarrhea and other GI signs can be caused by a food allergy, but are more often the result of a food intolerance, rather than a real immunologic reaction to a food component, which is the hallmark of a food allergy. Let’s consider some of the more distinct syndromes in this category, starting with the gastrointestinal diseases.

Inflammatory Bowel Disease (IBD). Not everyone agrees that IBD is a food allergy, but it is certain that diet can play a large role in its management. Symptoms of IBD include vomiting and diarrhea, though not necessarily both, and not necessarily at the same time.

Two dog foods fall more into the IBD management category than the others, and they are also touted for their ability to treat pancreatitis, colitis, diarrhea, constipation, and gastrointestinal disease in general. These are Eukanuba Low Residue, and Purina EN (ENteric, meaning intestinal). Low Residue contains moderate levels of soluble fiber, is overall low in fat but with a “balanced” Omega 3 to Omega 6 fatty acid ratio, and is highly digestible. EN is low in fiber and fat, and provides extra medium-chain triglycerides, all of which theoretically make it easier to digest. IVD’s Select Care Neutral, also a relatively “hypoallergenic” diet, can be used as well.

Pancreatic disease. Pancreatitis in dogs is correlated with dietary fat, so the IBD diets may be particularly well-suited to treating that condition. Hill’s i/d (intestinal diet) is considered a good diet for pancreatitis, and is often the first choice of veterinarians for just about any digestive problem. Failure of the pancreas to produce sufficient enzymes for digestion can result in incomplete digestion and assimilation of food. IVD’s Select Care Neutral, Sensitive, and Vegetarian formulas all contain digestive enzymes that may be helpful. Purina EN is also recommended for these problems due to its low fiber and high digestibility. Diabetes is sometimes a consequence of primary pancreatic disease, so the diabetes diets might also be appropriate.

Diarrhea or constipation. Since these are kind of “opposite” conditions, you might expect that diets for these two conditions would be completely different. However, the use of fiber to moderate gastrointestinal motility – slowing it down in the case of diarrhea, or speeding it up in constipation – creates the ability to use some of the same diets for both. Therefore, most of the weight management diets could be used here.

Eukanuba’s Nutritional Intestinal Formula Low-Residue can be used for both of these as well as other problems such as flatulence, vomiting, and colitis (inflammation of the colon). Hill’s i/d is frequently used for these conditions as well. IVD’s Select Care Neutral is indicated for chronic GI diseases, small bowel diarrhea (increased volume, frequency, and water content of stool), and IBD, while its Select Care Sensitive is more suited for acute GI diseases – viral or bacterial diarrhea, perhaps, or recovery from an episode of “garbage gut,” where a dog ate something he shouldn’t have eaten. Purina EN and Waltham High Fiber also cover these conditions.

Colitis. Inflammation of the large intestine (colon) can result from many causes, including stress, parasites, allergies, or cancer. While this can lead to constipation, it is more often associated with diarrhea. The dog needs to go more frequently, although the amount of stool is typically small, and there may be mucus or blood present on or in the stool. Parasitic colitis, of course, must be treated with an appropriate dewormer.

But for dietary or stress colitis, high fiber is, once again, the most common treatment. (In a few cases, excessive dietary fiber may actually irritate the colon, worsening the problem.) Eukanuba Low-Residue, Restricted Calorie, and Glucose Control, Hill’s i/d and w/d, IVD’s Hifactor, Purina’s DCO and OM, and Waltham’s Calorie Control and High Fiber might all be appropriate for dogs with colitis.

Skin reactions. The primary theory behind diets for allergic skin disease is that allergies develop to items that the dog has been exposed to for a long time. By feeding ingredients the dog has not had before, the immune system is no longer challenged by the original allergens, and things should calm down. This was the origin of the “lamb and rice” diets. However, so many foods now contain lamb and rice that these ingredients have become less useful for treatment (though rice still seems to be fairly benign for most dogs). Manufacturers have had to scramble to find other “novel” or “alternative” protein and carbohydrate sources.

This is why we now have Eukanuba’s Nutritional Skin & Coat Formulas (Fish & Potatoes, Kangaroo & Oats), Hill’s d/d (Lamb & Rice, Rice & Duck, Rice & Egg, Rice & Salmon, and Whitefish & Rice), IVD’s Select Care Vegetarian and IVD Limited Ingredient Diets (Rabbit, Venison, Whitefish, and Duck with Potatoes or Green Peas), and Purina’s LA (Limited Antigen) diet (rice, salmon, and trout).

A slightly different theory about food allergies has spawned Hill’s z/d and z/d ULTRA, and Purina’s HA (Hypo-Allergenic) diets. The idea is that the immune system reacts only to large proteins (such as those found in chicken, corn, or beef) that are absorbed intact. If you chop up all the proteins into little tiny pieces before the dog eats them, they will essentially “fly under the radar” of the immune system and not provoke an allergic reaction. This is a great theory, and allows the use of ordinary ingredients (chicken, in the case of z/d) as long as they go through a special process that breaks down the proteins. The dog can fully utilize the amino acids contained in these proteins, so the food still provides complete nutrition. Purina HA is actually a vegetarian food using soy protein instead of meat.

The only problem with this theory is that it doesn’t always work. There have been cases where an animal has become allergic to z/d or a similar diet. It’s uncommon, but it lends credence to the idea that it’s wise to change foods periodically, so the immune system is not bombarded with the same ingredients year after year. Your dog may be far less likely to develop a food allergy in the first place if you follow this advice.

There are a number of OTC dog foods that attempt to mimic some of these veterinary diets – without making specific medical claims. Hill’s makes “Sensitive Skin” and “Sensitive Stomach” formulas. Precise also makes a “food allergy” type formula, “Sensicare,” which also claims to protect the skin. Hill’s skin formula contains egg protein, plus extra Omega 3 and 6 fatty acids and antioxidants compared to its regular adult maintenance food. It’s certainly true that these ingredients will help keep the skin and coat in better condition.

Oddly enough, Hill’s “Sensitive Stomach” food has an identical list of ingredients and identical guaranteed analysis. However, according to a Hill’s customer service representative, the products have different formulations, which is possible if the proportions of ingredients are different.

Both foods claim relatively (compared to other brands) high levels of the antioxidant vitamins C and E. Those other brands must not have much vitamin C, since a dog would have to eat a pound of Hill’s kibble just to get 100 mg of it! The vitamin E content is higher, since it is also contained in the preservative system. Most of Hill’s veterinary diets are preserved with artificial preservatives BHA, BHT, and propyl gallate, so its OTC foods in this category may be a better choice on that criterion alone.

Growth and Recovery Dog Foods

There are several veterinary diets available for animals who are just plain sick, or who are recovering from illness, injury, or surgery. These high-fat, high-protein formulations are available only in cans. Hill’s a/d is a standard for animals who need a lot of energy packed into a small amount of food. It is also extremely palatable and easy to digest; its smooth, pudding-like texture makes it perfect to force-feed by syringe, or to administer through an implanted feeding tube. IVD’s SC Development and Euka-nuba’s Maximum Calorie have somewhat similar characteristics and indications.

Hill’s p/d (pediatric diet) is also a high-calorie, easily digested food, designed for puppies but suitable for older dogs who need big-time nutrition fast. It comes in both canned and dry versions.

Unique Formula Dog Foods

Hill’s Pet Nutrition, long the leader in veterinary diet innovations, has three unique formulas that are worthy of mention, and have not (yet) been imitated.

Hill’s l/d (liver diet) is designed for animals with liver disease, such as canine hepatitis. It features low copper and can be used in dogs (primarily Bedlington Terriers) with metabolic copper storage disease. It contains a mix of amino acids thought to maximize liver function, and high levels of antioxidants to protect the liver.

The company’s n/d (neoplasia diet) is based on research conducted at Colorado State University’s College of Veterinary Medicine and Biomedical Sciences on canine cancer and diet. It seems that cancer cells are particularly fond of carbohydrates. Dry dog foods generally are composed of half or more carbohydrates, and even most canned dog foods contain a fair amount of starch. Feeding canine cancer patients lots of carbohydrate-based foods may well be feeding their cancers.

To address this, Hill’s developed n/d, a high-protein, very high-fat diet with minimal carbs. Cancer patients benefit from extra protein and fat, which can help prevent muscle wasting and theft of protein and fat by the tumor. The n/d formula also features very high levels of Omega 3 fatty acids, which have anti-cancer properties, and high levels of the amino acid arginine, which aids immune function. Studies show that, even after the tumor has been surgically removed or killed by chemotherapy or radiation, cancer-induced alterations in metabolism persist, so n/d should be fed “forever” to dogs who have had cancer.

Hill’s newest entry in the field of veterinary diets is b/d (brain diet). According to Hill’s promotional literature, b/d has been shown to “improve alertness, increase attentiveness to problem-solving tasks, and improve enthusiasm, so they feel younger.” Just exactly how they asked the dogs how old they felt is not disclosed, but that’s the claim. This food contains high levels of antioxidants. Oxygen free radicals are thought to be the major contributor to human aging, so antioxidants should reduce the signs of aging. This appears to be the mechanism of b/d. This food also contains some nice veggies like spinach and carrots, to appeal to those looking for a more “natural” food than is usually associated with Hill’s.

Conclusions

While Hill’s is probably not all that thrilled with sharing a market that was once Hill’s alone, the competition in both veterinary and OTC diets is good news for dogs whose medical conditions improve with nutritional adjustments. If your veterinarian prescribes a certain diet for your dog, but your dog does not like the food or doesn’t do well on it, or his condition doesn’t improve as much or as rapidly as expected, try one of the other formulas in the same category.

Remember that OTC foods cannot be expected to produce the same results as veterinary diets; they are not as rigorously researched and are allowed onto the market without proof that they work like their labels say they do.

And finally, keep in mind that medical diets are formulated to address specific medical concerns, not to maintain long-term health in dogs of all ages, sizes, and breeds. These foods rarely meet WDJ’s normal selection criteria for top-quality foods (see “Choose the Best Dry Food,” WDJ January 2016). As a rule, the smaller, independent food makers who produce the sorts of foods we regard as supreme in quality do not offer diets for medical conditions.

Jean Hofve, DVM, of Englewood, Colorado, is a regular contributor to WDJ.

Heartworm Medicine Side Effects: Reader Experiences

2
Dog hearworm medicine side effects are a possibility.
Image of a heartworm through a microscope stained and on a slide. Credit: Ed Reschke | Getty Images

Concerning your article, “Reflections on Heartworm, WDJ August 2002:

Last summer in July, we adopted Casey, an 11-month old, 13-inch Beagle. All was well until we gave her the first monthly Heartgard medication. Casey was fine for about 24 hours, after which she developed diarrhea and became lethargic. We took her to our veterinarian, who told us that this incident was just coincidental, and that the medication couldn’t possibly be the cause of the reaction. He gave her an antibiotic and Casey recovered over a period of about a week.

A year later, just about a month ago, we debated about whether we should give her another Heartgard. Foolishly we opted to do so, trusting our veterinarian’s judgment that the medication was necessary. We got the same reaction, only more severe! We are certain that Casey survived only because she is young and strong. Now we know she should never have this medication again, and we are looking for a new veterinarian.

-Luke and Mariana Thompson
Coral Springs, FL

———-

My beloved pet of two years is a Miniature Schnauzer named Jack. I almost lost him. We went to the vet for his yearly booster about four weeks ago and the vet suggested I get the ProHeart 6 injection for Jack instead of the monthly chewable since I forgot to give him a dose.

Exactly two hours later, Jack began throwing up, itching uncontrollably, and trying to escape from the house. I called the vet at 7:25 p.m. (five minutes before the office was supposed to close) and after consulting the vet, the nurse told me that it couldn’t be a shot reaction because they gave him a shot of Benadryl. She told me to wrap him in a towel and call them in the morning.

Five minutes later, the vomiting was more violent. I called the office back and their answering machine was on. I rushed him to the emergency vet and they gave him fluids and another shot of Benadryl. Jack was depressed and avoided me for about a week. The emergency vet told me, Don’t be quick to blame the ProHeart injection for your dog’s reaction. However, I have seen several other cases just like Jack’s and coincidentally, they all had just received the ProHeart 6.

I realize that heartworm prevention is better than getting heartworm, but I will give him the monthly chewable and only during mosquito season.

-Paige Michalski
via e-mail

———-

I gave a Heartgard chewable to my four-year-old Maltese, Pookie, on November 1, 2001. He had just had his annual physical and was healthy, a very playful, energetic, and loving dog. Starting November 8, he slowly became lethargic, didn’t want to play, had one episode of diarrhea, didn’t want to walk, and stopped eating. On November 12, he lost his balance, had two seizures and he died that evening at an emergency veterinary clinic, going into cardiac arrest while having a blood transfusion and while I was holding him. His platelet count was very low and the diagnosis was immune mediated thrombocytopenia.

This has been such a terrible loss and experience, and I still can’t believe that my healthy sweet little dog died. There were no warnings on the package, like death or serious illness being a possible side effect.

-Barbara Marsden
Pasadena, CA


I am so sorry to hear accounts like these. We would never advocate that the preventives for heartworm should not be used; clearly, they have their uses.

However, we’d like to see dog owners and veterinarians regard them with more caution. Many vets are unconvinced that the medications that they use so frequently without problems can cause some dogs illness, and by discounting this possible link, precious time is wasted that could be spent treating the animal for poisoning.

We’ve said this in a number of articles about the potential dangers of using toxic pesticides on dogs; serious illness or death is a possible side effect of all of them. Many dogs tolerate the use of these products without problems; some probably experience mild side effects that are never associated with the pesticides; and a few do suffer serious illness.

So, even if your veterinarian doesn’t do it, it is vitally important that YOU report your loss to the FDA’s Center for Veterinary Medicine. They maintain a database of adverse drug experiences suffered by animals. There is a form you can fill out online (www.fda.gov/cvm/index/ade/adereporting.htm) or you can call (888) FDA-VETS. Both reporting systems are confidential.

While the Adverse Drug Experience reports don’t “prove” links between a health problem and a drug, they can help highlight areas where further study or caution is needed. –Editor

———-

As a former user of black walnut, I feel compelled to share with you what I learned from my holistic veterinarian. He informed me that black walnut can have very astringent effects on the lining of the digestive tract, and that over a period of time can actually harden the gut, inhibiting the nutrient transfer process. Black walnut contains a high level of tannins, which can ultimately interfere with absorption of vital nutrients. He discouraged the long-term use of this herb extract as a preventative for heartworm, instead encouraging immune system support and proper nutrition. He is also an advocate of a topical mosquito repellent, Buzz Away (made by Quantum, quantumhealth.com or 800-448-1448). This is a combination of cedarwood, eucalyptus, lemongrass, and peppermint oils, and is available in a pump spray and towelette form.

-Ann Schmidt
Nantucket, MA

———-

I enjoyed “Living with a Difficult Dog” (September 2002) and the accompanying sidebar that encouraged owners to rule out physical causes an often overlooked cause of aggression.

At four years old, our female Shar-Pei/mix started being aggressive. She lunged at someone who petted her, and a few weeks later bit a small boy who was running by. We took her to our trainer for a refresher course, but after two more incidents, we thought we might have to put her down.

While looking her over one night, I happened to check her mouth. She flinched and jumped as I ran my fingers around her gums. I got her to lay still while I peered inside. Imagine my horror when I found four broken molars with pink roots exposed, causing excruciating pain! An outstanding veterinary dentist told us that the hard knuckle bones Calypso loved to chew were the cause of her problems; she had ground her teeth down to the roots. Her problems were solved with several root canals and stainless steel crowns.

Five years later, Calypso is the sweetest, best-loved dog in the neighborhood. She eats raw turkey necks and chicken backs to keep her teeth in good condition, and at nine years old, her veterinarian always exclaims, “What great teeth, and what a sweetheart!”

-Donna Philburn
via e-mail