Home Blog Page 318

Dog Injury Solutions: Calendula and St. John’s Wort

[Updated May 23, 2018]

You come in from a jaunt in the woods with your trusty Labrador and notice, as you rinse the mud from his legs and feet with a hose, that he somehow got a cut on his upper leg. You could spray it with an alcohol-based disinfectant, or swab it with an antibiotic cream, in an effort to kill the bacteria that might infect the wound.

But, according to holistic healers, these modern wonder drugs may constitute a chemical overkill, going far past their intended purpose (killing harmful foreign bacteria) and killing the resident beneficial bacteria that live on the dog’s skin. And what sense is there in dragging out the heavy artillery when just a light protective force is needed? Especially when there are natural, effective, inexpensive, and synergistic alternatives: calendula and hypericum, herbs that have been used for centuries for wound care.

Calendula officinalis (also known as the Marigold plant, but usually called calendula) and hypericum (also known as Saint John’s Wort), are very safe, yet incredibly effective at cleaning the site of an injury and encouraging the body to heal. Homeopathic and herbal preparations of calendula and hypericum have proved invaluable in modern-day holistic dog care. In fact, it’s difficult to find an herbal wound preparation that does not contain some form of one or both of these potent plants.

Healing Your Dog’s Wounds with Calendula

calendula officinalis

Wiki Creative Commons

Calendula is one of the most effective remedies known to mankind for the treatment of wounds. Although it has no antibiotic properties (it does not have the ability to kill or slow the growth of living organisms), calendula seems to help prevent infection by somehow triggering the release of the body’s own antibiotic substances.

Calendula also helps stop bleeding and promotes tissue granulation so that cuts and burns can heal properly. It even helps prevent proud flesh (an overgrowth of granulation tissue, an angry red color, laden with tiny blood vessels that bleed easily). Because of these properties, any wound from a minor scrape to a deep, serious gash can benefit from the use of this medicinal herb.

Cleansing solutions made from calendula tincture can also be very useful. Whereas products like Betadine clean and disinfect wounds, they do not encourage healing. A solution made from calendula tincture cleans the wound, helps stop bleeding, stimulates the body to fight infection, and triggers the body’s own internal wound-healing processes such as granulation. Calendula also demonstrates a potent anti-fungal action and may be used externally to combat such infections.

To start the healing process, promptly rinse the wound with distilled (if possible) or tap water and then flush the site with calendula or a calendula/hypericum solution (see below).

The topical calendula products can be used liberally and frequently. Apply them once a day for minor or mostly healed injuries, or three to five times a day for more serious conditions. Continue using them until the cut, abrasion, or burn has healed completely.

Hypericum Helps with Nerve Damage

hypericum perforatum

Wiki Creative Commons

Hypericum perforatum, usually called hypericum, is used for injuries to nerve endings. It is especially helpful for blows to the extremities like the toes and tail, where there are intricate clusters of nerves. It is also effective for spinal injuries where there is threat of damage to the spinal cord. Because of its ability to repair nerve damage, it helps to relieve pain from any type of blow such as a bruise from a kick or a painful cut. It also helps the body resolve abscesses and infections. In addition, it can be effective in preventing tetanus.

Hypericum works beautifully in wound care when applied topically along with calendula. Use the combination formula described below to flush wounds and promote tissue and nerve healing. For a wound that needs regular cleaning and dressing, use the solution every time you treat the injury.

Making a Calendula-St. John’s Wort Solution

To make a calendula/hypericum solution you will need to purchase a “mother tincture” of each remedy. A mother tincture is made from a mixture of the original herb and alcohol or glycerin. Unlike the homeopathic form, which is drastically diluted, a mother tincture is a concentrated form of the active element of the herb.

To prepare the solution, you need a jug of distilled water and a jar or bottle. Using very clean utensils, measure out the ingredients into the container in the following ratio: one part calendula tincture, one part hypericum tincture, and eight parts water. Do not contaminate the tinctures by touching them with your hands or unclean utensils. Once you have added the tinctures to the distilled water, close the container and shake gently to blend.

There are several ways to apply this solution. You can pour it onto sterile cotton balls which you use to clean the wound. You can also pour the liquid into a syringe and use it to flush the wound. This application is ideal for initial treatment of an open wound or daily flushing of a puncture wound. You can also pour the solution into a small spray bottle and mist it onto the skin.

Store the solution in a cool, dark place. Because the mixture has a limited shelf life (about one week), only make what you will need for the particular condition you are treating. If the solution becomes cloudy or fuzzy, dispose of it.

Mother tinctures will last a long time if they are kept in a dark, dry, cool location. Keep the kit for making and using the solution (mother tinctures, distilled water, measuring utensils, mixing jar, syringe, cotton balls, a copy of the directions) clean and available in a sealed plastic container in your medicine cabinet so they will be ready for an emergency. Calendula and hypericum are wonderful herbs to keep in your first aid kit.

Dog owners can readily find these herbal wound-care preparations in health food stores and some pet stores and catalogs. Purchase and experiment with them now, so you will be familiar with them if your dog suffers a skin problem or wound in the future.

About Puncture Wounds

No dog lover likes to see a wound on his or her dog, but puncture wounds — ones which are deeper than they are wide — should cause extra concern. A puncture wound can trap debris in its recesses and provide a perfect environment for bacterial growth. Bacteria of some kinds can cause a troublesome infection, but the worst kind of bacteria — tetanus — can cause a life-threatening disease. For these reasons, puncture wounds call for immediate attention and diligent ongoing treatment.

Unlike humans and horses, dogs possess natural resistance to tetanus, and for this reason are rarely vaccinated against the disease. Herding dogs and those who live around high concentrations of livestock are the exceptions, due to the high amount of tetanus bacteria found in horse and cow manure. Tetanus is relatively uncommon, but because it is a fast-moving, often fatal disease, dog owners need to treat its threat with respect.

Signs of tetanus include spastic contractions and rigid extension of the legs, difficulty opening the mouth and swallowing (giving rise to the infamous nickname, “lockjaw,”), hyperactive reflexes to any stimuli, and, sometimes, fever. (See below for more information about seeking help with your dog’s serious injuries.)

If your dog suffers a puncture wound — which can be caused by a porcupine quill, stepping on a nail, or a bite, to name a few – and he exhibits any of the above symptoms, he needs immediate veterinary care. If he has tetanus, he’ll need an injection of tetanus anti-toxin and an antibiotic to save his life, followed by injections of tetanus toxoid vaccine for future protection.

While herbal medicine and homeopathy offer alternatives to antibiotics for fighting infection and preventing tetanus in puncture wounds, it is important to discuss the options for care with your regular veterinarian before an injury occurs. It is not appropriate to interfere with an attending veterinarian’s treatment protocol (using antibiotics and tetanus anti-toxin) while he or she treats a serious wound.

When To Call A Veterinarian

Finding your dog in any of the following situations indicates a serious condition that should be treated by a veterinarian immediately:

1. Higher-than-normal temperature (normal is about 101 to 101.5; smaller dogs tend to be at the higher end of that range).

2. Unusually depressed or frantic behavior, particularly if the episode follows injury or illness.

3. Lack of usual appetite or failure to eliminate as usual.

4. Any wound where an item is still lodged within the injury site or there is potential damage to a tendon, bone, or joint.

5. Any wound that is bleeding profusely or drains thick cloudy pus.

6. Any time your dog is in tremendous pain or experiences any serious swelling, heat, or lameness.

7. Any wound that is non-sensitive at the time of injury but develops sensitivity in the days following.

8. With any illness or injury your dog experiences, ask yourself, “Do I feel completely comfortable treating this condition myself?” If you cannot answer YES with total confidence, call your veterinarian for assistance. The most important thing is to not overestimate your abilities.

Also, never put off calling the veterinarian solely to save money. Instead, consider the visit as an investment in your dog’s health and an educational opportunity. Ask your vet to explain his or her examination procedure and treatments and learn!

As Good As Your Dog?

0

Most of us were exposed to “If,” the famous poem by Rudyard Kipling, when we were in high school. If you weren’t required to read it in a literature course, you probably saw it on a poster on a childhood friend’s bedroom wall. You know, it’s the one that begins,

“If you can keep your head
when all about you
are losing theirs,
and blaming it on you . . .”

The poem goes on to list a number of things that the author suggests are prerequisites for being an honorable human. If you can do this and do that, he sums up, then . . .

“yours is the earth and everything that’s in it, And – which is more – you’ll be a Man, my son!”

Recently, a dog lover sent me the following takeoff on Kipling’s poem, by an anonymous author, and containing a surprise ending. He’s got a point. To wit:

“If you can start the day without caffeine,
If you can get going without pep pills,
If you can always be cheerful, ignoring aches and pains,
If you can resist complaining and boring people with your troubles,
If you can eat the same food everyday and be grateful for it,
If you can understand when your loved ones are too busy to give you any time,
If you can overlook it when those you love take it out on you when, through no fault of yours, something goes wrong,
If you can take criticism and blame without resentment,
If you can ignore a friend’s limited education and never correct him,
If you can resist treating a rich friend better than a poor friend,
If you can face the world without lies and deceit,
If you can conquer tension without medical help,
If you can relax without liquor,
If you can sleep without the aid of drugs,
If you can say honestly that deep in your heart you have no prejudice against any creed, color, religion or politics,
Then, my friend,
you are ALMOST as good as your dog.”

Ouch!

Did that zing you, too?

It stings because it’s so on target!

As I read it the first time, I couldn’t help but envision a human who exemplifies all the characteristics contained in the poem. In my mind’s eye, I saw a rather too-perfect, saint-like character. But then suddenly realizing that the author was actually describing a dog . . . It’s with shock that I re-read it and realized, my goodness, almost ALL dogs can fit this description, most of the time!

My favorite line is the one about ignoring a friend’s limited education and never correcting him. When you turn it around the way the author intended and realize that dogs accept our lack of knowledge about them rather calmly, it really points out how dramatic and demanding we can get when we want dogs to learn our ways.

Keep some perspective as you work with your dog – and your friends and family!

-By Nancy Kerns

Pickin’ Clickers

0

First, there was the box clicker a strip of steel encased in a small plastic box that makes a resounding CLICK! when pressed on the free end of the steel strip. The clicker, used to mark the instant of desired behavior and communicate to the dog that he has just earned a reward, has become a familiar training tool in the last decade. (See There’s More Than One Way, WDJ July 1998; Doggedly Clickin Chickens, December 1998; Tricks for Clicks, May 2000.)

These wonderful tools inexpensive, sturdy (although not indestructible they can rust) are incredibly powerful, though they don’t require even an ounce of force to be exerted on the dog. Massachusetts-based trainer Karen Pryor deserves thanks for this. It was she who launched the dog training industry’s interest in clicker-training with her unassuming and now-famous paperback book, Don’t Shoot the Dog, published in the late 1980s and re-released in 1999. The only drawback of the original box clicker was that it was hard to hold onto with hands that were covered in dog spit and hotdog slime. We can thank human ingenuity for solving that problem, and for the slew of clicker innovations that have been developed in the last decade, each better or more fun than the last.

If you are still struggling with dropping the original box clicker on the ground when you reach into your pocket for treats for your dog, you are in for a treat yourself. You are about to discover the wonderful world of clickers for the new millenium.

These clickers are unrated
Because of our extremely biased attitude about clickers we’ve never met one we didn’t like; we’ve simply met some we like more than others! We’re going to forego our usual zero-to-four-paws ratings for these products. We’ll simply present you with a chronological history of the clicker, which has evolved (and continues its evolution) with numerous helpful features; choose the models that suit your training style. You can’t go wrong only one of the clickers featured here costs more than $5; most are much less.

Clicker Basics
Like a beloved old workhorse, the original box clicker is still serviceably sound. It clicks when you push on it. In the beginning, that was all we asked from our clickers. Soon trainers began ordering personalized box clickers with their business information printed on the back.

Then someone solved the clicker-drop problem by drilling a hole in the corner of the clicker and running a string or elastic hairband through it, which could be slipped over the trainer’s wrist.

Next, an enterprising entrepreneur took the concept one step further and produced the tab clicker. At one end, the tab clicker has a little plastic tab with a hole in it. Two elastic hairbands made it a simple matter to dangle the tab clicker from your wrist, thus eliminating the clicker-drop problem. (Run one elastic band through the tab hole, then back through the band itself to secure it to the tab. Then take the second elastic band, run it through the first, and back through itself. Insert hand through second band. Presto!)

The tab clicker helped owners become more coordinated and improve the timing of their clicks and treats, since they could now drop the clicker with impunity in order to deliver the goods promptly to the waiting canine. When they needed the clicker again, it was right there on their wrist, instead of somewhere on the ground.

Humans, however, are never satisfied with make-do when a marketable product is inventable! Soon enough we had the wrist clicker and the finger clicker. Then someone realized that a metal split-ring fits neatly through the clicker-tab hole. That person threaded a plastic coil (like those used to hold keys) though the ring, and the official wrist clicker was born. Before you could say ponytail, trainers all over the country had abandoned their elastic hairbands and were leashing their clickers to their arms with bright, neon-colored wrist coils.

Gary Wilkes, an early clicker trainer from near Phoenix, Arizona, took this concept one step further, and added a whistle onto the coil of his Wrist-O-Click. The whistle can be used either as a long-distance attention getter or a long-distance reward marker. Wilkes came up with yet another variation the Redi-Click a box clicker with a small elastic loop attached to one end, just big enough to fit over the trainer’s thumb or finger. This keeps the clicker handily in the palm of your hand rather than dangling from your wrist.

Sometimes, however, the wrist or finger clicker gets in the way. It dangles freely from the arm or hand, and can thump your dog in the head at inopportune moments. There’s nothing more frustrating than accidentally punishing your dog by bonking her in the head with the clicker when you were reaching to pet, praise and reward her because she finally offered you that elusive behavior you have been working so hard to get.

Dedicated clicker thinkers quickly came up with a viable solution to the clicker-bonk challenge.

The next thing we knew, we had the clip-on clicker. Still incorporating the plastic coil technology, the clip-on clicker uses a straight coil rather than a loop. One end attaches to the split ring, the other to a small metal clip that fastens neatly to your belt loop or other handy ring. The clicker is still kept leashed and under control, but now resides at your waist instead of on your wrist. It takes a little bit of trainer adaptation to get used to reaching for your hip (Smile when you say that, Pardner!) instead of just grabbing for the wrist clicker hanging below your hand, but it’s a behavior change that’s relatively easy to accomplish if you put your mind to it. The no-bonking pay-off is well worth it.

But the inventors and entrepreneurs weren’t done with the clicker yet. Until very recently, all of the clicker innovations were relatively low-tech, with few moving parts. That changed in the year 2000, with the introduction of the Retract-O-Click.

The Cadillac of Clickers
By far the greatest leap forward in clicker technology to date, the Retract-O-Click comes attached to its own miniature retractable leash that coils itself up into a tiny round plastic case. The case is mounted on a small alligator clip that easily grabs onto your belt loop, pocket, or any other handy loop or flap of fabric. When not in use, the clicker zips itself neatly into its case and sits there snugly, just waiting for you grab it and pull it out again.

While the other changes that occurred over the years were pleasant improvements to the basic clicker, in our opinion, the Retract-O-Click is a must have. When they try it out for the first time, the reaction of most trainers is a huge grin and the comment, I love it!”

Kermit’s contributions
The only clickers that we’ve seen that depart from the box design are metal or plastic frog clickers. The metal frog has a tiny hole drilled in his posterior and comes with a key chain and split ring attached. Froggie opens his mouth when you click his tail, and emits a click at a much higher pitch than the standard clicker, which makes it a nice option for dogs who are a little intimidated by the resounding CLICK! of the box clicker.

Plastic frogs are not always available, but when they are, they’re very inexpensive, and lots of fun as giveaways. Having a birthday party for Bowser, or taking Sheba to school for show-and-tell? The little frogs are great party favors, and make a huge impression on Bobby’s classmates. They are not very durable, so don’t expect them to last as long as your regular clickers. They do make a comparatively small click!, and are also useful with dogs who are afraid of loud clicks.

The best accessory
Finally, we would be remiss if we did not tell you about our favorite clicker accessory, Doggone Good’s clicker bait bag: This pet products maker (best known for its portable Cabana Crate) has created a well-designed and -constructed nylon bait bag (to hold your dog’s most beloved training treats) that has an added feature a clicker-sized pocket that your most beloved training tool can snuggle in when you aren’t using it. No more lost clicker woes if you can remember where you left your bait bag, you’ll know where your clicker is.

-By Pat Miller

Shocked About E-Collars

Of course, we asked for it (literally!), but we have received an avalanche of mail regarding an article we ran in our January 2001 issue, “A Buzz About E-Collars.” The letters of support for our position against the collars outnumbered the letters from people who approve their use, but every writer had good points to make. The following is a sampling of the letters we received, pro and con. All the letters have been edited for brevity – people really wanted to talk about this!

One interesting phenomenon: Thus far, we have not received any letters in favor of using e-collars for training – just for barking-control and containment.


Against the collars
In my opinion, “electronic training collar” is a very appropriate label for this training tool because they inflict stimulation and shock. In inexperienced hands these collars very definitely “shock.” If anyone thinks that they don’t cause discomfort then why does the dog respond to the collar?

It’s doubtful that e-collars teach a dog to be respectful – and they definitely don’t teach trust. Trust and respect can be taught through simple and effective, pain-free, management and training techniques.

Further, teaching people to train and manage their dogs is far more enjoyable and risk-free with the clicker. Also, I’ve never seen a dog bite the trainer for clicking inappropriately, unlike giving a collar correction with bad timing or incorrect force. If a mistake is made with the timing of a reward marker, the worst thing that happens is that training may be momentarily delayed.

-Valeria A. Cascaddan
Technique Canine Services
Vanderbilt, MI


I wholeheartedly agree with your bias against e-collars. If someone really thinks they are so humane, I suggest they wear one and let you “tune” the intensity until it reaches their “recognition” level. I have two dogs who, admittedly, have their problems, but I cannot fathom making them submit or respond out of fear, which is exactly what the e-collar instills.

-Marlene Tokarski
via email


If these shock collars are indeed as safe and painless and effective as they are claimed to be, why then couldn’t they by used by parents on their unruly children? Parents could easily maintain control of children, during our quiet dinners in restaurants, for example, by an occasional “zap” to remind them of the “rules.”

Brilliant idea, don’t you think? NOT!

-Betty C. Whiteaker
(A positive reinforcement trainer)
Springfield, VA


To anyone still harboring doubts concerning the humaneness of shock collars, I suggest the following test. First, reread the pro-shock collar segment published in the January issue, but mentally substitute “child” for “dog.” No matter how nice it might be to get that potty training taken care of just a bit quicker, are you convinced?

Now perform the same substitution while reading Pat Miller’s rebuttal. Could you, or anyone else, fail to be swayed by her arguments? The fact that shock training works (the fact that we can use pain to impose our will upon animals) simply does not make it right. Not until everyone is as enlightened as Ms. Miller will such needless cruelty of convenience end.

By the way, I have tried such a device on myself. It hurts. A lot.

-Brad Pritchett, Ph.D.
Tucson, AZ


While I certainly respect your willingness to look at both sides of an issue, I feel there are certain issues that do not have two moral sides. Discussing the pros and cons of shock collars is like discussing the pros and cons of beating a child.

While I understand that some trainers have had “success” in using these devices, that certainly does not make it a humane method of training. There are far too many people who are just looking for some “expert” to justify their use of such devices. You have now given them one.

-Lisa Hanson Mantle
via email


Dr. Phyllis Giroux (the expert you quoted in favor of e-collars) is a friend of mine and chiropractor to my dogs. While we agree to disagree about training methodologies, I know her and her staff to be knowledgeable, professional, and to have a deep affection for dogs. I have not had the pleasure of meeting Pat Miller, though I have felt a kinship with her through her writings for the past couple of years. Our training histories appear to be very similar, as are our current views on training.

To find true conviction in our beliefs, we need to know something about “how the other guy lives,” or trains, in this case. I applaud Dr. Giroux for bringing forth her information/training beliefs to what she must have known would be a tough audience! I applaud Ms. Miller as well, in her point-counterpoint type response to Dr. Giroux’s article. My congratulations to WDJ for providing the forum. While we may not agree with all the methods of dog training available, knowledge is power! I hope other subscribers hold to WDJ’s New Year’s Resolution to “stay respectful, kind, patient, and open-minded.”

-Cathy L. Hughes
Mountain View Dog Training
Amissville, VA


Approving use for barkers
As a long-time subscriber to WDJ, I thoroughly enjoy the large majority of your articles. I find the magazine to be extremely informative and respect the decision to not allow advertisements. In fact, I respect all that WDJ and its contributors say. I don’t always agree but that’s not why I subscribe!

I am not an advocate of the e-collar at all! To use such a device for training purposes is, in my humble opinion, lazy. But I wouldn’t say that using it for behavior management is inhumane. Here’s why:

I have two beautiful, healthy, lively German Shepherd Dogs, 15 months old, brother and sister. They are inside more than out and we take them everywhere. There’s one problem, they love to bark – and bark and bark – especially when we are not home and they are outside. One of our neighbors doesn’t care for them because he doesn’t like the barking; that’s understandable. However, he dislikes it so much that he has called Animal Control several times. He’s been at our front door yelling and threatening to file a “nuisance” claim.

In order to keep our pups alive and free from the threat of this man (we even worry whether he would try to poison them), we purchased e-collars for them. Without these collars, we would not have these pups. We are convinced that our neighbor would have acted out his anger. The stimulus from the lowest setting keeps our dogs from barking excessively. They still bark, just not continually. Apparently, this is tolerable for our neighbor; we’ve had no further complaints.

We tried every other known tool to stop the barking when we’re not home, including citronella collars (they actually don’t mind the scent) and audible and inaudible noise emitters.

I am truly disheartened that WDJ failed to acknowledge that this collar can be a life saver for managing barking. Please “Don’t Shoot Me” and others in a similar position.

-Kristy Jennings
via email


Approving use for fencing
Your article condemning e-collars does much to lessen your credibility as an authoritative dog care and training publication. The very term “shock collar” is pejorative and inflammatory.

We have used the products on a large, fully coated Siberian Husky known for his wandering ways, and two small Cavalier King Charles Spaniels, too valuable to permit to wander. The collar emits a warning tone prior to any electrical stimuli, which is fully adjustable to permit the least amount of stimulation to the animal depending on its body structure and thickness of its coat.

The product is professionally installed and professional training in its use is furnished with the purchase. Once the training is completed, dogs understand where the line is that they are not to cross. Certainly the small shock – no more intense than that experienced from static electricity – is preferable to the pain a dog would suffer if hit by a car or fired upon by an irate neighbor.

-John A. McHardy
Pueblo West, CO

Tethering Your Dog for Training

For many years, I have been a vigorous and vocal opponent of keeping dogs tied or chained as a primary means of confinement. The hazards of tying a dog are well-documented, and include increased aggression, vulerability to human and non-human intruders, and the risk of hanging or choking.

It may come as a surprise, therefore, to know that I regard the tether as an invaluable piece of training equipment. The difference – and it’s a big one – is in the application.

Used as a training tool, the tether is a short (about four feet in length) nylon-coated cable with sturdy snaps at both ends. Its purpose is to temporarily restrain a dog for relatively short periods of time in your presence, to allow you to accomplish any one of a number of training and behavior modification goals. It is not used as punishment, or to restrain a dog for long periods in your absence.

appropriate dog tethering

Among other things, the tether can be used as a time-out to settle unruly behavior; to teach your dog to sit politely to greet people; as an aid in a puppy supervision and housetraining program; and to help your dog learn long-distance downs. There are several different ways to set up your tether, depending on your circumstances (see “It’s Easy To Make A Tether” below). Let’s take a look at how you might use the tether in each of the situations listed above.

How to Start Using the Tether with Your Dog

You want your dog’s time on the tether to be a pleasant experience. Before you actually use it the first time for training purposes, take the time to teach him that it is a good place to be, so he doesn’t panic when you try to use it.

Start by attaching his collar to the tether and staying with him. Click! or say “Yes!” and feed him treats, several times. If he knows the “sit” cue, ask him to sit and Click! and treat him some more. Then take a step back, Click! and return to give him a treat.

Gradually vary the distance and length of time between each set of clicks and treats, until he is calm and comfortable on the tether even if you are across the room. If he seems worried about being on the tether, keep your session brief and try to do several short sessions a day until he accepts the restraint.

Release him from the tether when he is most calm, not when he is fretting. If the tether doesn’t worry him, one or two practice sessions should be all you need to start using it in training.

Using A Tether for Dog Time-Outs

Rowdy, your adolescent Lab, is out of control. He’s not supposed to get on the furniture, but every time you sit on the sofa he tries to jump in your lap. If you push him off your lap he just comes back for more; in fact, he thinks it’s a great game. Rowdy needs to learn about “Time Out!”

A time-out is not intended to be a harsh punishment. It is simply an opportunity for Rowdy to calm down, and to learn that his rambunctious behavior results in his house-freedom privileges getting revoked for a while. Believe it or not, with the use of a tether, he can learn to control his own behavior in order to maintain his freedom.

Install a tether in the room of the house where you spend the most time – or have several, one in each of your high-use areas. Put a rug or soft dog bed at each tether, so Rowdy will be comfortable. Have a few of his favorite toys handy so you can give him one when you put him on a time out.

Now just sit down on the sofa, and wait. When Rowdy jumps into your lap, say “Oops, time out!” in a cheerful tone of voice. Then take hold of his collar and gently lead him to the tether. Be pleasant – no scolding or yelling. Hook the tether to his collar, put his toys on the rug, and walk away. If he fusses, ignore him.

When he settles and is lying calmly on his rug, you can Click! your clicker or say Yes! and either toss him a treat or walk over and give him one. After a few Clicks! and treats for calm behavior, release him from the tether and sit on the sofa again. If he jumps up, do another “Oops, time out!” and pleasantly put him back on his tether.

The number of repetitions required to get the message across to Rowdy will vary, depending on you and your dog. If he has a long history of reinforcement for jumping on your lap – that is, if he has been playing the lap game with you for years – it will take longer to change his behavior than if he’s only been doing it for a few days, weeks, or months.

training dogs with tethers

Also, if you (or other members of your family) are not consistent about putting him on a time-out for every lap-jump, the behavior will persist much longer than if everyone reacts in the same way.

Dogs learn through repetition, so if he continues to jump on you after you release him from the tether, just “Oops, time out!” him again, put him back on the tether, and consider it a golden opportunity to do lots of training repetitions.

The timing of your Click! is important because it marks the good behavior; you want your dog to know he’s getting rewarded for whatever he was doing when he heard the Click! The timing of your “Oops!” is also important. The “Oops!” should happen while Rowdy is doing the inappropriate behavior, not when you are attaching him to the tether, so that he can eventually understand which behavior has earned him the time out.

Putting a dog in the back yard when he misbehaves is not as effective as using a tether, because most owners forget to let the dog back inside when he’s behaving himself. If you expect him to learn how to be well-behaved, it is important to give him the chance to be rewarded for the behavior you want (being calm), and not just manage the behavior you don’t want by exiling him from the pack.

Teaching Dogs to Greet Politely

Jumping up on people is a natural behavior for dogs. It’s also a very annoying one. Dogs just want to greet you and have you greet them back. They quickly learn that people invariably pay attention to them when they jump up, so they keep doing it – remember, dogs do what works.

You can use the tether to teach Rowdy that people pay attention to him only when he sits. If he learns that jumping up doesn’t work, he’ll stop doing it.

Start by practicing with family members. Put Rowdy on the tether and take several steps back. Now walk toward him. If he jumps up, stop out of his reach and wait for him to sit. If you have been clicker-training him, this should happen fairly quickly.

When he sits, move forward again. If he jumps up, stop, and wait for him to sit. Continue until you are standing in front of him and he is sitting in front of you. Click! and feed him a treat. Now do it again, until you can walk right up to him without having him jump up. (If he jumps up when you offer the treat, whisk it away behind your back, wait for him to sit, and offer it again. Several disappearing treats should convince him to sit patiently until you get it to his mouth.)

As soon as Rowdy will sit for your approach, add other people to the game – family members, friends, and anyone else you can convince to participate. Set up a tether near your front door for a handy place to attach your dog when you greet visitors. This will help you teach him to greet people calmly at the door at the same time.

You can make use of your leash for the same purpose as the tether when you are walking your dog in public. When anyone wants to pet him, tell them Rowdy is in training and you need their help. Explain that they can pet Rowdy and feed him a treat as soon as he sits. This way, Rowdy will learn that the “Sit” game works for all humans, not just the ones in his pack or at home in his den.

Puppy Supervision

The biggest mistake most new puppy owners make is giving baby Rowdy too much freedom, too soon. They spend much of their day two steps behind their darling little dynamo, cleaning up the destruction and doggie-doo. Rowdy gets to practice all kinds of rewarding inappropriate behaviors, such as house soiling, raiding garbage cans, counter-surfing, chewing human possessions, and playing a wonderful game of keep-away when humans try to get their possessions back.

This is the time in Rowdy’s life when it is most important to practice behavior management. Along with a crate and a puppy-pen, a wisely-used tether can take much of the pain out of puppyhood. The portable “under-the-door” tether is perfect for this application, as you can take it with you into any room, not just those that are set up for wall tethers. Since puppy teeth tend to find furniture particularly inviting, attaching the tether to the piano or coffee table leg isn’t a great idea either. You can slip the portable tether under a door, close it, and keep Rowdy close at hand instead of worrying about whether he’s peeing on – or chewing up – the Oriental rug.

Dog Training from a Distance

Tethers are not just for basic good manners training. Once Rowdy has learned house manners, you can also use your tether to teach him to respond to your cues from a distance.

In basic training you probably taught Rowdy to sit and lie down right next to your side, or directly in front, facing you. Rowdy now thinks that “Down” means “lie down next to my human.” If he’s on the other side of the room and you ask him to lie down, he comes to you and then drops to the ground. Darn. You wanted him to lie down on his rug on the other side of the room. How hard is that for Rowdy to figure out?! Remember that your dog is only doing what he thinks he’s supposed to do. Don’t get mad, get training. Using a tether, it’s simple to show Rowdy that “Down” means “down wherever you are.”

First, you need a good response from your dog to a verbal “down” cue. If you don’t have it yet, go back to his basic training. You want him to lie down for you on just the word cue, without having to point toward the ground or lure him down. When he will do that, attach him to the tether, face him, and ask him to down. Click! and reward when he lies down. Then invite him back to a sit and take a step back. Ask him to down again. If he steps toward you, let the tether restrain him, and just wait. If he doesn’t down after several seconds, lure him down. Click! and reward.

Stay in that same spot until he will down on the verbal cue from one step away. Now take another step back and try it again. Lure if necessary, Click! and reward when he does it. Continue to repeat the exercise at each new distance until he responds to your verbal cue. Then take another step away, until he will do a distance down on the tether from across the room or the yard. Then try it off the tether, again starting with a short distance, gradually moving farther and farther away as he understands what you are asking him to do.

Some dogs can do this in one training session, others take several. Remember to keep your sessions short, and to stop training while you and your dog are both enjoying the game. If one or both of you are getting frustrated or bored, stop, do something easy and fun, and take a break.

It’s Easy to Make A Tether

A tether is a simple, four-foot length of nylon-coated cable with sturdy snaps on both ends. Most of the cables available commercially are intended for tying a dog outside, and are a minimum of 10 feet. That is too long for most training purposes.

[Editor’s Note: Against Miller’s advice, we bought a 10-foot model, thinking we could cut it in half and make two tethers. Our test dog broke the commercial product’s hardware in about two minutes. Then we read the package’s warning that the product wasn’t made “to be used as a restraining device.” Oh!]

Fortunately, it’s easy to make your own training tether, or ask your local hardware store if they will attach the snaps to the ends of a four-foot cable for you with the necessary ferrules (the metal hardware used to hold the cable) and a crimping tool.

Take a four-foot length of 1/8-inch nylon-coated cable. Thread one end through one channel of the appropriate-size ferrule, then through the ring of a small but sturdy metal clip. Fold the cable back on itself, run it through the other channel of the ferrule, and crimp the ferrule on both pieces of cable to hold the end in place. Repeat with the other end. You now have the basic tether.

[Editor’s Note: We found the price of a crimping tool to be restrictive; we used a hammer to crimp the ferrules.]

Next, screw an eye-bolt into a stud or beam, or other solid piece of wood in your home (or put eye-bolts in several locations) that are sturdy enough to withstand your dog’s weight if he pulls on the tether with his full weight. Snap one end of the tether to the eye-bolt and the other to your dog’s collar. Be sure to provide a comfortable place for the dog, and a toy or Kong stuffed with food to keep him happy.

If you are renting, and cannot possibly screw eye-bolts into the walls, wrap one end of the tether around the leg of a heavy piece of furniture and hook it onto itself. Attach the other end to your dog’s collar. Be sure the furniture is heavy enough to prevent the dog from dragging it, and make a comfortable place for the dog to sit or lie down. This is an easy and convenient application of the tether for dogs who don’t tend to chew. It is not appropriate for most young puppies or other dogs who are inclined to gnaw furniture legs.

The Portable Tether

Screw an eye-bolt into small piece of wood, about 2″x 4″x 4″. Slip the cable under a door with the wooden block on the far side. Close the door. The tether is now held in place by the block, and you can clip the other end to your dog’s collar. This tether is handy to use when there are no eye-bolts installed, when the dog is too heavy to be held by furniture, or when a puppy might chew on furniture legs. It is easy to carry with you from room to room, or to take with you when you want to be able to work on your dog’s training at friends’ and relatives’ homes.

Work on the Relationship

Properly used, the tether is a great training tool. It can allow Rowdy to be part of the family instead of shut in his crate or exiled to the backyard. It can help ease domestic tensions when some family members are less enthused about your dog’s presence than others. Most important, it can teach Rowdy to control his own behavior, without his humans feeling compelled to constantly punish him for his inappropriate actions. This improves the relationship between dog and owner – and that makes the tether an extremely valuable tool indeed.

Pat Miller is a freelance author and a professional dog trainer. She is also a member of the Board of Directors of the Association of Pet Dog Trainers.

What’s In A Name?

0

As previously discussed in this column (“Who’s in Charge?” WDJ December 2000), the Association of American Feed Control Officials (AAFCO) is the single biggest organizational influence on the pet food industry in this country. Even though it is a non-regulatory, non-governmental voluntary agency, it is also comprised of the individuals who are most concerned with the production of pet foods – that is, state feed control officials as well as advisory liaisons from the United States Department of Agriculture (USDA), Food and Drug Administration (FDA), and the pet food industry, so most states adopt some or all of its rulings and regulations as law.

AAFCO meets twice a year to discuss developments in the industry and to hear requests for changes from its various constituents. These meetings are always interesting – at least, to those of us who are intensely interested in how the actions of this body can affect the food that gets eaten by the nation’s dogs and cats! The January 2001 meeting (which I attended) was typical in revealing the various pressures that the product – food for animals – is subject to by all the parties that have a financial stake in it.

For instance, numerous definitions were discussed at this meeting. How can a definition of a feed ingredient or feed description matter? Hey, in this business what you can call something is everything!

By any other name…
For example, in the January meeting, a new feed term, “Mechanically Separated Poultry, Feed Grade,” was sought by a single company, Ducoa, for a single product: defeathered, deboned, spent laying hens. “Spent hens” are worn-out egg layers, discarded by the egg industry before they reach their second birthday. Because they are bred to lay eggs, they aren’t meaty enough to be profitable when processed for human consumption. Up to now, they haven’t even been utilized much in animal feed or pet food, because it hasn’t been worth the cost to ship them to slaughter.

Ducoa proposes salvaging these spent hens for pet food through a newly developed process. First, the hens are fasted (to “clean out” their intestines), then killed by gassing with carbon dioxide. Feathers are scalded off, and the carcasses are centrifuged through a screen to separate the hard parts (bones, beaks, and feet) from the meat, viscera (internal organs), and other soft tissue. The resultant product will be treated with preservatives and antioxidants, chilled, packed, and shipped on refrigerated trucks. Ducoa has completed extensive testing to ensure that the product is free from bacterial contamination. The product is already nearing final approval by the FDA, although this is the first time it’s been presented to AAFCO.

While the finished product may be a good dog food ingredient, its new name poses a few problems for consumers. For one, the USDA already has a definition of “mechanically-separated poultry,” and it excludes viscera. Also, the current AAFCO definition of “poultry” does not include organs and by-products, but this definition of “poultry” does include organs and by-products. In addition, the “feed grade” part of the name is used only for the pet food makers’ information; once the product is included in the pet food, the term “feed grade” won’t be specified on the label of finished pet food. (In fact, no reference to grade or quality is allowed in a pet food ingredient statement at all.) So the label on the dog food will actually say, “mechanically-separated poultry,” which conflicts with the USDA definition.

Nevertheless, this definition passed on a vote of the committee, and will be considered by the full AAFCO membership in August. If it passes, it will be added to the 2002 book as a “tentative” definition, which is the initial status of all new definitions. It can be considered for official status next year.

In other poultry news…
The rendering industry was thwarted on its last two attempts to change the name of “by-products” to something more euphemistic. You see, it’s taken a while, but consumers have figured out what by-products are, and are avoiding foods that contain them. So, under the guise of “standardizing” the various animal product definitions, renderers asked the Ingredients Definitions Committee to approve two new definitions.

One proposed definition is “poultry protein,” which they would like changed to “the non-rendered product consisting of poultry tissues, including bone, exclusive of feathers, except in such amounts as might occur unavoidably in good processing practices.” Note that poultry “tissues” does not mean poultry meat. In essence, what this definition does is put a new name on “poultry by-products” and include bone.

Next, rendering reps asked to either generate a new definition for, or replace the existing definition of “poultry by-product meal” with the term “poultry protein meal.” This would be “the rendered product from poultry tissues, including bone, exclusive of feathers, except in such amounts as might occur unavoidably in good processing practices.” This is justified, say the proponents, because the current definition of “poultry by-product meal” excludes bones, while the definition of “meat and bone meal” clearly includes bones. The definition of “meat meal” does not specify whether it includes bones, but neither does it specifically exclude them.

The renderers evidently feel that all of this is just a terrible mess. It’s true that the only poultry ingredient that may include bones is “poultry meal.” The current definitions of “by-products” and “by-product meal” both exclude them.

AAFCO has twice denied similar petitions as attempts to confuse and deceive the consumer. However, the prior propositions were primarily cosmetic in nature. Initially, it appeared that this petition had a reasonable chance of success because it does make, in part, an actual change in the ingredient itself by including bones. Fortunately for consumers, the feed control officials are not likely to be fooled by the renderers’ newest proposal. The AAFCO Board directed the Iowa Feed Control Official to put together an expert panel to examine this issue in detail; if the definitions are to be changed, it appears, for now, that it will not be at the convenience of the rendering industry.

“Organic” dog food? Not!
The USDA recently approved guidelines for use of the term “organic” as applied to foods for human consumption. After several misguided attempts to include irradiated and sludge-fertilized crops (which drew a record number of citizen protests), a relatively good definition was eventually hammered out. The current USDA definition does not include pet foods; USDA evidently intends to include them at some future date.

In AAFCO’s January meeting, it was proposed that AAFCO accept the following reasonable-sounding definition of organic: “A formula feed or specific ingredient within a formula feed that has been produced and handled in compliance with the requirements of the USDA National Organic Program.” However, this proposal was met with great resistance from representatives of pet food companies, and, after much discussion, a decision on a definition was shelved in order to create a new “working group” that would direct further discussions on the topic in the future.

Why should it be so hard to accept such a simple definition? Because, if the whole product is to be labeled “made with organic ingredients,” the new USDA rules require at least 70 percent of the finished product to consist of organic ingredients. This means that pet food makers using organically raised meat, for instance, but no other organic ingredients, will not be able to say “made with organic meat” on the label. At least one pet food company has interpreted this to mean that they won’t be able to use any organic ingredients at all – because who will pay extra for organic ingredients if they can’t brag about it on the label?

For now, given that there is no accepted rule, pet food makers can still say anything they want regarding their organic ingredients on the label, as legal counsel has opined that pet food does not fall under the current definition, and USDA concurs.

Natural? You make the call!
The Ingredient Definitions Committee passed a new tentative definition for “natural.” That is: “A feed or ingredient derived solely from plant, animal or mined sources, either in its unprocessed state or having been subject to physical processing, heat processing, rendering, purification, extraction, hydrolysis, enzymolysis or fermentation, but not having been produced by or subject to a chemically synthetic process and not containing any additives or processing aids that are chemically synthetic except in amounts as might occur unavoidably in good manufacturing practices.”

What the heck does all that mean? Not a whole lot. This definition does little to restrict products that most of us would not consider truly natural. For instance, a substance could be extracted from a plant using acetone or other chemical, but as long as most of the chemical is evaporated or rinsed off, the substance could still be called “natural.” The limitation of “good manufacturing practices” does not reassure me. The regulations adopted by AAFCO require only “reasonable” procedures to prevent “unsafe” contamination (not quite the same as “zero” contamination).

Plus, exceptions and disclaimers will be allowed for things like “natural cheese flavor” on a product, even if none of its other ingredients meet the definition. Synthetic vitamin and mineral mixes can be used in an otherwise “natural” food if the label states “Natural with added vitamins, minerals and other trace nutrients” – and the qualifying statement must use print only half the size of that used for the word “Natural.”

Under this definition, animal digests, solvent-extracted meals, and other foods that undergo man-made chemical processing, may still be labeled “natural.” For instance, a product like “Soybean meal, dehulled, extruded-expelled” could now be considered “natural.” What is it really? “The meal product resulting from grinding the cake after removal of most of the oil by mechanical extraction method preceded by dry extrusion at 300-320°F of dehulled soybeans.”

The approved definition is, at this point, in “tentative” status; it will most likely be approved as is by the full AAFCO membership at its August meeting.

The bottom line? In our opinion, label claims really don’t give consumers much useful, dependable information, and should not necessarily influence you to either buy or not buy a given food. While state feed control officials, by and large, are in the consumers’ corner (as opposed to being in the industry’s pocket), their ability to protect us and our dogs is under constant assault by the profit-motivated industry. Buyers must always beware.

-By Dr. Jean Hofve, DVM

Dr. Jean Hofve is the Companion Animal Program Coordinator for the Animal Protection Institute, located in Sacramento, California.

Training Classes for Aggressive Dogs

[Updated November 16, 2017]

Dogs fight other dogs for many reasons. They fight in aggressive play. They squabble over food and toys. They challenge each other for the best spot in the pack or the best spot on the bed. They fight to protect their puppies and other canine pack members, or to defend territory and their humans. Some fight because they’ve been bred or taught to fight. And a surprising number of dogs fight just because they are poorly socialized; they’ve never learned to speak “dog,” and as canine social “nerds” they inadvertently display body language that triggers aggressive responses from other dogs. Serious dog-on-dog aggression is a common problem, and one that is often overlooked and too often tolerated. However, it is not normal dog behavior, and it can, in many cases, be prevented or mitigated.

All dogs are capable of turning on one of their canine acquaintances with a short but ferocious attack. If this happens only occasionally, these brief (though dramatic) interchanges are actually normal – a device that dogs use to set boundaries regarding what kind of behavior they won’t tolerate, or to establish dominance over each other. But dogs that frequently attack other dogs without regard to the victim’s behavior can cause us a lot of trouble, heartache, and even lawsuits.

A tiny percentage of these canine bullies are born, not made; certain breeds were developed to fight each other. But far more dog-aggressive dogs were made that way by their owners – through a lack of proper socialization, inappropriate human intervention in normal canine interactions, and even encouragement of aggressive behavior. In other cases, a dog slowly develops increasingly aggressive behavior that goes unchecked or unnoticed by his owner – at least until it gets bad enough that the dog seriously injures someone else’s dog.

It’s very frustrating for social, responsible dog owners when they end up with a dog who can’t get along with other dogs. Understandably, few people want to walk with them. The walks they do take are fraught with tension, as they try to control their dog and warn other owners to keep their distance. Eventually, many people tire of the stress, and dominant canine bullies end up exiled in back yards, or even put to death.

Help Your Dog Regain Social Access

Fortunately, with appropriate training, many of these social misfits can regain access to society. Some trainers, including myself, occasionally offer special classes for such dogs. These “Growl” or “Difficult Dog” classes are designed to teach owners new skills for dealing with their dogs’ antisocial behaviors, and to give the dogs the opportunity to learn appropriate social skills.

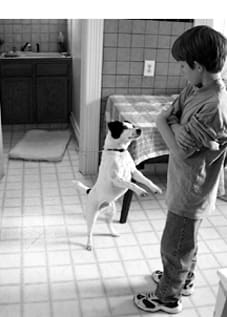
One goal of the class is teaching owners how to detect and interpret their dogs’ aggressive body language in time to avert confrontations with other dogs. They learn exercises that can distract their dogs from their habitual and aggressive focus. The owners also learn to use food lures, rewards and praise to reinforce desired behaviors.

The other major goal is to give the dogs opportunities for learning appropriate dog social behavior from each other. In the wild, dominant body language is most frequently used to avoid fights, since it is contrary to pack survival for dogs to go around routinely injuring each other. Most dominance moves – snarls, raised hackles, chin over shoulders – are bluffs, designed to intimidate the opponent into bloodless submission. Occasionally, a brief scuffle may ensue, rarely causing serious injury. Thus dominance in wild packs is usually settled and maintained with relative non-violence. Owners of domestic dogs tend to be phobic of any display of aggression between dogs. Because of the perceived risk of serious injury to the participants, owners don’t let dogs “fight it out” in an uncontrolled setting, so most dogs never experience the natural consequences of their aggressive behavior. Therefore, minor, normal and usually harmless scuffles are often treated as major crises. The dogs are yanked apart and punished mightily. As a result, not only do the dogs not learn how to settle their squabbles peacefully, their levels of stress and aggression actually escalate and they become more aggressive around other dogs. It becomes, literally, a vicious cycle.

In a Growl Class, dogs can be allowed to interact to the point of learning those consequences – with an important difference: they wear soft but strong muzzles. In this controlled setting, dogs safely get past their initial burst of aggression so they can get to the part where they learn to relate appropriately.

It’s critical that dogs and owners enrolled in these classes are pre-evaluated by the trainer. Classes are then custom designed to meet the needs of the students. Protections are put in place so that big bullies are prevented from trouncing the timid dog who bites in self-defense. Where appropriate, owners can be shown some of the exercises ahead of time so their dogs get extra practice. A bully might need to spend more time practicing his “Off” exercise, while a very nervous dog might get extra homework assignments in “Relaxation Techniques.”

By the end of the course, some dogs can be fully integrated into their local canine community. Others can be given supervised freedom in a designated “play group.” Still others will never be trustworthy for off-leash play, but will be under much better control and far safer on-leash than previously.

The best results will be enjoyed by highly motivated owners who enjoy close bonds with their dogs. Dogs who are responsive and connected to their owners and who are easily motivated by food, praise or other rewards are most likely to benefit from this type of class. Independent dogs who are oblivious to their owners’ presence and behavior requests are more likely to fail.

A Typical Difficult Dog Class

The mix of people and dog personalities (and mixed results) displayed in one of my recent Growl Classes was fairly typical. I offered the class in Santa Cruz, California, late last summer, and after fielding lots of inquiries from owners of dog-aggressive dogs, I selected four to participate: Beau, an eight-year-old neutered male Rottweiler mix; Kito, a three-year-old neutered male Akita; Jessie, a four-year-old spayed female Australian Cattle Dog mix, and Schmaal, an eight-year-old spayed female Saluki.

These selections were made on the basis of my careful pre-evaluations of each potential member of the class. Jessie was an overachieving, slightly fearful herding dog who was strongly driven to protect her owner from the mere presence of other dogs. Schmaal was a graceful, athletic sighthound, who routinely responded to other dogs with aggression, though the stress of a training class made her act aloof, almost to the point of catatonia. Her stress level was so high in class, in fact, that getting her to eat treats was a major accomplishment.

Kito the Akita was previously abused and had been attacked by dogs before; he seemed to go on the defensive with other dogs due to apprehension about being attacked. In general, it seemed he had a lot of issues to sort out. Beau, however, was my greatest concern. He had been attacking dogs all of his life, enjoyed being a bully (all 120 pounds of him), and was on a restricted diet due to problems with his digestive system. He had also previously been through punishment-based training to try to control his aggression.

Food is an important part of a successful Growl Class. Instructors use positive methods to reduce the dogs’ stress and to teach them that having other dogs around is a “good” thing. This cannot be accomplished with punishment, only with reinforcement and reward. Since food is a primary reinforcer that can be delivered quickly and easily, its use is critical in getting a dog to think positively about a stimulus (in this case, the presence of other dogs) that has previously been perceived as a negative.

In this particular class, the use of food as a reward was problematic for two of the dogs (Beau had digestive problems, and Schmaal was too stressed to eat). I warned the owners in the class that this would present us with additional challenges.

Growl Class Session 1

I do not allow the dogs to interact in the first session of a Growl Class; we practice exercises and assign homework so that the dogs are more responsive to their owners before the first interaction in Class #2. We start out with students and their dogs spread out around the training area – with as much distance between them as is possible. People and dogs are seated on blankets or rugs on the ground.

I start the first class with an in-depth discussion of dog behavior, aggression, and canine body language. Each owner describes his dog’s history of aggression, and the kind of behavior he anticipates from his dog in the class setting. We analyze the body language that each of the dogs displays, discuss its likely meaning, and make predictions about the dogs’ behaviors during their interaction to come. It is important from the very beginning of the first class that owners begin to develop their skills in reading dog body language so they know when and how to intervene appropriately.

Next, I invite discussion from the owners regarding their feelings about their dogs and about the class. It is normal for owners to be apprehensive. I explain that we wouldn’t let the dogs hurt each other, and that one goal of the class is to allow dogs to interact safely so that they can learn appropriate body language and social behavior around each other.

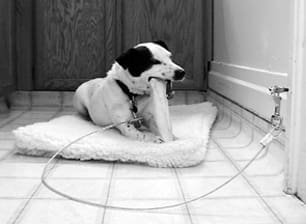
Then, we began to work with the dogs. Unlike my regular classes, where I am upbeat, speak cheerfully, and move quickly, Growl Classes are almost like meditation sessions. The first exercise is intended to lower the stress levels of dogs and owners by doing relaxation exercises – massage on a rug or blanket for the dogs, with deep breathing for the owners.

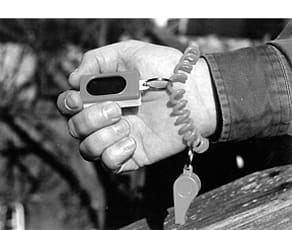
Next, dogs and owners learn an “Off” exercise (see link below for all exercises), which means that if they give a “hard glare” to another dog they are asked to “Off” and are given a Click! and treat when they look away from the other dog. They can also get clicks and treats for “soft” glances (and tail wags!) at other dogs, and lots of clicks and treats for paying attention to their owners. The purpose of this is to teach them that the presence of other dogs is a good thing – they get lots of treats when other dogs are around.

As I had anticipated, Beau had the most difficulty with this critically important exercise. Not only was he very committed to the hard stare that signals the pre-launch phase of an all-out attack, but the treats his owners used – his regular dinner kibble – were not nearly attractive enough to distract him from his seek-and-destroy missions. We finally began to have some success with Beau in Week #4, when I started rubbing meaty treats on my hands and letting him lick the flavor off as his reward.

Another exercise taught in the first class is the “Gotcha!,” a positive cue (with treat reward) for a grab on a dog’s collar, which becomes necessary when we need to intervene in a scuffle.

Next, we practiced fitting muzzles on the dogs, and did a little calm, one-at-a-time leash walking around the training area, while owners practiced their tone of voice (calm and upbeat, not panicked or commanding) for use with the “Off” cue. We ended with more relaxation and discussed how everyone felt about the class so far. I instructed dog and owner pairs to leave calmly, one at a time, to avoid confrontations at the door.

Growl Class Session 2

I start and end every class from the second week forward with the relaxation exercises learned in the first class. My group of four responded well to these exercises, and we got settled quickly. Then I had the owners put the muzzles on and do some calm on-leash walking/attention exercises. At first, I had three dogs sitting and just one walking, while getting lots of positive reinforcement from her owner for calm behavior as she passed the other dogs. Then we did “pass-bys,” where two dogs pass each other walking on leash, again with lots of treats for good behavior. The challenges of Beau’s and Schmaal’s food restrictions became apparent early in this exercise.

After the relaxation and leash exercises, we conducted the first off-leash interaction. I checked each of the dogs’ muzzles for comfort and secure fit, while we discussed the rules. I explained that I would tell the owners when to release their dogs, and that they should simply stand back out of the way. Confrontations between the dogs would be likely, but the muzzles would prevent injury.

The first off-leash interaction was a high anxiety time, for me and the owners. I felt my adrenaline build, and disciplined myself to keep my voice and body language calm. “If there is a problem,” I cautioned my students, “let me handle it. If I need help I will ask for it. We all took several deep breaths, and then I told them to release their dogs.

First (Muzzled) Dog-Dog Interaction

Surprisingly, little Jessie was the first aggressor. She flew out from behind her owner at Schmaal, who wandered by too closely. This started a free-for-all, with the most intense aggression, as expected, between Beau and Kito. Jessie and Schmaal disengaged fairly quickly, while Beau and Kito trounced each other for several minutes before calling a truce.

We all breathed a sigh of relief. The dogs wandered around the training area, glaring but not attacking. We then called the dogs, rewarded them, put their leashes back on and removed the muzzles, and settled down for more relaxation and debriefing. Yes, it was scary, but it was a relief to see that the muzzles worked, and that the fighters stopped quickly, and of their own accord.

However, I explained that in the next class, we would not allow the fighting to continue to its own conclusion. We would use our “Off” interrupter to try to intervene pre-launch (with a big click and reward if the dogs succeeded), and our “Gotcha” to intervene post-launch if necessary. I instructed the owners to practice “Off” and “Gotcha” for at least 20 minutes per day, so that, hopefully, the dogs would attain a high level of responsiveness by the next class.

Growl Class Session 3

In the third week, Jessie’s owner reported that Jessie was making great progress. She was passing other dogs on the street without giving them the evil eye, and was responding nicely to “Off” and rewards. Schmaal, also, was doing surprisingly well. Although she still disdained treats in class, she would eat them out in the “real world.” However, I had concerns about Beau and Kito. Even during relaxation exercises Beau glowered at Kito from the opposite corner of the room. Despite my pleas to Beau’s owners to find some other kind of high value treat, they still fed him only kibble.

We warmed up with by-passes; Jessie and Schmaal got to do theirs without muzzles. Then, with all four muzzles on, we tried for some controlled interaction. The dogs were released. Beau and Kito launched for each other; Jessie and Schmaal wanted to join in but responded to their owners when called back. Lots of rewards for that!!! Meanwhile the two big bruisers seriously went at it. We looked for an opportunity to intervene with an “Off” and a “Gotcha” and retired to our relaxation rugs.

Next, we gave Jessie and Schmaal an opportunity to interact together without the boys. Muzzles on, there was only a brief threat from Jessie that was over almost before it began.

Growl Classes 4 and 5

Kito didn’t show up for the next class. Since they hadn’t called me, I couldn’t know if it was because his owners were discouraged or if it was due to an unrelated scheduling conflict, but it was disheartening, and it put a crimp in our program. We did our basic exercises with the three remaining dogs, and tried an off-leash interaction with all the dogs muzzled. Beau behaved well with just the girls present. I showed his owners how to rub meat flavoring on their hands and the kibble treats, to get Beau more engaged in the reward process. It seemed to work for the wife, who learned to combine the treat reward with upbeat verbal praise. Beau still ignored the husband’s boring treats and monotone voice, however.

This session went so well that after the three-dog interaction we put Beau back on his relaxation rug, and removed Jessie and Schmaal’s muzzles. With calm, relaxed off-leash walking, owners nearby, both dogs did beautifully. Jessie was aware of the other dog but she stayed under control; Schmaal just pretended Jessie wasn’t there. We all agreed that Beau was not ready for off-leash interaction without his muzzle.

Kito returned for the fifth class, which seemed to renew the animosity between the two big males. Beau would not respond to his “Off” and “Gotcha” exercises, and the off-leash interaction between the two was not productive; Beau simply wanted to bully Kito unmercifully. We tried removing Kito from the training area to repeat the previous week’s success with Beau and the two girls, but he was too aroused from his interaction with Kito, and jumped on Jessie. For the two boys, the focus for the rest of the classes was on “on-leash” behaviors.

Jessie and Schmaal continued to progress with off-leash and off-muzzle work. Jessie’s owner became adept at reading Jessie’s body language and pre-empting any kind of scuffle with the “Off” cue.

The Final Difficult Dog Class

Kito’s owners called me to say that they had enjoyed the class and felt Kito benefited, but they wouldn’t be attending the last session due to scheduling conflicts. I was disappointed – I thought Kito had much more potential than he was allowed to develop.

As the rest of us began our last class with relaxation exercises, we talked about our goals and how we felt the dogs had done throughout the class. We agreed that Jessie was the star of the class. She was just the right type of dog to benefit the most from a Difficult Dog class – bonded to her owner, food motivated, responsive, and committed to doing her job. She just needed to have her job description rewritten slightly. Her owner, Melanie, reported that while Jessie was not yet 100 percent reliable around other dogs she was much improved. Melanie is confident in her own awareness of canine body language as well as her improved control over her dog to take Jessie places and give her considerably more freedom than she would have in the past.

Stephanie, Schmaal’s owner, was pleased with her progress. While she was nowhere near ready to turn Schmaal loose on the beach with a pack of dogs, she was much more confident in her ability to get Schmaal to respond to her when necessary.

Beau was my biggest disappointment. At Week 6 he was still looking for someone to bully. His eight-year history of dog aggression, along with his owners’ failure to find a suitably enticing reward, proved to be insurmountable obstacles. While he was marginally better behaved on leash around other dogs, and did respond to the relaxation exercises, Beau still had a long way to go.

Growl Classes will continue to be one of my training offerings; there is a crying need to help dogs remember how to be part of a pack. The shame of dog-aggressive breeds, poorly socialized pups, and dogs encouraged or allowed to be aggressive with each other, is our failure. This is a species designed to live and work together in relative harmony, and we have botched the plan. But for many dogs it is not too late. If you have a dog who wants to eat other dogs for breakfast, find your nearest positive reinforcement trainer (who will use treats, praise and other rewards rather than choke or pinch collars) and ask for assistance. If you’re lucky, she may start a Growl Class soon.

Click here to view the dog exercises.

Pat Miller, a freelance writer and dog trainer, is a frequent contributor to WDJ.

Best Nail Clippers For Your Dog

It’s really a safe and simple procedure; one that most dog owners can easily learn to perform on their dogs. I have done it to my own dogs since I was a little kid. So it never ceases to amaze me when I ask my training classes how many owners clip their own dogs’ toenails and an average of only one out of eight raise their hands. That means the other seven either neglect this important procedure, or spend hundreds of dollars over a dog’s lifetime to pay someone else to do it.

Because young dogs often wear their nails down naturally by running on hard rough surfaces, we tend to overlook the importance of teaching them to accept nail trimming. Then, when the dog ages, slows down, and needs help with those nails, the procedure is seriously traumatic. Shelter workers and veterinarians tell horror stories of elderly dogs unable to walk because their nails have curled around and grown through their pads.

It is vitally important to teach your dog to accept nail trimming as part of his regular grooming routine. If you start with a puppy or a young dog, wait until she is resting quietly on the floor after a play session, gently clip off the tip end of one or two nails, feed her tasty treats and tell her what a great dog she is, she will grow up thinking that nail trimming is a wonderful thing.

There are several common mistakes that dog owners make when trimming nails. The first is clipping a nail too short (or “quicking” the dog) which causes pain and bleeding and immediately teaches the dog that nail trimming is not fun. This happened to a young puppy of mine, and it took more than a year of desensitization to convince him to accept his pedicure calmly again.

The second major mistake is trying to trim all the dog’s nails in one session. This is fine once the dog learns that nail trimming is a positive thing, but until then, physically restraining a flailing, panicking pooch while insisting that every nail is clipped only makes matters worse. Take the time to do nails one or two at a time, using treats and games to make it fun.

Finally, using poor equipment can make the even most accommodating dog fear nail trimming. Dull blades, tools with only poor visibility (and thus, encourage quicking), and awkward clipper construction can turn nail trimming sessions into nightmares.

To help you with equipment choices, WDJ tested four different nail trimmers on four relatively willing subjects who were accustomed to having their nails “done.”

WDJ Approves

White Nail Scissors
(4-1/2” for small animals)
J-B Wholesale Pet Supplies, Inc.
Oakland, NJ; (800) 526-0388
$5.95

These scissors were advertised for use with small to medium breeds, and our “WDJ Approves” rating applies to small dogs only.

These scissors are made of nickel-plated steel. They appear solid and well-made and are affordably priced. They work just like a pair of scissors. But while they clipped my eight-pound Pomeranian’s nails easily, they required more force than I liked to cut through the nails of my 25-pound terrier mix.

I like the solid construction and simplicity of these scissors, but their application would be limited to cats and very small dogs. I was also disappointed that the packaging the scissors came in was a plain plastic sleeve with no instructions for use. If your dog is 15 pounds or less, you could give these a try. For anything larger than a Lhasa, keep reading.

Not Recommended

Vista Dog Nail Clipper
(with Safety Stop)
J-B Wholesale Pet Supplies, Inc.
Oakland, NJ, (800) 526-0388
$7.95

I purchased the medium size clipper, and found it perfectly capable of cutting the nails of my 75-pound Australian cattle dog mix. While advertised as having “heavy steel blades,” the clippers did not appear as well constructed as the previously described nail scissors – in fact the plastic handles appear downright cheap; I doubt they would stand up to heavy use. The instructions on the back of the package are well-illustrated, clear, and easy to understand, and include that all-important warning: “Avoid cutting off too much at one time.” The safety stop is an interesting feature, and may inspire confidence in the nervous, first-time owner/clipper, but would just get in the way for a more experienced nail trimmer. (Fortunately, it can be removed.)

My biggest complaint about these clippers is that the blades don’t line up tightly against each other, so they tend to leave ragged edges on the clipped nail. I suggest you skip this one; there are better clippers available at better prices.

WDJ’s Top Pick

Resco Guillotine Nail Clippers
J-B Wholesale Pet Supplies, Inc.
Oakland, NJ, (800) 526-0388
$5.85

These are the old stand-by nail clippers that many owners are familiar with. The ominous “guillotine” name comes from the fact that the dog’s nail is inserted through an opening and the blade slices down to chop it off. Without a “safety stop,” the owner must control how much of the nail is inserted through the hole (not an easy task with a wiggling dog). And, as the package instructs, it’s important to slice off only a small amount at a time in order to avoid quicking the dog.

This has long been my favorite nail-trimming tool. It gives a better view of how much nail I am cutting than does the scissors-style clippers. The tool fits solidly in the hand and is easy to grasp and hold. The price is right. The snug blade fit allows for a clean cut. And, best of all, the blades are replaceable. When you start to find ragged edges on your dog’s newly trimmed nails, it’s time for a new blade.

WDJ’s Top Pick

OSTER Electric Nail Grinder
J-B Wholesale Pet Supplies, Inc.
Oakland, NJ, (800) 526-0388
$54.65

This is the tool for the connoisseur of nail trimmers. It is routinely used in the dog-show world to achieve the nub-short nails in vogue for the show ring. It is available in electric and cordless models, and works like a charm, effortlessly grinding away unwanted nail material. Effortlessly, that is, if your dog will allow you anywhere near with the grinder turned on!

Two of my four test dogs tolerated the tool with some initial resistance that was overcome by the liberal use of liver treats. Both dogs were tense about the procedure, and it would take additional desensitization to get them as relaxed about this tool as they are with guillotine clippers. The results of the trim were beautiful – short, rounded nails – shorter than I had ever been able to trim them with the guillotine clippers.

However, my other two test dogs wanted nothing to do with the noisy, vibrating machine. They would stay close for liver bribes when the machine was turned on, but feeling the vibrations against their nails was more than either could tolerate. For these two, a serious desensitization program would have to be implemented before we could successfully grind their nails.

If you are planning to show your dog in the breed ring, the Oster Nail Grinder is a must. Be prepared to spend a considerable amount of time desensitizing your dog to get him or her to accept it. But if you are the average dog owner who just wants to keep your dog’s nails in reasonable shape, the Oster Nail Grinder may be more tool than you will ever need.

One last caution. Don’t count on the package instructions to help you put the Grinder together. After a good bit of struggling, I finally took it to my husband. In typical male fashion he ignored the instructions and managed to put the grinder together by pushing and prodding until the right parts were in the right places.

Canine Road Rage

I have a friend with an eight month old dog who has gotten very aggressive all of a sudden. It happens only when he is in his crate and when he is in the car, where he attacks the steering wheel and the keys. His owner was crying to me tonight about how she would have to get rid of the dog if he kept this up. He is a puppy mill dog and I don’t know if this is part of the reason for this problem.

I have given them some suggestions on social dominance but I am not sure that is the problem. They don’t allow him on the sofa or bed, and they don’t feed him table food; in fact, they eat before he eats. These are all things that have been suggested to me but I am not sure this is going to work. To me it sounds like rage syndrome.

-S.W., Indianapolis, IN

Pat Miller, WDJ’s Dog Training Editor, answers this question for us. Miller offers private and group dog training classes from her base in Fairplay, Maryland. Miller responds:

Certainly, puppy mill and other poorly-bred puppies are at a higher risk for genetically unstable temperaments. In this case, it is good that his behavior is limited to two very specific circumstances. Aggression is easier to deal with when we can identify the triggers and predict the behavior. In the crate, it could be territorial or defensive. Have the owners ever punished him in the crate? Have kids ever teased him there? In the car, it sounds like he may just be aroused about going for a ride, or it could also be territorial or possession aggression.

I tend to minimize the importance of social dominance. The dominance concept has been way overused, and tends to give people permission to use harsh punishment. I focus more on the terms leadership and deference. I restrict a dog from the bed or sofa only if a problem is occurring there. Otherwise, I simply teach the dog (using positive methods) to remove himself from those places when I ask him to leave. That is, he defers to me. When the dog is on the sofa, for example, say “off” and toss a treat on the floor. When he jumps off to get the treat, Click! your clicker (or say “yes!” in a pleasant tone of voice) and feed him another treat. Make it a fun and rewarding game, and he will happily leave the bed or sofa whenever you ask.

I see nothing wrong with feeding table scraps. The dog doesn’t know it’s people food unless you feed it to him from your plate. I prefer not to feed from my plate because I don’t want my dogs begging when I eat, but they get people food in their bowls and as training treats all the time.

I also don’t believe that eating before our dogs or going through doors first teaches them anything about dominance. Teaching them to “wait” at a door every time before you allow them to go through does teach them good manners and deference, however, as does teaching them to sit and wait for their food bowl until you release them to eat.

I would start this dog on a Nothing In Life Is Free (NILIF) program, in which he must earn all good things. He needs to learn to sit for attention or for treats, or for his ball to be thrown, or to make any good thing happen. He also needs to learn that very good things happen when he is in his crate. No punishment for his aggression you will just convince him that he is right to be upset when people approach. Have one of his owners stand near the crate and just wait until he is calm. Then Click! the clicker and feed him a treat.

As long as the Click! happens while he is calm, go ahead and feed the treat even if he gets cranky when they drop it in. Keep doing this and you should shortly see him calming down as he learns to anticipate the treat when he hears the Click! Eventually, he will also anticipate people approaching the crate because he knows good things are coming. When he is over the worst of the behavior, have the owners walk past while he is in the crate and just drop treats without clicking first until he is totally convinced that having someone approach his crate is a very wonderful thing.

I would manage the car behavior by seat belting him into the back seat, at least until the NILIF program has had a chance to take effect. If he jumps into the car and immediately takes up his position at the steering wheel, have them leash him and lead him to the back seat when they take him to the car so he can’t get to the front.

I would also suggest having them read Jean Donaldson’s wonderful book, The Culture Clash (James and Kenneth, 1996) to help them better understand what’s going on in an aggressive dog’s brain, and sign them up for a basic training class with a good positive trainer so they can learn how to communicate better with their dog (and vice versa!). If the dog is not already neutered, I would do that immediately as well. It may or may not help with the behavior challenge, but it will certainly ensure that he doesn’t produce more puppies with his aggression problem.

Finally, I don’t believe that this is rage syndrome, also known as idiopathic aggression. True rage syndrome is rare, and has no definable pattern or cause. You have clearly identified the pattern and the triggers in this case. Good luck and let us know the outcome.

Target-Train Your Dog to Ring A Doorbell

[Updated June 12, 2018]

Each month, I stand in the middle of my training center during the second session of my newest Level One class and introduce my students to the “Targeting” exercise. “Targeting,” I say, “is teaching your dog to touch his nose to a target, on cue.” Each month, I am invariably met with a half-dozen blank stares. I can read my students’ unanimous thoughts. “Why on earth,” they are clearly thinking, “would I want to teach my dog to do that?” Their initial lack of enthusiasm for this exercise is understandable. Targeting is not presented in most of the top-selling dog training books on the market, and only in recent years have modern dog trainers started to include it in their class curriculums. Once my students get past their skepticism, however, most of them are as hooked on targeting as I am – even my dogs have become hooked!

There are dozens of reasons to teach your dog to target. It’s fun and it’s easy. It’s the perfect exercise for helping you to see the learning “light bulb” go on in your dog’s brain. Most dogs love targeting, which makes it a handy tool for getting your dog’s attention in a distracting environment, as well as making it a great parlor trick to show off to family and friends.

train dog to ring a doorbell

Targeting is also a wonderfully useful tool for helping timid dogs gain confidence. It is the foundation behavior for teaching your dog a multitude of more complex behaviors, such as ringing a bell on a string at the door to tell you he has to go outside, turning light switches on and off, closing doors, teaching a suspicious dog to come when called, retrieving, learning object discrimination, pausing in the required contact zones in Agility competition, and doing “go-outs”- used in advanced levels of obedience competition and in good manners exercises such as “Go To Your Place,” where the dog goes and lies down on his bed or rug – to name just a few.

In fact, targeting is one of my all-time favorite exercises. It may be hard to fathom how one exercise can accomplish all of the incredible things listed above, but as I say to my blankly-staring students: Trust me. You and your dog will love it.

Teach Your Dog to Target

It’s ridiculously easy to teach your dog to target. Hold out your open hand at your dog’s nose level, palm facing him, fingers pointed toward the ground. When he sniffs or licks your hand, Click! your clicker (or say “Yes!”) and give him a treat from your other hand (see photos, next page). Make sure his nose actually touches your skin – “close” only counts in horseshoes. Plus, you must endeavor to Click! the instant his nose makes contact with your skin. If you consistently Click! too soon, you will teach him to stop before he touches you. If you consistently Click! too late, you will teach him that moving his nose away from you is the way to earn a reward.

When you have clicked and rewarded your dog’s first touch, remove your target hand, then offer it again, in the same position. When he sniffs, Click! and treat. Do it again. And again. (Notice we have not used a verbal cue yet.)

Most dogs will do the initial sniff easily. If your dog doesn’t sniff your offered palm, rub some hot dog or other tasty, moist treat on your skin to make your hand more enticing. Most dogs will sniff your newly-offered hand a few times and then ignore it, looking directly at your treat hand. You can almost hear them say, “Why am I looking at this hand? The GOOD STUFF comes from over there!” When this happens, hide your treat hand behind your back, offer him the target hand, and wait. He should soon sniff the offered hand. If he doesn’t, rub a treat on it and offer it again. If that doesn’t do it for him, take a step or two backward and offer him the target as he moves toward you. Click! and treat.

Repeat this step over and over, until he deliberately bumps your hand with his nose. This is the heart-stopping “Aha!” moment that positive trainers love – when you can see that your dog knows that the way to make the Click! happen is to touch your hand. Some dogs “get it” very quickly. Louis, a Border Collie client of mine in Santa Cruz, California, got it in three repetitions. Others take longer for the light bulb to go on, depending on variables such as the owner’s skill and timing, the dog’s interest in the training game, the desirability of the treat reward, and the level of distractions in the surrounding environment. You can enhance your dog’s learning speed by working in a quiet location, using very delicious treats and paying attention to your Click! timing.

Most of the behaviors that utilize the “Touch” are somewhat complex to train. Remember to keep your training sessions short, and if either you or your dog are getting frustrated, do something easy and fun to end the session, then take a break and try it again later.

Adding Verbal Marks to Targeting

Once your dog is deliberately bumping your hand with his nose you can add the verbal cue. Start saying “Touch!” just before his nose touches your skin. Click! and reward. Gradually offer the verbal cue earlier and earlier, until he has had the opportunity to associate the verbal cue with the targeting behavior and is responding to the cue.

target training a dog

Now we raise the bar. So far, your dog understands that he is supposed to touch his nose to your hand when he is sitting in front of you and the target is presented to him, directly in front of him, at nose level. It’s time to change the criteria.

Now you want him to touch the target wherever it is, even if it’s moving. Back away from him, offer the target and say “Touch.” As he gets up to follow you, keep moving slowly backward. When he catches up to you and touches the moving target, Click! and treat. Move your hand off to one side and ask him to touch it. Click! and treat. Move it to the other side. Move it lower, toward the floor. Move it higher, so he has to jump up to touch it. Put it above a chair seat, so he has to place his front feet on the chair to reach up and touch it.

When he’s really confident about touching the target, put the behavior on a schedule of random reinforcement – ask him to touch two times before you Click! and treat. Then three times. Then once. Then once. Then four times. Then two times. Vary the number of times you ask him to touch before he gets clicked; don’t always make it harder and harder or he may get frustrated and give up.

How to Add New Targets

If you want your dog’s targeting behavior to be really versatile, you now need to teach him to touch other targets. I teach the target stick next. (Some trainers start by using the stick as the training target. I prefer starting with the target hand, because most dogs naturally want to sniff our hands, and because some dogs are initially intimidated by a stick in their owners’ hands.)

A target stick can be a small branch off a tree, a dowel from the hardware store, a pencil or Tinkertoy (for small dogs), or an “official” target stick purchased from a pet supply source. If you are using a homemade stick, wrap a piece of colored tape around one end to designate the actual target. Accept touches near the tape at first, but ultimately shape the touches to the actual target by clicking only those touches that get closer and closer to the tape.

Hold your target stick vertically with the target end near your dog’s nose; if a vertical position doesn’t work, try holding it horizontally (as shown below). Some dogs will sniff the end of the target stick the first time you offer it. Click! and treat. Others may need a bit of hot-dog rubbed on the end to motivate them to touch this new object. Still others will be afraid of the stick. If your dog is leery of the stick, hold it so most of it is hidden behind you and only an inch of the tip protrudes from your hand.

Strengthen Your Dog’s Targeting

When your dog will touch the tip, extend the stick a little at a time, until he is touching it at its full length. “A little at a time” will vary from one dog to the next. Some dogs will accept a six-inch increase at a time, others will tolerate only half-inch increments. Start small to avoid frightening your dog, and work up to larger increases if he seems to be tolerating them well.

As soon as your dog is readily touching the tip of the stick, at whatever length, start using the verbal “Touch” cue again to elicit the targeting behavior. When he is proficient at touching the target stick, you can use it to extend your reach. With three feet of arm length and three feet of target stick you can get him to touch things a full six feet away from you. If you place the tip of the target stick against a door, wall or other object, you can start teaching him to touch other things, including people.

This is a useful tool for encouraging a timid dog to be brave. When he is very confident about touching his target stick you can place the target closer and closer to a scary object and he will become braver about approaching it.

Targeting is Useful for Tricks

You can also teach your dog to touch other things by holding the intended target object in your hand. I like teaching dogs to ring a bell hanging on a string from your doorknob to tell you he has to go outside. It’s easy – if you take it one step at a time.

First teach him to ring the bell hanging from a string in your hand. Then have him touch the bell when it’s hanging on the door, with your hand held near. Gradully withdraw your hand, and then start slowly moving your entire self away from the door until you can send him across the room to ring the bell on your verbal cue.

As soon as he is proficient at ringing the bell on the doorknob, start asking him to ring the bell every time you take him outside. Although we frequently use a treat as the reward for the Click!, if your dog is thrilled about a trip to the yard, letting him out is an even better reward at that moment than a food treat. If you start making the bell a consistent part of his “going out” routine, and keep asking him to ring the bell from greater and greater distances, you should be able to “fade” (gradually eliminate) the “Ring the Bell” cue, and he will learn to run to the bell and ring it to tell you that he has to go outside.

There is no limit to the ways that you can utilize the touch behavior to accomplish behaviors you like. You can move your dog into heel position (and keep him there) by using your hand as a target next to your leg. You can teach him to close cupboard doors by having him target to a spot on the door. You can teach him to turn lights on and off by pushing up on a stick attached to a light switch or by touching a “Touch Lamp” with his nose.

You can also teach your dog object discrimination by having him learn to identify and touch various objects (or people) by name. The opportunities for application of the touch behavior are virtually endless – limited only by your creativity.

Now, if you’ll excuse me, I’m going to go use targeting to teach my Pomeranian to bowl!

Thanks to trainer Sandy Thompson, of Sirius Puppy Training in Berkeley, California, for her help demonstrating these techniques in these photographs.

The Ancestral Dog Food Diet

The ancestral dog diet was mainly raw meat.
The ancestral dog diet was much like the diet of wolves. Raw meat and other opportunistic food.

Dog food as we know it today – that is, either crumbly bits of kibble packaged in bags and boxes or gloopy meat-based concoctions sealed into cans – was invented in 1860. Think about that for a moment. Our great-grandparents and great-great-grandparents raised dogs completely without the benefit of Purina. Before 1860, no one poured a pile of chow from a bag marked, “Dog.” Everyone who had a dog knew what dogs ate and how to feed them.

Considering how many thousands of years that dogs have survived while living in our homes and sharing our meals, it is interesting that most dog owners are shocked and perplexed when it is suggested that they might want to consider giving up their cans and bags of dog food.

Try this as a test: Tell one of your dog-owning friends you’ve read that dog food is not good for dogs, and she should stop feeding it. Her first question will be, “Well then, what WOULD I feed my dog?!”

The Ancestral Dog Diet

The answer is food . . . real food . . . raw food, the kind of food that canines have been living and thriving on for the last few centuries! Yes, we are talking (mostly) about meat.

You may have noticed that in the last few years, nutrition experts have “rediscovered” the value of a Paleolithic diet for humans – one that includes far more fruits and vegetables and far fewer grains than we eat now, a certain amount of fresh meat, and certainly no dairy products.

Veterinary nutritionists (and holistic veterinarians) can likewise tell you about the many benefits of feeding your dog his ancestral diet. The actual recipes are speculative, of course, but there is no doubt about the major constituent of the diet: raw meat.

Duplicating this diet as closely as possible is said to have numerous benefits. Holistic veterinarians and breeders who utilize a raw-meat diet say that it can make itching dogs stop scratching. Thin, dull coats become thicker and shinier. Apathetic dogs regain enthusiasm for life. Females who have had difficulty conceiving or carrying puppies to term become pregnant and bear healthy puppies.

“Having raised animals on commercial pet food, and now, having raised animals on raw meat, there’s no comparison,” says Celeste Yarnall, a pet nutrition specialist and author of Natural Cat Care, and 1998’s Natural Dog Care. “Animals who are fed an appropriate raw-meat diet are alive, they glow from whisker to tail tip. They are happy and comfortable in their skins.”

Why is Raw Meat Better for Dogs?

There are numerous reasons why dogs might do better on a diet largely comprised of meat. Foremost, says Yarnall, is that dogs’ bodies are designed to produce only about 25 percent of the enzymes they need to digest their food; the remaining 75 percent should be within the food they eat. All raw foods contain the enzymes the body needs to digest the food. But when you cook foods, the enzymes are destroyed. In order to digest a food devoid of enzymes, the body needs to work overtime to produce its own digestive enzymes to break down the food.

Many holistic veterinarians believe the resulting wear and tear on the pancreas may be responsible, in turn, for other health problems. In her book, The Natural Dog, Mary Brennan, DVM, says that many research studies have linked enzyme deficiencies and diseases, both acute and chronic. To counter this, one can supplement the dog with digestive enzymes, or feed raw food! Cooking also destroys a large percentage of the food’s nutrients. Some foods lose as much as half of their vitamins when they are cooked.

And, finally, to some degree, cooking generates a certain amount of toxins in food. Raw food enthusiasts cite the fact that the number of white blood cells circulating in the bloodstream usually doubles or triples immediately following consumption of a cooked food meal; the number does not rise when raw food is eaten. A body that initiates an “attacking” immune response to every cooked meal wastes much of its precious resources sidetracked in a needless battle.

Overcoming the Raw Food Sceptics

It is a testament to our skeptical times that most people who feed their dogs raw food spend more of their time defending their decision than describing the benefits of their diets. Fortunately for us, that mean the experts were ready with answers to our typical questions:

What about the danger of bacteria and food poisoning?

Many people fear bacterial contamination and resultant food poisoning so much that they cannot entertain the idea of feeding their dog raw meat. To these people, Yarnall says, “So many dogs live with sub-clinical medical conditions all their lives, dying of cancer, kidney failure, liver disease, arthritis, and every other combination of the diseases . . . I’d rather take my chances against the bacteria, and feed the food that best supports dogs’ health.”

This is not to say that Yarnall and other raw feeders disregard the threat of contamination. Most use some method to disinfect the meat they feed their dogs and observe “safe-meat” handling techniques (see “Taking the Fear Out of Raw Feeding,” below, for more detail). These things put Yarnall’s mind completely at ease.

“Of course you have to practice safe hygiene. You have to be more intelligent than someone who uses a can opener to prepare their dogs’ meal. But the benefits outweigh the risks by so much,” she says.

Doesn’t raw food cost a lot?

There’s no doubt about it: feeding meat on a regular basis costs more than feeding dog food. But according to the experts, the improvement in the dog’s health will more than offset the price of the diet.

Yarnall says she could prove this one on a graph. “I don’t spend money having my veterinarian treat my dog for flea problems and allergies and fungus problems and heartworm and all the other diseases brought on by poor nutrition,” she says. “I spend my money on the food, instead.”

Dr. Brennan tells of a client who raised Yorkshire Terriers and Llasa Apsos, and was concerned about the increased cost of feeding a higher quality diet. However, at Brennan’s urging, she tried the diet, and in the next heat cycle, she saw a 75 percent improvement in her dogs’ conception rate, proving that the change was cost-effective to her business.

We should add that the above question made one raw feeder we spoke get angry. “So, if I want to save money I should raise my children on Top Ramen and generic Cheerios?” she exploded. “I tell people that if you can’t afford to feed three children properly, you shouldn’t have three children, and they understand me. But when I say that if you can’t afford to feed three dogs properly, you shouldn’t have three dogs, they come unglued. Why people will try to defend being cheap with the health and well-being of their loved ones is beyond me.”

Isn’t dealing with meat inconvenient?

Fortunately, the market takes care of all inconveniences. There are a number of companies springing up to cater to those who don’t want to take the time to select, buy, and prepare meat for their dogs. Others buy enough meat for a week or two or even a month, and spend a couple of hours on that day preparing and separating the food into individual portions that they then freeze. Then, each night they transfer the next day’s meal into the refrigerator, where it can thaw safely for feeding the next day.

Why would my veterinarian tell me to feed Brand X, if it is so bad for my dog?

We’ll let Celeste Yarnall answer this one: “If you feed your dog nothing but commercial pet foods, you will have a very happy veterinarian, because your dog will be a patient for life. Go on into the veterinarian’s office and get your bags and your cans, and you will come back with a dog who has cancer, with dripping orifices, with skin problems and allergies, and worse. Veterinarians are wonderful people, don’t get me wrong, but they have been educated very poorly in nutrition.

“Guess where most veterinarians got their education? Who donates the largest amounts of money to university vet schools? Guess who writes the textbooks? The pharmaceutical industry and the pet food companies, that’s who! So is it any wonder that the veterinarians are all taught that dogs are better off eating food from a bag or a can?”

I can see this diet working for wolves, but our modern dogs are vastly different animals . . . aren’t they?

Actually, the wolf and the dog are not that far apart. It’s true that we have bred them to look very different from their wolf ancestors, but what’s “under the hood” is still essentially the same. Dogs have been living with us for a long time, but they still have 42 shredding teeth; they haven’t suddenly grown big grinding teeth like ours!

Taking the Fear Out of Raw Feeding

The biggest objection that most people have to feeding their dogs a raw diet is the fear of poisoning their pets with bacteria-laden meat. Fortunately, there are a number of inexpensive and easy meat-management techniques you can employ to reduce bacterial contamination of the meat. Without lessening the importance of feeding bacteria-free food, let us mention that most raw-food feeders start out by aggressively disinfecting every bit of meat they serve to their dogs, and, when they find their dogs’ health improving, they relax a little. After all, a healthy dog with a robust digestive system full of beneficial bacteria ought to be able to digest meat in any condition.

Observe the following raw meat safety admonitions:

Buy meat from the most reputable sources

Fresh and clean are your watchwords. Look for a butcher shop that is immaculate; if it smells bad, or if the refrigerator cases don’t look sterile, don’t shop there. Choose a location that gets a lot of business; more turnover means fresher meat.

Disinfect any meat you are worried about

Depending on your level of confidence, you may wish to disinfect all meat you feed to your dog, or just the meat with an appearance or odor that undermines your trust.

Grapefruit seed extract and food-grade hydrogen peroxide are potent substances that are commonly and safely used to disinfect meat (they can also be used to clean fruits and vegetables!). Both are fairly inexpensive and both exhibit a powerful antibacterial action, even when diluted considerably.

Many raw feeders, including Celeste Yarnall, use grapefruit seed extract to disinfect their dogs’ meat. Yarnall mixes four drops of the extract into 6-8 ounces of purified water, and uses this to disinfect one pound of meat. Dr. Swift uses one tablespoon of 3% food grade hydrogen peroxide mixed into a cup of water per pound of meat.

Place the meat chunks into a clean glass or ceramic bowl and pour the liquid over it. Bacteria is generally introduced to the outside surfaces of meat, by touching a dirty counter, for instance, or being cut with a dirty knife. When dealing with chunks of meat, your concern is only for the exposed surfaces. (If feeding ground meat, use the grapefruit seed extract formula, which can be mixed right into the meat and served to the dog without harm.) Cover the bowl and allow it to “marinate” in the refrigerator for an hour or so. Afterward, rinse the meat off in clean water; it’s ready to feed or freeze.

Keep meat cold

Unless you’re careful, there are unlimited opportunities for meat to warm up while in your care; don’t let it. Meat begins to spoil above 40 degrees F. Cold temperatures inhibit the growth of the bacteria that causes spoilage, so stop at your favorite butcher shop right before you drive home; if you shop in a supermarket, select the meat right before you go to the checkout line. Put meat in the refrigerator before unpacking your other groceries.

Take the meat out of the refrigerator just before you prepare it.

When using frozen meat, thaw it in the refrigerator. It takes longer, but it keeps the outermost portion from warming to temperatures above 40 degrees while the rest is still thawing.

Use fresh meat quickly

The United States Department of Agriculture recommends using fresh beef within three to five days of purchase. However, the USDA food safety experts suggest using ground meats, and all poultry and organ meats within one to two days of purchase. Again, while refrigeration inhibits the growth of bacteria, the cold temperatures do not stop spoiling altogether.

Keep your kitchen clean

There is probably a greater chance of meat becoming contaminated in your kitchen than in most butcher shops, because butchers religiously practice “safe-meat” practices.

Start out, like a butcher, with a clean theater of operations. Don’t let the meat touch any surface that has not been disinfected. Make sure that all your cutting boards, counters, knives, and dishes are pristine before bringing out the meat.

As you handle the meat – unwrapping it, cutting it up, mixing it with other things, putting it in a dish, and disposing of the wrapping – remember to “detoxify” everything the meat touched with an anti-bacterial agent. This includes your hands, the counter you set the meat on, the knives or cutting board you used, the sink, the sponge, any dishes you touched, and anything else your unclean hands touched. This especially includes the dog’s bowl.

If the meat actually were contaminated, any uncleaned surface in your kitchen could be infected with bacteria, which, in turn, could lurk behind and contaminate another meal. However, if you followed its trail with a potent disinfectant, you would eliminate all the possibilities for it to lurk behind and “spoil” another day.

How to Feed a Dog Meat

OK, let’s assume you are sold. How do you go about formulating a raw-meat diet?

Recipes for home-made dog food abound, and every book on our resource list (see “Raw Resources”) includes at least one. But despite numerous small variations of opinion regarding supplements, the basic proportions of raw meat to grains to vegetable matter is roughly the same.

Yarnall suggests formulating a diet that is comprised of about 40 percent meat, and 30 percent vegetables, and 30 percent grains. She uses about 60 percent muscle meat and about 40 percent of organ meat (kidneys, liver, or heart). The vegetables vary, and are prepared, raw, in a food processor. Yarnall uses only slow cooked oatmeal (the 30-minute type) or barley flakes. She adds enough purified water to make the mixture the consistency of a thick chili. Yarnall supplements this food with an essential fatty acid supplement and a small amount of bone meal.

For comparison, McKinnon uses a diet comprised of about 30-40 percent meat, fish, or eggs, 40-50 percent grains, and 20 percent vegetables. Some raw feeders eschew the use of grains altogether, since grains are not technically part of the dog’s ancestral diet. Dr. Russell Swift, a Florida veterinarian who has had a long-time interest in pet nutrition, was among the first to question the need for grains in dog food. His recipe for home-made dog food (published in the March 1998 issue of WDJ) contains a smaller amount of grain than many authorities. He suggests using just 1/4 cup of oats or multi-grain hot cereal and 1/4 to 1/2 cup of chopped raw vegetables to every 1/2 pound (about a cup) of raw meat.

Most raw food enthusiasts size the dog’s meals at about two to three percent of the dog’s body weight daily. (A 50-pound dog would get 1 to 1 1/2 pounds of food a day.) Watch your dog’s weight and condition and adjust the amount accordingly – reduce the amount if he starts gaining weight, increase the amount if he begins to get too slim.

That last advice may sound unscientific, but it’s not. It’s representative of the kind of thinking – the whole mindset – that you should bring to the task of feeding meat to your dog. It’s simple. It’s intuitive. It’s natural. It’s how dogs are supposed to eat.

Preparing For and Training Young Puppies

white lab

The first time I saw Buddy he was a tiny tan morsel nestled in his owner’s arms, a perfect pudge of a yellow Labrador retriever puppy – eight weeks old, fat, round and chunky with a shiny black button nose, warm brown eyes and milk-sweet puppy breath. His owner, Tena, had carried him into my training class to hand him over to me for three weeks of in-home boarding and training.

I generally don’t recommend that an owner send an eight-week-old puppy to a trainer for boarding and training. This is an important learning and bonding period for dog and owner; it is usually more beneficial for the two to learn together. But Buddy’s owners had made some big mistakes in the two weeks they had owned their new puppy.

First, they had purchased him at the age of six weeks, depriving him of a very important two-week period of education and socialization with his mother and littermates. Puppies taken away from their litters at this tender age often have problems with being mouthy (biting too hard on human skin) because they missed out on the chance to learn bite inhibition from their mother and siblings. Unless they are given ample opportunity to socialize with other puppies or gentle adult dogs as they grow up, “only” puppies can become canine social nerds, failing to learn appropriate body language and other canine social skills. And sometimes, puppies taken away from their litters too soon often grow up to be aggressive to other dogs.

The owners’ second big mistake was adopting a six-week-old puppy two weeks before going on a three-week vacation. They had belatedly realized the folly of putting a very young pup in a commercial kennel for three weeks, and had begged me to take him. I agreed, reluctantly. I am not set up to do boarding, and have long resisted adopting a puppy myself because of the huge commitment of time and energy that they require. However, I, too, was reluctant to see Buddy spend these important formative weeks in a kennel, and his owners were willing to pay a considerable sum for the privilege of keeping Buddy at my home. Buddy was coming to stay for three weeks.

My class was just concluding. I dismissed my students and walked outside with Tena to discuss last-minute details.

“Put him down,” I urged her. “Let him walk.”

She gently placed him on the ground and he toddled along behind us as we strolled down the driveway. Suddenly he stopped and sat in the middle of the road. We continued on, and when we had gone about 15 feet she turned back to him.

“What are you doing?” I asked her.

“Going back to get him,” she replied.

Big mistake number three – Buddy’s owner was already getting “trained” to do what the puppy wanted!

“Nope,” I said. “Leave him.”

“Leave him?” There was a note of panic in her voice.

“Leave him,” I insisted. “He’ll come.”

We kept walking, Tena glancing nervously over her shoulder every three steps. Sure enough, we hadn’t gone another 15 feet when Buddy jumped up and came galloping after us. My first lesson for Buddy (and for Tena!) was a success – we were the leaders, and it was his job to keep up with us.

I reassured Tena that Buddy would be fine. She bid him a reluctant good-bye, got in her car and drove away. I used a treat to lure Buddy into the crate I had brought with me, put him in my van and headed home.

Coming Home

“Home” had been prepared for Buddy’s arrival. I had put down a plastic tarp in the living room, covered it with a thick layer of newspaper and set up a puppy pen on top of it. A variety of enticing chew toys awaited Buddy’s needle-sharp baby teeth: a Kong stuffed with cream cheese, a bleached marrow bone filled with peanut butter, a Goodie Gripper with freeze-dried liver jammed into the holes, a Roll-A-Treat Ball full of tasty kibble, a couple of Vermont Chew Toys. We were ready!

We would use the umbilical cord approach to puppy management. Buddy would be kept at all times either in his pen, in the safely fenced and puppy-proofed yard with my dogs, on a leash with me, or under my direct supervision in the house. We would thus avoid a common mistake of novice puppy owners — giving the puppy too much freedom. The first few weeks of puppyhood are a critical time. If the pup’s early behavior is well-managed, he will never learn to chew the furniture, climb on the counters, and urinate in the back bedroom. Through the judicious use of puppy pens, fenced yards, crates, adult dog baby-sitters, leashes and direct supervision, we avoid unwanted behaviors that are much easier to prevent than they are to unteach.

Three Weeks with Buddy

I arrive home with Buddy and introduce him to the Miller pack. I know that none of our four dogs will hurt him, but I also know that they won’t tolerate obnoxious puppy behavior. As he charges through the front gate he is greeted by Josie, our 11-year-old terrier mix and pack leader. Josie promptly lets out a fierce throaty growl that knocks Buddy onto his back. From Tucker, the 75-pound cattle dog mix and Katie, the 45-pound Australian Kelpie, all the way down to Dusty, the eight-pound Pomeranian, each of the four Miller dogs lets Buddy know in turn that they will brook no misbehavior.

I take Buddy inside and put him in the pen, where he promptly begins to cry and shred the newspaper. This is where puppy owners often make another huge mistake. If I heed his cries and relent, letting him out of the pen, he learns an important lesson – crying gets him what he wants. Instead, by ignoring him, I will teach him that crying is not a useful behavior. If I “Click!” a clicker and treat him when he stops crying, he will learn to be quiet even faster. I ignore Buddy’s cries, and within 15 minutes he finally gives up and settles down for a nap.

I start Buddy’s housetraining from day one, teaching him a verbal cue to go to the bathroom, and rewarding him for eliminating. At 11:00 p.m. I wake Buddy and take him outside on his leash. As he squats, I tell him “Go pee!” When he is done, I “Click!” and feed him a treat. After a short wait he also deposits feces, also accompanied by my “Go pee!,” cue followed by a “Click!” and treat. We will do this every two hours throughout each day for the next three weeks, giving him lots of opportunities to do it right, and never giving him the chance to “make a mistake” in the house.

If I made the common novice-owner error of just putting him outside by himself, he could eliminate anywhere he chose. He might not even go to the bathroom at all, especially if I give him a treat when he comes back in. If “coming in” is the behavior that gets rewarded with a treat, he might as well skip the bathroom step!

Having other dogs to play with outside can also distract him from his bathroom purpose – he may be having so much fun playing that he forgets to stop and eliminate. By going out with him, I teach him to relieve himself in the exact spot I want him to use, and I make sure he actually eliminates. (If he doesn’t, I bring him back inside and return him to his crate for a while, then try again.)

By rewarding him immediately after he goes, I make sure he knows what he is getting rewarded for. Using the “Click!” from a clicker gives him a clear message about which behavior is getting rewarded, even if the treat arrives a few seconds later. We will be using the “Click!” a lot with Buddy over the next few weeks. When Buddy is done going to the bathroom, I lead him into the bedroom and toss a treat into his crate.

“Go to bed,” I urge as he pokes his nose into the crate, looking for the treat. A gentle nudge to his tail pushes him into the crate, and he is ready for bed. (Within three days he will voluntarily go into his crate upon hearing the verbal cue, “Go to bed.”) He has had a long, exciting day and is ready to sleep. He cries for a few minutes, but when I continue to ignore him, he curls up and sleeps through the night without a further peep.

The Routine

The following days fall into a routine that centers around Buddy. We wake at 5:30 a.m. to a dry crate, and rush outside for his morning bathroom ritual, then come back inside for breakfast in his puppy pen. The day consists of lots of trips in and out, interspersed with three meals, and several short training sessions. Within two days he is galloping into his pen at the “Go to your pen” cue, ready for his meal. He quickly learns to run up to me and sit for a Click! and treat instead of jumping up. (We accomplish this in less than a day by turning our backs when he jumps up – ignoring the behavior we don’t want – and clicking and rewarding him with a treat when he sits.) By Day 4 he offers a sit for every possible occasion.

He also learns to sit quietly in order to be released from his pen. When I approach the pen gate he must sit in order for me to proceed. If he jumps up, I turn away. When he sits, I start to open the gate. If he gets up, I turn away again. He quickly realizes that the sooner he sits and stays sitting, the sooner the gate opens. If he gets up before I release him, I close the gate again. I don’t even have to ask him to sit – he chooses to sit because that gets him what he wants – out! He is learning to control his own behavior without being nagged by me to do the “right” thing. This is a key element of positive reinforcement training – teaching the dog to take responsibility for his own behavior rather than always being told what to do.

On Day 3, after just one session with the clicker, he learns to lie down on a verbal cue. We start by “luring” him down with a treat without even using the word “down,” and “Click!” and treat him when he does it. Once he does the “down” behavior smoothly, we add the word to tell him what he is doing, as he does it, still clicking and treating for each “down.”

After a dozen or so repetitions, I ask for the “down” first, then lure with the treat, followed by “Click!” and reward. It only takes a couple of dozen repetitions for Buddy to understand that the word “Down” means the same thing as luring “down” with the treat, and he is soon dropping like a rock to the floor on the verbal cue alone.

As expected, Buddy is excessively mouthy. When I offer him a treat, he chomps down on my hand. His sharp little teeth hurt! I consciously resist the impulse to punish him for the pain he inflicts on me – instead I begin to teach him to soften his uninhibited bite. I offer the treat in my closed fist, and suffer the discomfort of his teeth until I feel his bite begin to gentle. As soon as the bite softens, I say “Gentle,” then I “Click!,” tell him “Take it!” and give him the treat. He soon learns that he doesn’t get the treat until he is gentle with his mouth. Although I see progress within a few days, it takes the entire three weeks to get him as soft with his mouth as I want him to be.

A Constant Watchful Eye

Anytime Buddy is given house freedom he requires direct supervision. He wants to eat everything! Distracting him with the Chew Man only lasts as long as I play with him. We work on increasing his self-control. I sit on the sofa and ask him to “Down” at my feet. At first I “Click!” and reward him just for the down. Then I gradually increase the length of time between the cue for “Down” and the “Click!” and reward. (“Gradually” means a few seconds at a time!) By the time Buddy returns to his owners, he will lie quietly at my feet for as long as a half-hour.

We walk on leash to the mailbox every morning to get the newspaper. He is overcoming his tendency to sit and wait to be picked up, and is beginning to walk nicely by my side. I “Click!” and reward him a lot whenever he walks with me, and stop and stand still if he pulls on the leash. He soon learns that pulling does not get rewarded – the more he pulls, the longer it takes him to get where he wants to go.

Encouraging Good Behavior

On Day 4 the newspaper is lying on the ground. Buddy grabs it in his mouth. Having spent the last three days taking forbidden items away from him, I have to stifle my immediate instinct to take it out of his mouth. This is a good behavior to encourage! I allow him to carry the paper proudly back to the house, where I trade him for a treat. From that morning on, he fetches the newspaper every day.

It is possible to completely inhibit a dog’s natural retrieving tendencies by punishing him every time he puts something in his mouth. I encourage Buddy to pick up, play with and fetch appropriate play toys. I use the words I want him to learn – “Fetch” when he runs to get the toy that I throw, and “Give” when he brings it back.

Of course, he doesn’t know what “Give” means until I teach him. He is reluctant to unclamp his tiny jaws from his favorite chew toy, so I offer to trade him for a treat. Bingo! He lets go of the toy as I say “Give,” and I “Click!” and reward him with the treat for his good behavior. We use this same method to get him to give up a forbidden item, and thus avoid teaching him to play keep-away by chasing after him when he has something he shouldn’t. We try to keep inappropriate objects off the floor and out of his reach, but he always seems to be able to find something he is not supposed to have!

By the beginning of the second week I am looking for new challenges for Buddy. He loves to splash in his water bowl, so we buy a baby’s swimming pool and teach him to play in the water. He is hesitant at first, but within a few days he is leaping into the pool to fetch his toys. He accompanies me to my “Dog Days of Summer” lecture at the Santa Cruz SPCA, acting as my “demo” puppy for the “Puppy Stuff” lecture. His quick response to the clicker wins several converts over to the positive reinforcement method of dog training. I also take him with me to do a television show promotion for the lecture series, and on T.V. we demonstrate clicker training and puppy behavior management tools such as the Kong stuffed with cream cheese.

We spend the third week polishing his behaviors and preparing to return him to Tena. He has added “Come,” “Stay,” “Off,” “Relax,” and “Touch,” to his repertoire. He sits and downs promptly on cue, and walks nicely on a leash. He goes into his pen and stays there without protest, sleeps through the night in his crate without a sound, and is allowed much more house freedom, although still with supervision. He can last six hours in his pen without soiling his papers, and in three weeks has only had one accident in the house. I am exhausted. It takes so much work to properly raise a puppy! It is no small wonder that so many dogs end up at animal shelters – there are far too many puppies who never get they attention the need to become well-behaved canine citizens.

In preparation for returning Buddy to Tena, I review all that he has learned in three weeks. I recognize that there is an inherent satisfaction in shaping a puppy’s behavior, watching him explore the world and teaching him to be a good canine citizen. And while I look forward to the relief of returning Buddy to his owners and having my own household return to normal, I worry whether his people will keep up with his training and behavior management. I realize that I will miss this bright little guy with his boundless enthusiasm for life and learning.

Epilogue

Buddy’s owners were quite pleased with the results of his stay at “Camp Miller,” and signed him up for one of my Peaceable Paws puppy training classes. Buddy and I were delighted to see each other when he arrived for class, where he was handled by his owner’s son, seven-year-old Mark. Buddy and Mark graduated from the class with honors.

Pat Miller is a regular contributor to WDJ. A freelance writer and dog trainer, she lives in Salinas, California.