Home Blog

How to Treat Yeast Infections in Dogs

Early detection is the key to how to treat yeast infections in dogs.
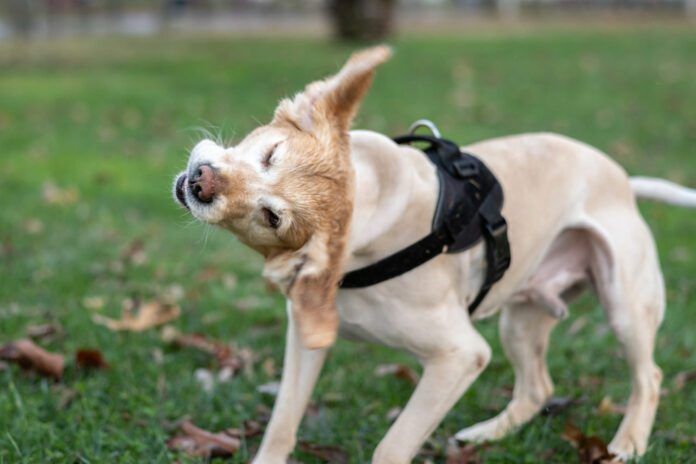
Dogs with drop ears are more prone to ear infections. Shaking their heads can be a symptom. Credit: Berk Ucak | Getty Images

Yeast infections can be a minor inconvenience or a major recurring hassle. The most common yeast found in infections in dogs is Malassezia, which thrives in warm, moist areas on the dog’s body. That means that ears, paws, and skin, especially the groin and armpit areas. These are favorite spots for yeast to colonize on your dog.

The best treatment will attack the yeast, and possible secondary bacterial infections, while you work on the underlying cause (that is a must!). Topical treatments are the first choice. This means medicated shampoos, mousse, or ear drops. Oral medications can be necessary for severe and stubborn cases of yeast.

If you catch a yeast infection while it is just getting started, some home treatments can help. For example, for paw infections, soaking in Epsom salts to clean the paws is a first step. Then dry the paws carefully and apply foot powder. Most foot powders are anti-inflammatory, anti-fungal, antibacterial, anti-itch, and taste bad so they discourage licking. Gold Bond is a personal favorite. While I would not put foot powder in a dog’s ears, it works for mild armpit, paws, and groin cases.

Does My Dog Have a Yeast Infection?

Many dogs live in harmony with a low level of yeast. When something tips the balance, however, your dog will start to show clinical symptoms.

You might notice your dog rubbing or scratching his ears, a musty sort of smell, and when you lift the ear, you might see moist, red inflammation or dark debris. Either way, this yeast infection can be painful for your dog. With severe cases, your dog may hold his ears funny (sort of like “airplane ears,” where he tries to hold them out from his head). He may also have a mild head tilt.

Yeast infections on paws tend to start in the spaces in between toes. If you look carefully, you will see moist, red, and inflamed skin. The surrounding hair may turn brown due to enzymes in your dog’s saliva as he licks and chews on his feet. There is an odor, too. If his paws become painful, he may limp, shorten his stride, or become less active.

Yeast infections in the skin tend to be red, moist, and inflamed areas along with the sickly, sweet odor. If areas where your dog can lick are involved, the hair will be discolored. The haircoat may feel greasy.

What Causes a Yeast Infection in a Dog?

Causes for yeast infection tend to center around disruptions of the immune system. That might mean allergies (ear yeast infections often tie in with food allergies specifically), endocrine disorders such as hypothyroidism, grass and pollen allergies for the paws, or secondary to external parasites like fleas and mites. Obviously, you want to try and determine the underlying cause, if possible, as treating that will help to cure the yeast problem.

Yeast infections tend to be more common in dogs with drop ears like Cocker Spaniels, Basset Hounds, and other breeds with drop ears. Ear canals are often moist and tend to be warm and safe for yeast. Your veterinarian can diagnose a yeast infection by doing a slide impression of the affected area and examining it under the microscope.

Remember that your dog may need a diet change as well. Diagnosing food allergies requires food trials. Sometimes simply changing the protein source may be all you need. Adding a good, canine probiotic can also help.

Caught early, yeast infections can be reasonably easy to treat, especially once you identify the triggers.

Video: How to Help an Overweight Dog Lose Weight

0
Have an overweight dog that needs to lose weight. Check out our handy video guide.

Extra weight creeps up on dogs, and it’s easy for an owner to miss. It also matters: excess body fat raises a dog’s risk of arthritis, diabetes, breathing problems, and trouble getting around.

Whole Dog Journal executive editor Kate O’Connor talked with companion animal nutritionist Mary Cope, PhD, about how to tell when a dog is carrying too much weight and how to take it off safely.

How to tell if your dog is overweight

Dr. Cope says the ribs are the first thing to check. You should be able to feel them under a light covering of fat, see a waist from above, and see a tuck behind the ribcage from the side. A dog can still have a waist and a tuck and be overweight, so go by the ribs first.

She also suggests thinking about extra weight as a share of the dog’s body, not in pounds. One extra pound is a lot on a Chihuahua and very little on a Great Dane. In the video she demonstrates a quick test that uses your own hand to show what a dog’s ribs should feel like. Sighthounds are the exception and have their own body condition chart.

Smaller portions or a weight-management food?

If you caught the weight gain early, feeding a little less of the regular food can be enough. Dr. Cope trims her own dogs’ portions in winter, when they get less exercise.

For a dog with more to lose, she recommends a weight-management food. Cutting a regular food in half also cuts the protein, vitamins, and minerals in half. A weight-loss formula lowers the calories while keeping those nutrients in place, so the dog can eat a normal volume of food and still feel full.

Don’t rely on the feeding guide on the bag

Many owners of overweight dogs tell Dr. Cope they feed exactly what the bag recommends. Those amounts are generalized and tend to run high, she says. Use them as a starting point, then adjust to what you see on your own dog.

What to look for in a weight-loss food

Start with “complete and balanced.” Then find the calorie statement on the back of the bag, usually in small print, and compare kilocalories per cup. That means a standard 8-ounce measuring cup, not whatever cup is in the cupboard.

Dr. Cope looks for lower calories, good animal protein to support lean muscle, and higher fiber to help a dog feel full. The goal is slow, gradual weight loss the dog can maintain. For a very overweight dog, work with your veterinarian, who can help the dog lose weight safely.

Treats count

The rule of thumb is to keep treats under 10 percent of daily calories, which is hard to track for a small dog. Dr. Cope’s fix is to hold back about a quarter of the day’s food and hand that out as treats. Unsalted canned green beans, thin slices of carrot, and small pieces of lean meat are low-calorie options. Daily dental chews add up quickly.

How to know the plan is working

Weigh your dog every two to four weeks. Most veterinary offices will let you stop in and use the scale. Plateaus are normal. If there’s no loss, or a gain, after four weeks, it’s time to adjust the plan and talk to your vet.

Dr. Cope has done this herself. She adopted a beagle who weighed 50 pounds and should have weighed 22 to 24.

Her advice for owners

Measure everything, limit unplanned extras, and get the whole household on board, because one person slipping the dog table scraps can undo the plan. And skip the guilt. Dr. Cope says there is no shame in having a dog who needs to lose a few pounds.

Watch the full interview above for the hand test and the rest of Dr. Cope’s advice, then ask your veterinarian to help you set a target weight for your dog.

Is your dog overweight? Most owners can’t tell

0

In this video interview, companion animal nutritionist Mary Cope, PhD, talks with Whole Dog Journal executive editor Kate O’Connor about how to catch a weight problem early and fix it safely.

They cover:

  • A hand test that shows you what your dog’s ribs should feel like
  • When smaller portions are enough, and when to switch to a weight-management food
  • Why the feeding amount on the bag may be working against you
  • What to look for on a weight-loss food label
  • How to keep giving treats without undoing the diet
  • How often to weigh your dog, and when to change the plan

Dog Stress Relief: How to Help Your Dog Feel Calmer

Dog stress relief can be obtained by training, socialization, and medication or some combination thereof.
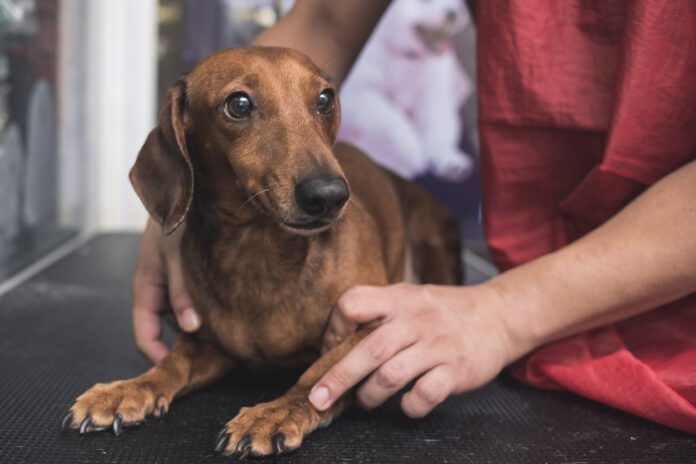
Trips to the vet, groomer, or boarding kennel can often be stress-inducing for dogs. Credit: MDV Edwards | Getty Images

Most dogs will experience stress or anxiety at some point, just like us. Stress occurs on a spectrum from mild through to moderate and extreme. It can impact both health and behavior—especially if the stress becomes chronic—and it can have a negative effect on a dog’s quality of life. But knowing the signs that indicate a dog is stressed, identifying stress triggers, and understanding how to help relieve the stress can help reduce its impact on your dog. In this article, we’ll take a look at the signs a dog is a stressed, common causes of canine stress, and what you can do to help relieve it.

To continue reading this article or issue you must be a paid member.

Join Whole Dog Journal

Get full access to Whole-Dog-Journal.com – more than 4,000 articles – for just $20.
Join today and save 30% off our full price.
Already a member?
| Forgot your password? | Activate Web Access

DIY Dog Training: How to Train Your Dog at Home with Practical, Positive Methods

0
DIY dog training can be accomplished with patience and attentiveness.
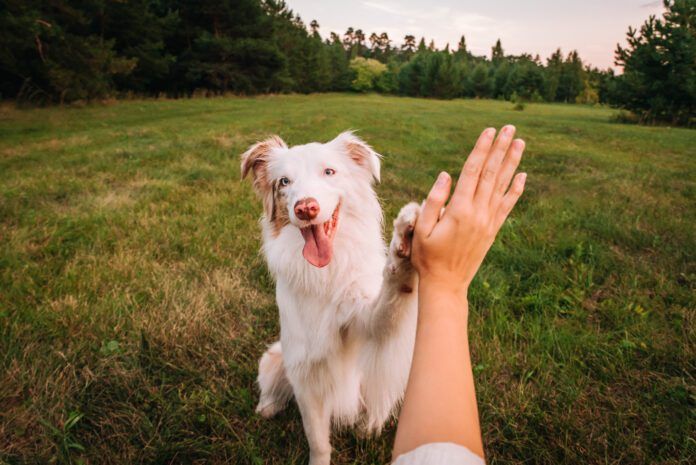
From manners to tricks, there’s no shortage of things you can teach your dog at home. Credit: Julia Suhareva | Getty Images

Training should be at the top of every responsible dog owner’s to-do list. Dogs deserve to be taught how to successfully navigate our human world, and effective dog training reduces nuisance behaviors while promoting public safety.

Plus, training is a great bonding activity, and trained dogs (and the humans who love them) have more fun! When your dog is well-trained, you’re more likely to include him in your adventures—from lunches with friends at dog-friendly eateries to road trip, fun dog sports and more!

What Is DIY Dog Training?

DIY dog training is teaching and managing your dog’s behavior independently instead of relying on a professional trainer. It involves using everyday routines and short training session to help your dog learn basic behaviors.

Is DIY Training Right for You?

Every dog can benefit from DIY dog training when it comes to the basics. And the truth is, even when you attend a group class or work one-on-one with a trainer, you—the owner—are still the one doing most of the training. The trainer’s job is to train you, so you can practice with—and train—your dog!

DIY training plans are best suited to teaching skills that promote manners, civility, and basic safety when in public. If you’re trying to rehab a dog who grossly lacks these skills—or who struggles with anxiety or aggression issues—we recommend consulting a qualified positive-reinforcement trainer for help.

Basic Principles of Successful Dog Training

Modern dog training centers on the principle of positive reinforcement—the act of adding something pleasant (a reward) after a desired behavior occurs. Simply put, behaviors that are rewarded will be repeated. Rewards can be anything your dog enjoys: treats, praise, petting, chasing a ball, a game of tug, a good sniff in the bushes, and more.

Being mindful of the following will help set you and your dog up for success:

  • Consistency Counts. Dogs love to gamble. If something works occasionally, they’re more likely to keep trying. If you’re trying to teach your dog not to jump up on you, your family, and your guests, you need to maintain this expectation across the board to be fair and prevent confusion. It may seem cute and cuddly when he jumps up on a Saturday morning and you’re in your pajamas, but it won’t be so cute when his feet are muddy and you’re dressed for work! Make sure everyone in the family is on the same page to uphold clear and consistent expectations.
  • Timing is Everything. Aim to deliver the reward (the treat, the toy, etc.) within two seconds of your dog performing correctly. This helps your dog connect the reward to the behavior. Be mindful of what’s happening as you deliver the reward. For example, if you’re working on “sit,” it’s best to reward your dog while her hind-end is on the floor. If you take too long to deliver the reward, she may sit, then stand. At that point, you’re likely rewarding a sit-stand combination.
  • Practice Often. DIY dog training is most successful when we practice a little and often. A few short, five-minute sessions per day is great. It’s also helpful to sneak in a little training during daily interactions that happen outside of set practice sessions. Mealtime is a great opportunity to practice a short sit-stay. A game of fetch is a great opportunity to practice “sit,” “down,” or any other known, easy behavior to teach your dog that performing successfully is what winds you up for the next toss.
  • Be Patient. Nothing kills the joy of a great training session like frustration. If you feel yourself getting frustrated, STOP. When we get frustrated, our tone of voice and body language changes. Dogs are masters at reading body language, and these expressions of frustration can damage trust and cause the dog to associate training with stress rather than success.

There’s nothing wrong with ending a session early. Ask for and reward an easy behavior your dog knows or simply declare that you’re done for the moment and excitedly remind your dog that he’s the best boy and you’ll try again later.

When cooler heads prevail, give some thought to what happened earlier. Was your dog distracted? Were either of you not feeling your best? Did you ask for more than your dog was ready for? This troubleshooting will help you set realistic expectations for your next training session.

Core Skills to Teach Your Dog at Home

The following skills are particularly well suited to DIY training, and they each offer benefits that extend beyond the basic commands:

  • Name Recognition. Teaching your dog to orient to you when she hears her name is a key skill because having your dog’s attention greatly increases the odds of success when asking for subsequent behaviors. Plus, it’s a great way to redirect your dog from potential poor life choices or hazardous situations.
  • A “sit” is simple to teach, useful in a variety of everyday situations, and serves as a foundation for more complex behaviors like greeting people calmly.
  • A reliable “down” is the first step toward teaching your dog to settle. It helps build impulse control, is a useful position for waiting—like when you’re on a walk and want to stop and chat with a neighbor—and when built into a reliable down-stay on a bed or mat, it can help prevent unwanted behaviors like bothering guests or counter surfing when you’re cooking.
  • Tug Games. Tug is a great way to build engagement with your dog. You can use the game to practice skills like “take it” and “drop it” while building impulse control by asking for a “sit,” “down” or any known behavior to turn the game back on. This structured approach helps keep the game safe while giving your dog an appropriate outlet for natural tugging instincts.

Avoid the “But He Does It at Home!” Trap

When embarking on a DIY training plan, be sure to slowly build up to practicing skills in new environments and around new distractions. With each new location or set of distractions, adjust your expectations and make it easier for your dog to get it right. A well-run group class can be a great place to practice around distractions!

Final Thoughts on DIY Dog Training

DIY dog training is an accessible and rewarding way to strengthen your relationship with your dog while building confidence and good habits. Start with the basics, celebrate small successes, practice in new areas as your dog is ready and turn to a professional trainer for troubleshooting or to explore more advanced skills. Together, these steps can help you raise a well-mannered canine companion you’ll be excited to spend time with.

Choosing the Best Hard Dog Crate for Your Dog

Hard dog crates can keep both large and small dogs safe during travel.
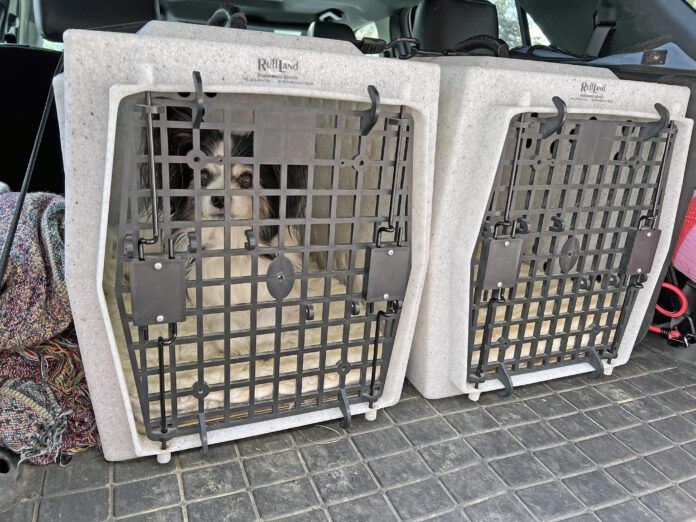
These RuffLand crates fit well in the back of our SUV, fit our dogs comfortably, and offer secure anchor points. They can also be easily removed when needed. Credit: Cynthia Foley

 When it comes to both protecting and restraining your dog, buying a crate or kennel seems like a no-brainer. What isn’t so easy to decide is what type of crate or kennel to buy. Your options fall into three categories:

  • Wire crates that offer optimal visibility
  • Soft-sided crates are lightweight and portable
  • Hard-sided dog crate constructed from thick plastic or heavy-duty aluminum

While wire and soft-sided collapsible crates are lower-priced and useful for things like visibility and portability, hard-sided crates offers structural integrity, privacy, and security that’s well-suited if you’re looking for a dog crate for vehicle travel, an airline-approved dog crate for commercial flights, or a comfortable (but extra-secure haven) for your dog at home. Hard crates are also most effective for behavior issues.

When a Hard Crate Is Best

A hard dog crate features solid walls on three sides with ventilation slits or wire-mesh windows. Unlike wire crates that offer your dog a 360-degree view of the environment around him, hard crates are better for car travel, flight cargo, and privacy. In contrast, wire crates are well-suited for house-training because they allow for maximum airflow and fold flat for easy storage.

Most consumer hard-crate models consist of two molded plastic shells that bolt or latch together, paired with a reinforced metal wire door. Higher-end rotational molding plastic and aluminum variants take things even further for extreme containment and vehicular crash safety. Note: Rotational molding construction is the same design used for white-water kayaks and commercial cooler chests, making the kennel virtually immune to cracking under heavy impact or flexing under pressure.

Key Features of Hard Dog Crates

To find the best travel dog crate or home refuge, look for these features:

  1. Size and Fit for Travel Dog Crates

The dog crate for car travel should be big enough for your dog to sit, stand up, turn around easily, and lie down. While it’s tempting to think bigger is better, oversized crates for car travel create possible injuries from a sudden stop, excess interior room increases the risk of impact injury against the interior walls.

Look for interior measurements rather than overall dimensions. Thick-walled or double-walled travel crates reduce the usable room inside. “So many people only look at the external measurements,” says Chris Loverseed, founder and head trainer at PK9 Gear. “Check the actual internal dimensions.”

  1. Ventilation and Environmental Placement

Ensure the crate is ventilated on at least three sides. Look for narrow slats or metal-reinforced grates that promote airflow without letting paws or muzzles poke through.

“Check it where you’re actually going to use it,” says Loverseed.  Even the best-ventilated crate will lose its effectiveness if it’s not positioned right. “Are the ventilation holes still clear, or have you got things packed against them? If the dog likes being out of view, choose a crate that gives them that without needing to block the ventilation.”

  1. Security, Latches, and Panic Protection

Ensure that door pegs extend deep into the crate frame to prevent the door from bowing under pressure. It’s also important to note the difference between containment and psychological comfort. While a hard dog crate contains your dog and keeps him safe from escaping, it doesn’t address panic or separation anxiety.

“There is a difference between the dog not being able to break out and the dog not being able to hurt itself,” says Loverseed. “Teeth and nails can still get damaged. I wouldn’t leave a dog that’s panicking in there to keep trying  [to escape]. Start with short sessions you can supervise, and if they’re struggling, get the vet and a qualified trainer involved.”

  1. Portability and Maintenance

Built-in handles make transporting empty crates easier. Molded plastic interiors are naturally leak-proof and easy to wipe down, hose off, or sanitize following accidents.

With these features in mind, we considered top crates (see chart) and then ranked them, with these coming out as our best choices in different categories:

Best Value CPS-Certified Crate: Cabela’s GunDog Kennel

Best for Crash Safety: Gunner’s G1 Kennel

Best Space-Saver for Travel: Impact Dog Crates Collapsible Aluminum

Best for High-Anxiety Dogs and Escape Artists: Impact Dog Crates Stationary Aluminum

Best for Everyday Transport: RuffLand Kennels Performance Kennels

ManufacturerProduct NameRecommendedApproximate Price RangeMaterial and ConstructionTarget
Cabela'sGunDog KennelBest Value CPS-Certified Crate$380 – $400Single-body molded plastic with stainless doorBudget-conscious buyers seeking a 5-Star Center for Pet Safety crash-test safety
Dakota 283G3 Large Framed Kennel$385 – $630Rotational molding plastic with steel door frameOutdoor enthusiasts, hunting dogs, budget-conscious heavy-duty rotational molding plastic buyers
GunnerG1 KennelBest for Crash Safety$550 – $900Double-walled, rotational molding plasticVehicle travel, maximum impact safety and 5-Star Center for Pet Safety crash protection
Impact Dog CratesCollapsible AluminumBest Space-Saver for Frequent Travel$800 – $1,200Foldable aluminum panels with drop-in locking pinsFrequent hotel stays, dog sports, temporary vehicle setups where cargo space is needed
Impact Dog CratesStationary AluminumBest for High-Anxiety and Escape Artists$600 – $1,100Powder-coated aluminum with stainless hardwareSevere anxiety, escape artists, destructive chewers, permanent home/vehicle setup
Lucky DuckLucky Kennel$550 – $750Light rotational molding plastic with injection-molded door5-Star Center for Pet Safety crash-test safety seekers wanting a lighter rotational molding plastic alternative
PetmateSky Kennel$75 – $400High-impact plastic shell with wire ventsCommercial airline cargo travel (IATA compliant), budget-friendly rigid travel
Rock Creek CratesMedium Stationary$800 – $1,000Heavy-duty welded aluminum frameBuyers wanting 5-Star Center for Pet Safety crash certification in a heavy-duty aluminum build
RuffLand KennelsPerformance KennelsBest Value for Everyday Transport$230 – $435Single-piece rotational molding PE plasticWorking dogs, agility/sport dog owners, high-value everyday vehicular transport

Hard Crate Seal of Approval

While there is no single government seal of approval for dog crates, there are government transportation regulations, industry standards, independent certification and testing programs, and manufacturer-commissioned testing.

The most straightforward benchmark for vehicle travel crates is the Center for Pet Safety (CPS). CPS says it doesn’t accept funding from product manufacturers.  To earn a 5-Star rating, a crate must pass crash testing, maintain quality controls, and be truthful in marketing claims.

If you’re looking for a crate for air travel, the  International Air Transport Association and USDA regulations establish requirements, but neither organization certifies individual crate models. The final decision on whether a crate meets compliance always rests with the operating airline.

Pros and Cons of Hard Dog Crates

Pros Cons
Superior impact safety: Ideal protection during road travel. Bulky: Hard crates do not fold flat when not in use.
Den-like privacy: Natural visual barrier reduces reactive barking. Warm-air retention: Requires careful monitoring in hot weather.
Easy cleaning: Plastic floor retains liquids and cleans quickly. Reduced airflow: Less like to feel a breeze compared to open wire frames.
Chew resistance: Smooth interior walls offer fewer chew edges. Weight: Heavy-duty models can be cumbersome to haul.

Safety Tips for Using a Hard Dog Crate

  • Remove collars and harnesses: Buckles, tags, or harness rings can snag on door wire grids or ventilation slots, creating a strangulation hazard.
  • Secure the crate in your vehicle: A free-floating plastic crate becomes a projectile in a crash. Always secure the crate using heavy-duty ratchet straps attached to designated vehicle anchor points. “The biggest mistake is having it loose,” says Loverseed. “Use the restraints and anchor points specified for the setup. A carry handle or a luggage hook isn’t necessarily made for that job.”
  • Be aware of the heat: Because solid walls hold heat longer than open-wire crates, never leave a dog in a hard crate in direct sunlight or in a vehicle without active climate control.
  • Be careful of what you leave: While you want your dog to be comfortable, it’s important to know your dog’s tendencies. “I recommend having bedding because they’re generally made out of hard surfaces,” Loverseed says. “With some dogs, having an item of your clothing that smells like you can help soothe them a little bit. It’s dog-dependent, like how well they are crate-trained and whether they’re going to chew and swallow it.”

Why Invest in a Hard Crate?

While you’ll pay more for a hard crate than you will for a wired or fabric crate, a high-quality hard dog crate is a good investment for your dog’s safety and peace of mind. By matching your dog’s size, temperament, and travel needs to the right combination of ventilation, latch security, and structural strength, you create a safe, portable haven that protects your dog on the road, in the air, and at home.


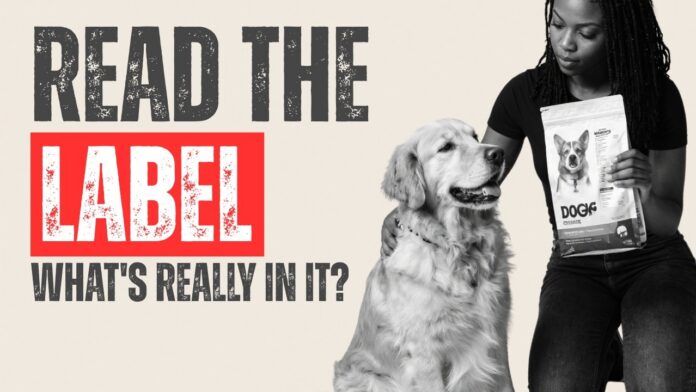
Video: How to Read a Dog Food Label (What Actually Matters)

0
How to Read a Dog Food Label (What Actually Matters) video from Whole Dog Journal

A dog food label is hard to make sense of. This video covers what to look at when you’re choosing a food — the ingredients, who formulated it, whether the company runs feeding trials, and where it’s made.

OTC Pain Meds for Dogs

OTC pain medication for dogs can offer pain relief for dogs dealing with minor injuries like sprains.
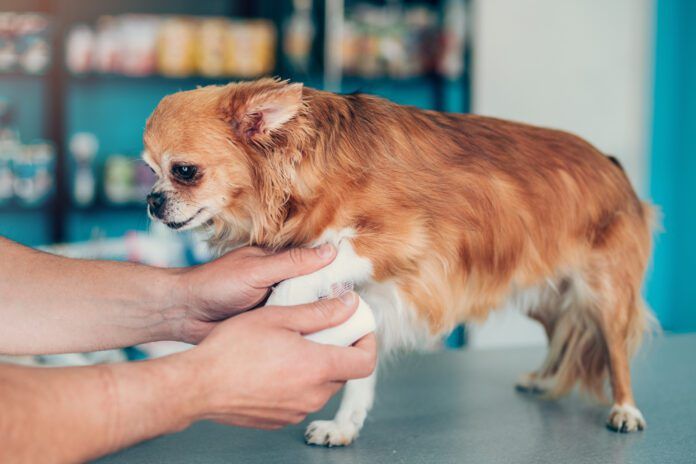
A vet probes a small dogs leg looking for a sprain or other injury.

We hurt when our dogs hurt. And our immediate reaction is that we need to give the dog something, anything, to help, especially if your regular clinic is closed. What can you do to relieve those signs of pain in your dog?

To continue reading this article or issue you must be a paid member.

Join Whole Dog Journal

Get full access to Whole-Dog-Journal.com – more than 4,000 articles – for just $20.
Join today and save 30% off our full price.
Already a member?
| Forgot your password? | Activate Web Access

The Most Important Things to Teach Your Dog

0

Ask most people what to teach a new dog first and they’ll say sit, stay, and loose-leash walking. Certified dog trainer and Whole Dog Journal contributor Jae Thomas has a different answer. In this interview with Kate O’Connor, she makes the case for three foundations that come before any of the basic cues.

Start with settling

Before sit or stay, Jae teaches a dog how to settle and calm down on their own. High-energy dogs often don’t come with a built-in off switch, and teaching one early – with a crate, pen, tether, or place bed – is what lets you travel with your dog or take them into public without a fight. Depending on the dog, it can take a few days to a few months, and settling loose in a busy house can be an ongoing project into adulthood.

Build engagement

Engagement is your dog choosing to pay attention to you because they want to, not because they feel forced. Jae calls it the foundation of both the relationship and every other skill: a dog who finds you rewarding is far easier to teach and far more willing to work through distractions. The key is noticing and rewarding the moments your dog offers engagement, rather than demanding it.

Teach your dog how to learn

The third foundation is teaching a dog how to learn at all: present a clear criterion, mark the moment they get it with a clicker or a word like “yes,” then reinforce with something they value. Jae leans on choice-based, shaping-style training, where the dog offers behaviors and gets rewarded for good choices – because, as she puts it, dogs do what works.

Where owners go wrong

The most common mistake, Jae says, is pouring energy into socialization and basic cues while skipping the one-on-one relationship that makes any of it stick. The other is forcing things – getting in a dog’s face to demand attention, or shoving a dog into a crate and calling it crate training. Settling, engagement, and learning all have to be the dog’s choice.

Precision when it counts

None of this means letting safety behaviors slide. A recall, a sit-stay, and polite leash walking still need to be proofed until they’re reliable. The experimentation and fun come on top of those, not instead of them – and the handler’s job is to stay clear about which is which.

Jae Thomas is a certified dog trainer and a Whole Dog Journal author.

Video: What to teach your dog first (it’s not sit and stay)

0

Ask most people what to teach a new dog first, and they’ll say sit, stay, and loose-leash walking. In our latest video, certified dog trainer Jae Thomas makes the case for three different foundations – and why they come before any of the basic cues. She sits down with Kate O’Connor to talk through what she teaches every dog first.

A few things covered in this video:

  • The three things Jae teaches before sit or stay
  • Why teaching a dog to settle on their own changes everything
  • What “engagement” really means, and how to build it
  • Where most owners go wrong with a new dog
  • Why letting your dog make choices is better than forcing them

Dog Ear Plugs: What To Know About Ear Covers and Swimming Snoods for Dogs

0
There are no dog ear plugs, but dog ear covers like swim snoods can keep water out of your dog's ears.
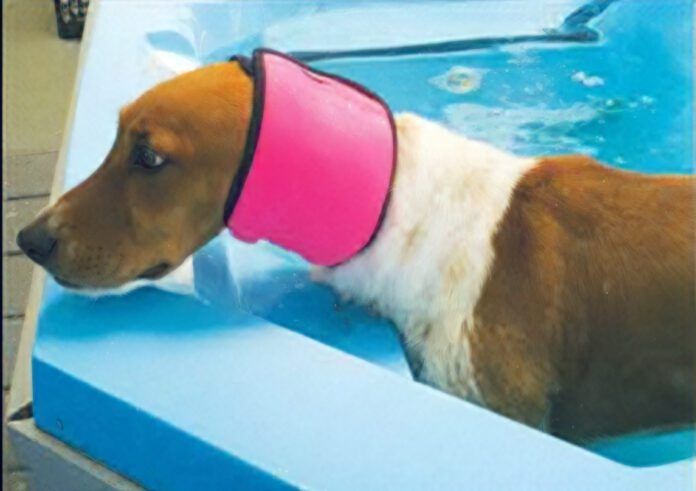
Ear covers, like this snood, can help keep water out of a dog’s ears while they swim. Credit: Courtesy of CJ Puotinen

Whole Dog Journal is reader-supported. If you purchase through links on our site we may earn a commission. Whole Dog Journal does not accept money for its food and product reviews.

If you’re searching for ear plugs or ear covers for your dog, you’re likely looking for something that will keep your pup’s ears dry and free of debris. Dogs who most need this type of protection tend to have long ears, narrow ear canals, allergies, a history of recurrent ear infections, or a tendency to repeatedly shake their heads after swimming.

Fortunately, there are several ways to keep your dog’s ears dry with ear covers. Available types include:

  • Snoods
  • Bathing covers
  • Swim caps
  • Swim hoods
  • Ear wraps
  • Headbands
  • Swim bands
  • Stretch tubes
  • Ear guards

What About Dog Ear Plugs?

Traditional ear “plugs” like those worn by humans are not usually sold for canine use. Although true ear plug for dogs do exist, the companies that make them had, when this article was written, gone out of business or their product lines were “temporarily unavailable.” Online searches for dog ear plugs bring up ear covers like those listed above.

When Ear Covers or Snoods May Be Useful

In addition to protecting the ears of swimming dogs, ear covers can be used during dental procedures to prevent fluids from collecting in a dog’s ears. Dogs with long ears can wear them at mealtime to keep their ears from being soiled by food. Snoods and other ear covers can protect ear hematomas or surgical stitches. Dogs sensitive to loud noises, such as the sound of a dryer during grooming, can relax without being stressed, and the compression that some bands provide has a calming effect on most dogs.

Why Protect Your Dogs Ears While Swimming?

Damp ear canals are a common breeding ground for yeast and bacteria, especially for dogs with long, floppy ears that reduce the flow of air around the ear canal. Even if a dog doesn’t develop an ear infection, water in the ears can be irritating. If your dog flaps her ears after every swim, try experimenting with headbands or snoods.

For swimming, the most suitable designs are usually snug, waterproof snoods rather than fabric hoods that reduce splashing but are not reliably water resistant. Snoods are external covers that hold the pinna (ear flap) close to the head so direct sprays and wave splashes can’t enter the ear canal.

Although the ear covers described here are designed for use in and around water, they can also help dogs relax, focus their attention, and be less distracted. In a previous article, I described how my Labrador Retriever, Chloe, shook her head whenever she swam, even though she didn’t have an ear infection. I purchased an AquaBandit and DogLeggs Swim Snood and found both of them helpful. Chloe swam every week at Apex Animal Hospital in Helena, Montana, where Adele Delp then worked as a veterinary technician. I left the head bands at the clinic’s therapeutic swimming pool for other dogs to try, and Delp said, “I think dogs are more comfortable when wearing a headband. Instead of shaking their heads, they relax and focus on swimming.”

When Casey, a six-year-old Border Collie, started swimming, he was intent on getting the ball, hypervigilant, and wild in the pool. “We tried a swim band on him,” said Delp, “and we were amazed at how focused and calm he became. Whenever we took it off, he became a wild man again. This led us to speculate about the band’s applications in thunderstorms and other stressful situations.

Like Chloe, most swimming dogs adjust quickly to head bands. And they work. Chloe seldom flapped her ears after she started swimming with a band.

ProductTypeMaterialsSizes, ColorsCost
Doglegg Swim SnoodExternal HoodWater-resistant Neoprene4 colors, 5 sizes$64
Walkabout SnoodleHead/Ear CoverWater-resistant Neoprene4 sizes, 2 colors$49
AquabanditHeadbandWater-resistant Neoprene5 sizes, 2 colors$42-$45
BAMY Ear CoverBand/Ear CupsWaterproof Diving Fabric3 sizes, pink$9

Popular Dog Ear Covers: Uses, Fit, and Sizing

The Doglegg Swim Snood is made from water-resistant lightweight materials that prevent water from splashing into a dog’s ears. Designed for dogs with pricked or pendant ears, the Swim Snood is soft and flexible. Velcro fasteners help the snood stay in place. It can be hand-washed in warm water and hung to dry.

For correct sizing, measure the circumference of your dog’s head, including the ears (under the jaw and around the head over the ears). Size Extra Small (XS) measures 9 to 11 inches; size Small (S) measures 12 to 16 inches; size Medium (M) measures 17 to 20 inches, size Large (L) measures 20 to 25 inches, and size Extra Large (XL) measures 25 to 29 inches. See the Doglegg website for a video demonstrating how to measure and use the Swim Snood. It comes in red, camouflage, navy blue, and royal blue.

The manufacturer recommends the Doglegg Swim Snood for aquatic rehabilitation or conditioning, swimming, dental cleaning, oral surgery, grooming, and shielding for sound sensitivity.

The Walkabout Snoodle is made from water-resistant neoprene. To get the right fit, measure the circumference of your dog’s head under the chin and around the ears with ear flaps down. Size Small (S) measures 13 to 16 inches; size Medium (M) measures 17 to 20 inches, and size Large (L) measures 21 to 23 inches. It comes in pink or camouflage.

The manufacturer recommends the Walkabout Snoodle for swim therapy sessions, surfing, swimming, dock diving, oral care, dental procedures, grooming, and for a noise control/calming effect.

The Aquabandit head band uses a specially designed Smooth Skin Neoprene to create a seal over the ear canal with a design that matches the contour of a dog’s head. Adjustable Velcro creates a proper fit. The Aquabandit website recommends measuring tightly around the dog’s head and then subtracting 3 inches to ensure a snug fit. Size Small (S) measures 12-1/2 to 14 inches; size Medium (M) measures 13-1/2 to 15 inches; size Large (L) measures 14-1/2 to 16 inches; size Extra Large (XL) measures 15-1/2 to 17 inches; and size Extra Extra Large (XXL) measures 18 to 22 inches. The Aquabandit comes in black or yellow.

The manufacturer recommends using the Aquabandit for all types of swimming as well as to prevent sand, seeds, grass, and foxtails from entering the ear canal. According to the Aquabandit website, veterinarians recommend it as a post-surgical device to replace cumbersome Ace bandages.

BAMY Ear Covers are made from high-quality diving fabric and plastic, providing waterproof performance during swimming, bathing, or grooming sessions. The cover’s elastic strap design gives a snug and secure fit. To clean and maintain the ear covers, rinse them with water and wipe them dry after use.

Measure your dog’s head circumference as described above. Size Small (S) measures 10 to 15 inches; size Medium (M) measures 14 to 19 inches; and size Large (L) measures 18 to 24 inches.  BAMY Ear Covers are available in pink, yellow, gray, and camouflage.

Safety and Limitations

Whatever the type, ear covers shouldn’t be relied upon to prevent any water or debris from ever entering a dog’s ears. They can be a good tool, but they’re not fool proof. Even when using ear covers, it’s important to keep an eye out for any unusual head shaking, tenderness, or odor that might indicate there’s a problem.

Also, getting a good fit can make a big difference when using ear covers since loose or ill-fitting covers won’t be as effective. Models and sizes can vary significantly so pay close attention to any manufacturer-recommended fitting instructions.

Tips for Teaching a Dog to Wear Ear Covers

Some dogs don’t mind wearing ear covers and take to them right away. Others have more trouble. To help a dog adjust to them, you’ll need to create positive associations with the covers. The trick is to go slowly and break the process down into small steps. That typically looks something like this:

  • Start by showing your dog the ear cover and rewarding them for any movement towards it. Rewards can be treats, praise, playtime, or toys—anything that makes your dog happy.
  • Next, show your dog the ear cover and wait until they touch it to reward them.
  • When the dog is comfortable touching the cover, gently stroke their face and head with it.
  • Place the cover (unfastened) on the dog’s head briefly and reward the dog.
  • If the cover is the pullover type, hold it open and reward the dog for putting their nose through it (even briefly).
  • When the dog is used to the cover being on their head, fasten it or pull it on, reward the dog, and immediately remove it.
  • Gradually extend the length of time the cover remains fastened.

NOTE: If at any point in the process, the dog moves away or looks uncomfortable, give them a break and go back to the previous step.


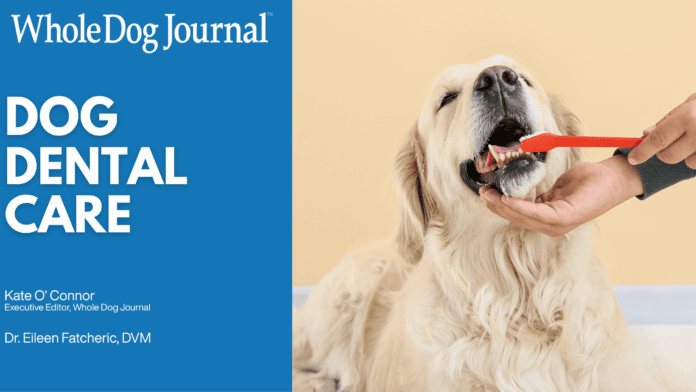
Video: How To Take Care of Your Dog’s Teeth

0
Dental disease is one of the most common problems vets see in dogs, and one of the easiest to get ahead of. In our latest video, veterinarian Dr. Eileen Fatcheric, DVM sits down with Kate O’Connor to walk through how to keep your dog’s teeth healthy at home.
A few things she covers:
  • The warning signs of a dental problem (bad breath is the big one)
  • Why daily brushing with a veterinary enzymatic paste is still the gold standard
  • Where professional cleanings fit in, and how often your dog really needs one
  • The products she reaches for, including a seaweed powder you add to food